
Modular Furniture Clip
Started 1y. Edited 1yStarted almost 2 years ago. Last edit over 1 year ago
Products
Completed
researchproductinjectionPPmould
More Information


%20--%3e%3csvg%20version='1.1'%20id='Layer_1'%20xmlns='http://www.w3.org/2000/svg'%20xmlns:xlink='http://www.w3.org/1999/xlink'%20x='0px'%20y='0px'%20viewBox='0%200%2064%2063'%20style='enable-background:new%200%200%2064%2063;'%20xml:space='preserve'%3e%3cstyle%20type='text/css'%3e%20.st0{fill:%23231F20;}%20%3c/style%3e%3cdesc%3eCreated%20with%20Sketch.%3c/desc%3e%3cg%20id='Page-1'%3e%3cg%20id='OA-Logo-Black-Background'%3e%3cpath%20id='Shape'%20class='st0'%20d='M14.1,30.1c-1.5-0.8-8.6-3.8-14.1-7.8c1.8-3.4,3.1-5.6,5-9.1c2.7,1.1,1.9,0.5,4.6,1.7%20c0.8,0.4,10.1,4.5,13.8,6.2c2.4,1.1,4.7,2.2,7,3.3L43,30.5l8.1,3.9c4,2,7.2,3.5,11.3,5.5c0.5,0.3-3.7,9.4-3.7,9.4%20c-1.7-0.6-3.9-1.8-5.5-2.5c-4.7-2.1-9-3.9-13.7-6c-4-1.8-6.7-2.9-10.8-4.5C25,34.9,17.1,31.6,14.1,30.1z'/%3e%3cpath%20id='Shape_1_'%20class='st0'%20d='M12.1,54.9c-0.8,0.6-1.6,1.2-2.5,1.6c-0.4-0.5-0.9-1-1.3-1.5c-0.3-1.2-2.3-4.9-2.7-6.2%20c-0.1-0.4-0.7-2.2-0.8-2.6c0,0,5-3.4,8.2-5.9c3.2-2.6,6.2-5,9.3-7.5c1.4-1.1,3.9-2.5,5.3-3.5c2.5-1.7,13-9.1,15.6-10.5%20c5.4-3.3,11.1-6.3,16.8-9c1.7,3.5,1.8,3,3.8,6.9c0,0-17.8,13.5-22.7,17.1c-3.8,2.8-7.5,5.7-11.3,8.5c-1.7,1.3-3.5,2.4-5.2,3.7'/%3e%3cpath%20id='Shape_2_'%20class='st0'%20d='M20.8,2.9l-0.2-0.8C25,0,31.2-0.3,31.4,0.2c0.4,1.1,0.9,2.2,1.2,3.4c1.4,4.4,2.7,8.7,4,13.1%20c0.4,1.4,2.8,10,2.9,10.5c0.5,2.8,1.2,5.6,1.6,8.4c0.8,4.7,1.4,8.6,2.3,13.3c0.6,3.1,1.3,6.3,2.3,11.3c0,0-5.8,1.4-7.5,1.8%20c-0.8,0.2-1.5,0.4-2.4,0.6c-0.3-1.1-0.2-1.2-0.5-2.1c-0.9-3.7-1.8-7.3-2.6-11c-1.5-6.4-3-12.9-4.4-19.3%20c-1.2-5.4-2.6-10.7-4.4-15.9c-1-3.1-1.8-6.3-2.7-9.5C21.1,3.8,21,3.8,20.8,2.9z'/%3e%3c/g%3e%3c/g%3e%3c/svg%3e)


1
Original Reference:
Published 1yPublished almost 2 years ago
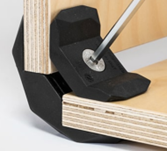
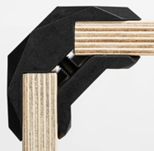
The original design is based on the 90° Connector by PlayWood.IT
It allows the user to connect two pieces of wood together with a non-permanent fixture. Two pieces of plastic are designed to attach together using a single M8 bolt to clamp two pieces of wood together at a right angle.
2
Changes from this design:
Published 1yPublished almost 2 years ago
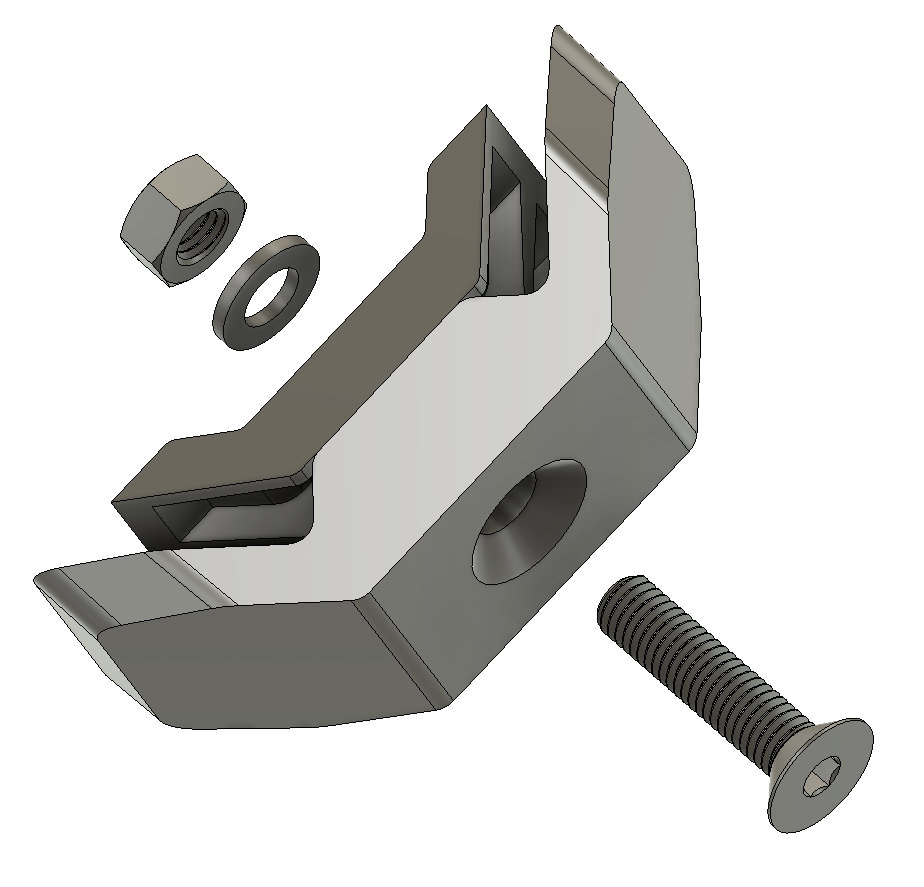
The method used to attach the two pieces together to clamp the wood:
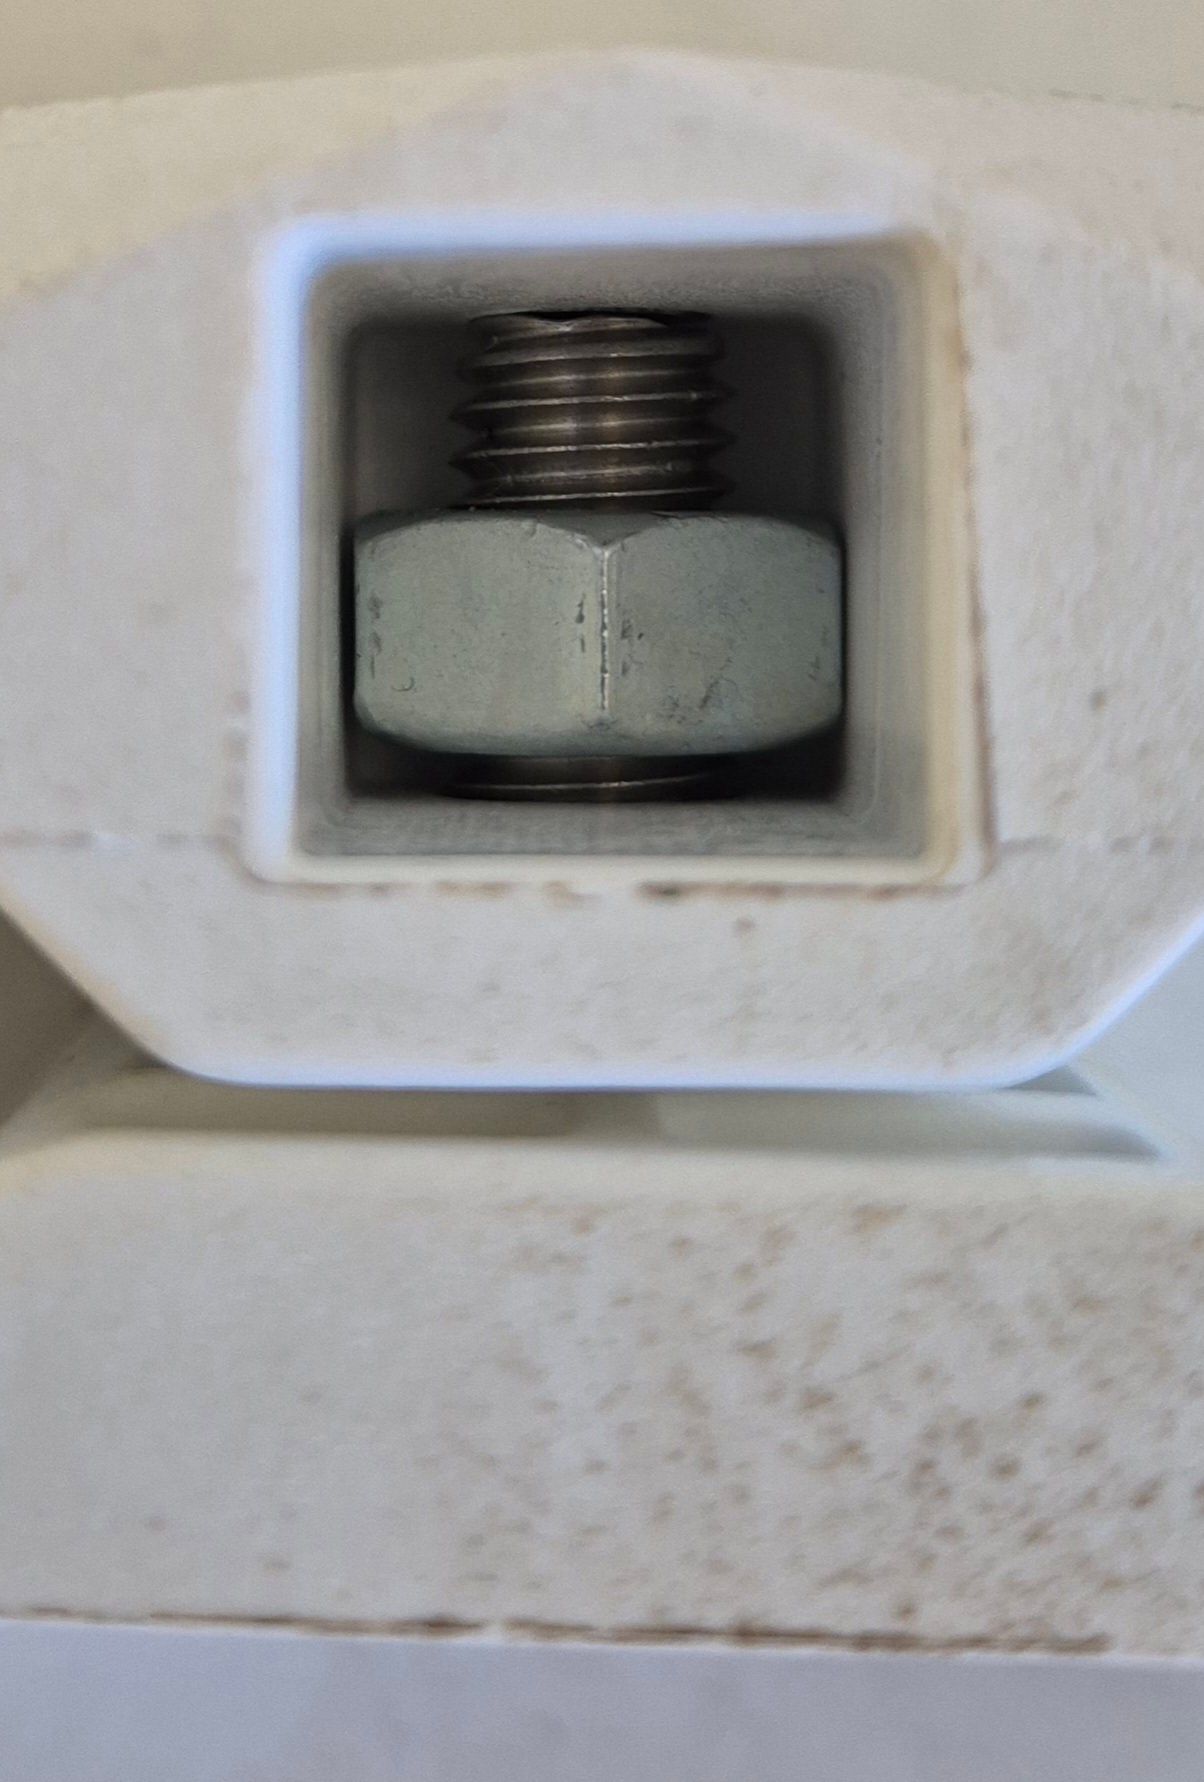
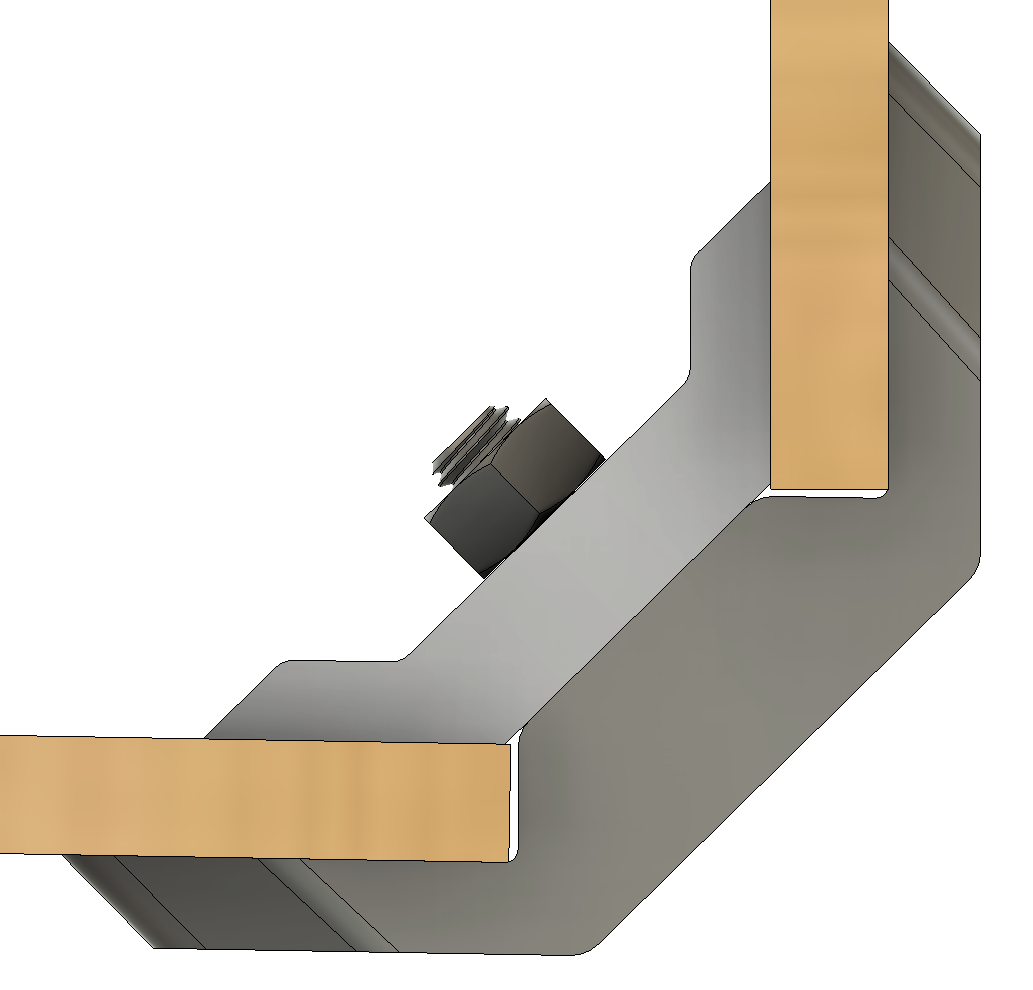
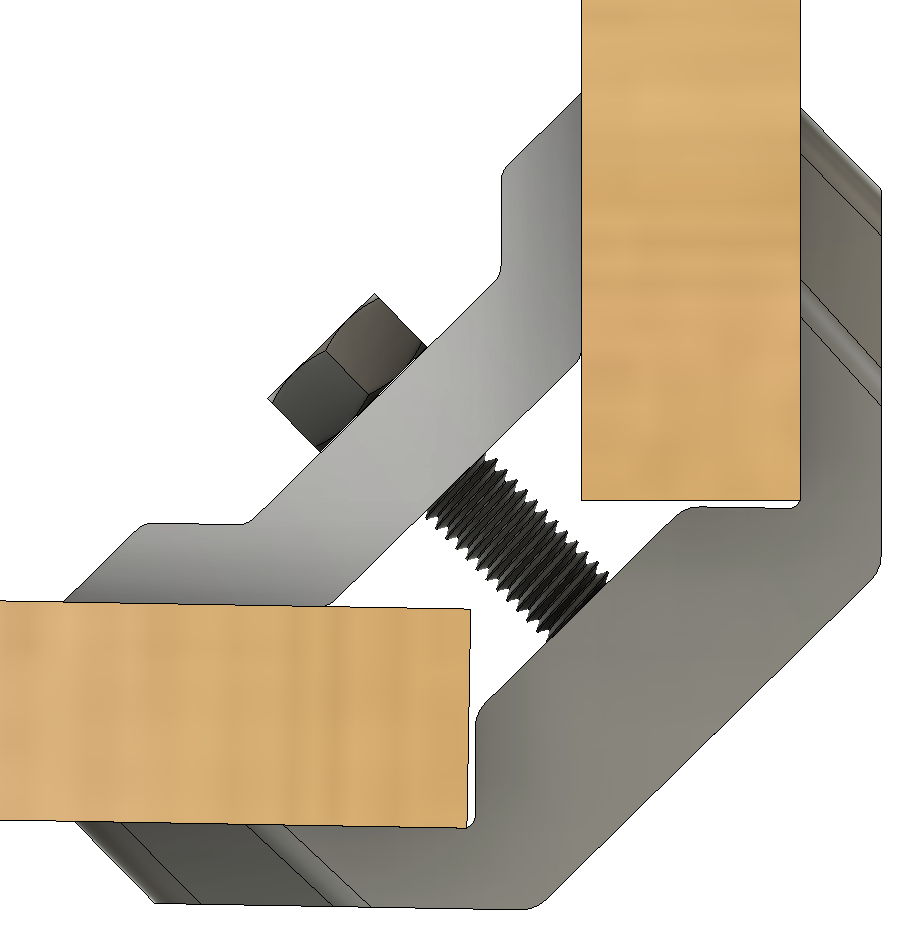
The 90° Connector is designed to have a nut slip into a hole and then the bolt is tightened from inside the joint. This was found to be very fiddley, especially if there is not much space inside the joint to allow for tightening the bolt. Therefore, the design was changed to the bolt enter from outside the joint and go through both pieces and connect to a nut on the inside of the joint.
The Size of Wood that is can fit:
The 90° Connector can currently fit wood with a thickness of 16-19 mm. This has been adapted to now allow for wood of 9mm – 19mm (a different bolt is needed for each).
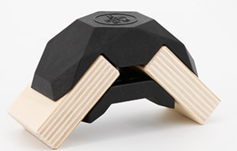
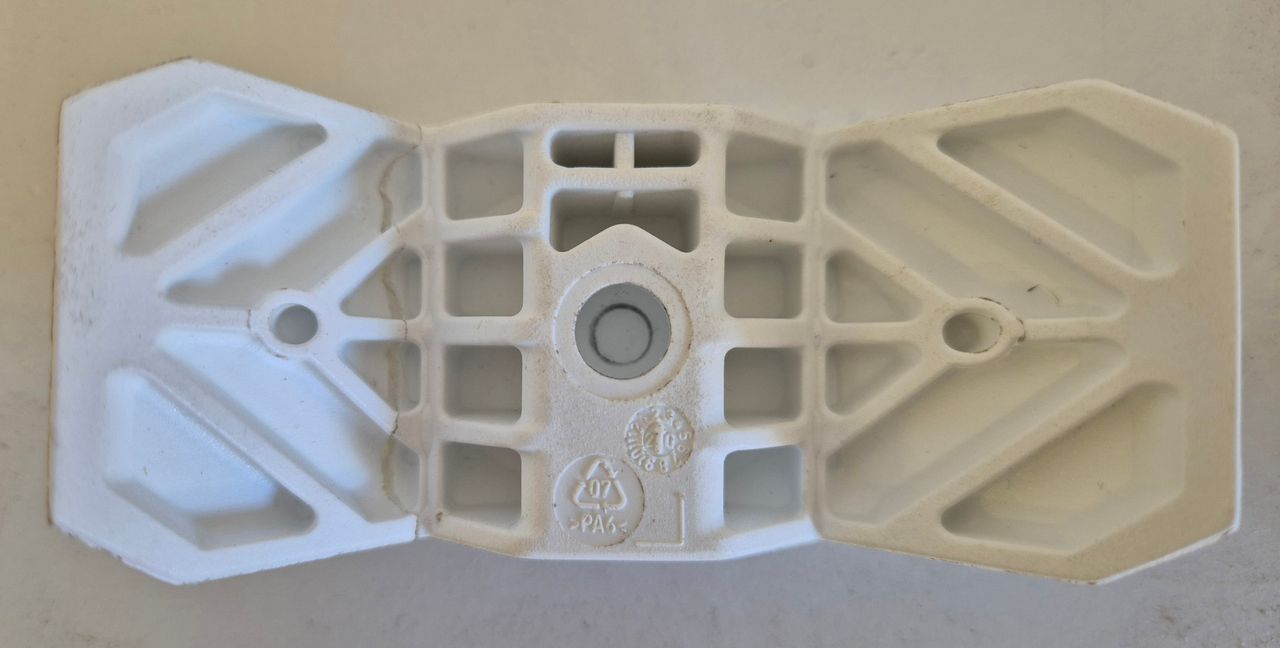
Shape:
An initial shape was modelled using injection moulded recycled plastics. This design has similar levels of ribbing to the 90° Connector but had a simpler overall shape. The ribs caused some difficulties in removing it from the mould. The shape was therefore further adapted to allow for easier injection with recycled plastics. The shape has been simplified, the number of ribs has been reduced and all sides have larger draft angles.
3
Testing:
Published 1y. Edited 1yPublished almost 2 years ago. Last edit over 1 year ago
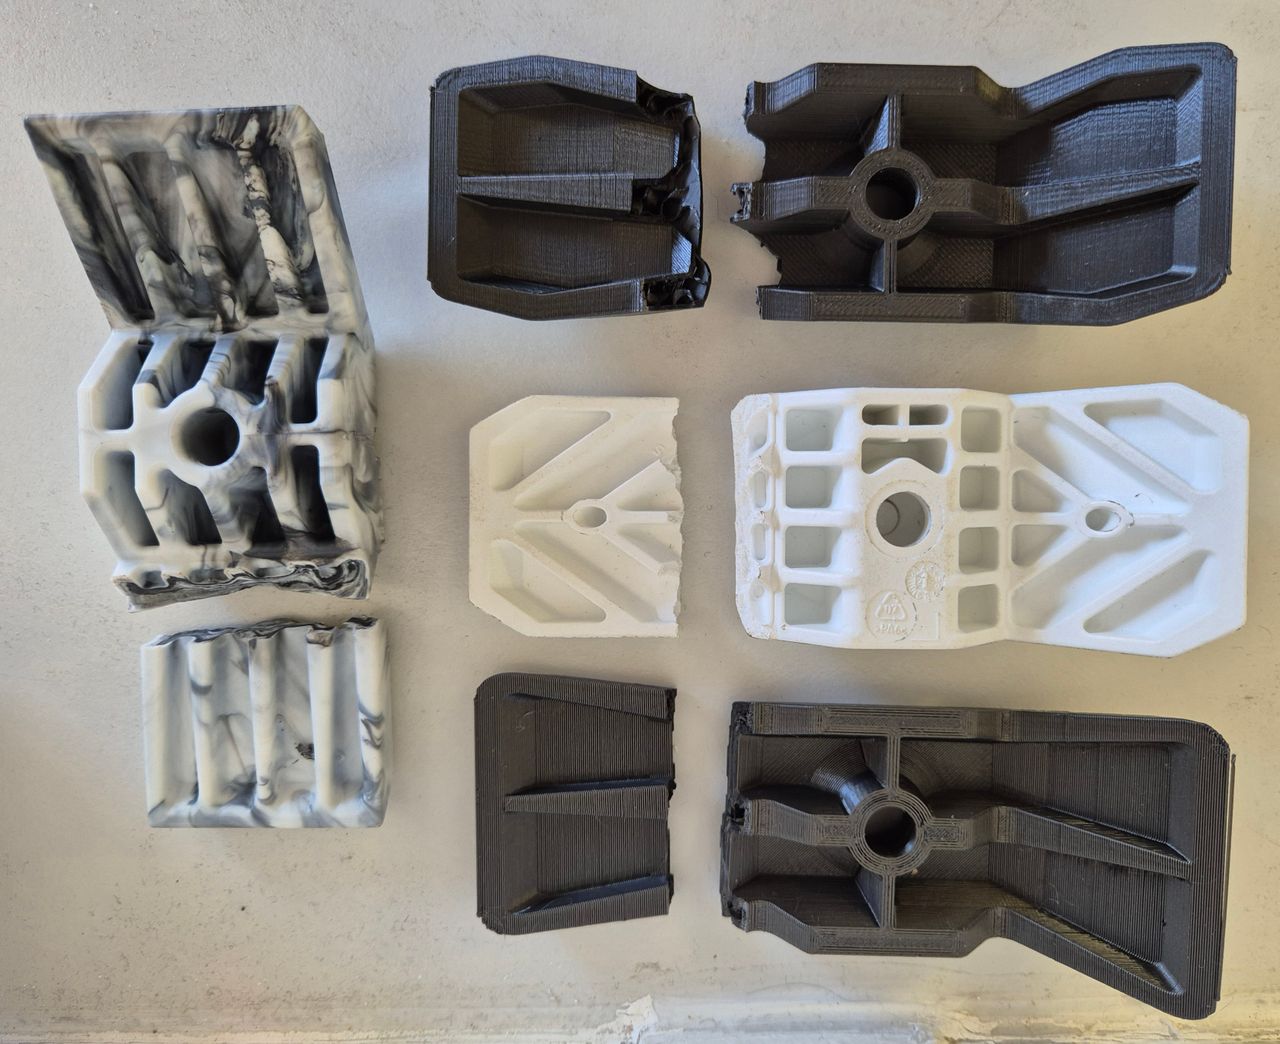
Multiple variations for the design were 3D printed and tested to compare to the 90° Connector.
These variants were:
1. Standard of the shelf furniture connector made from PA6 - The broke just as easily as the rest, however had slightly more flex when compared to the rest. Which is inline with the material properties.
2. 3D printed PLA ("0.2mm Strength" Setting on Bamboo Labs Printer) - This was strong, but as expected due to the PLA it was far more brittle. When it brakes it breaks violently.
3. Recycle Plastic Prototype 1. This was made by Sustainable Design Studio back in 2023. However it had mould releasing issues due to the number of ribs in the design and was significantly stronger than all options 1&2.
4. 3D printed prototype 2. In the second prototype we added more strength to where the first 3D printed item broke to see if the design could increase the strength, however for this material there was no significant increase in strength.
How did we test the strength of these items? We attached the furniture clips to two pieces of wood, and applied 85kg of force to the corner. Then counted how many clips were needed to withstand that load. All were similar except from the PP version that required 1 less. So the difference in results were marginal.
Since models could withstand similar levels of force applied, and all snapped along the same split line suggesting that the reduced number of ribs should work equally as well.
4
Moulds Design Phase
Published 1yPublished over 1 year ago
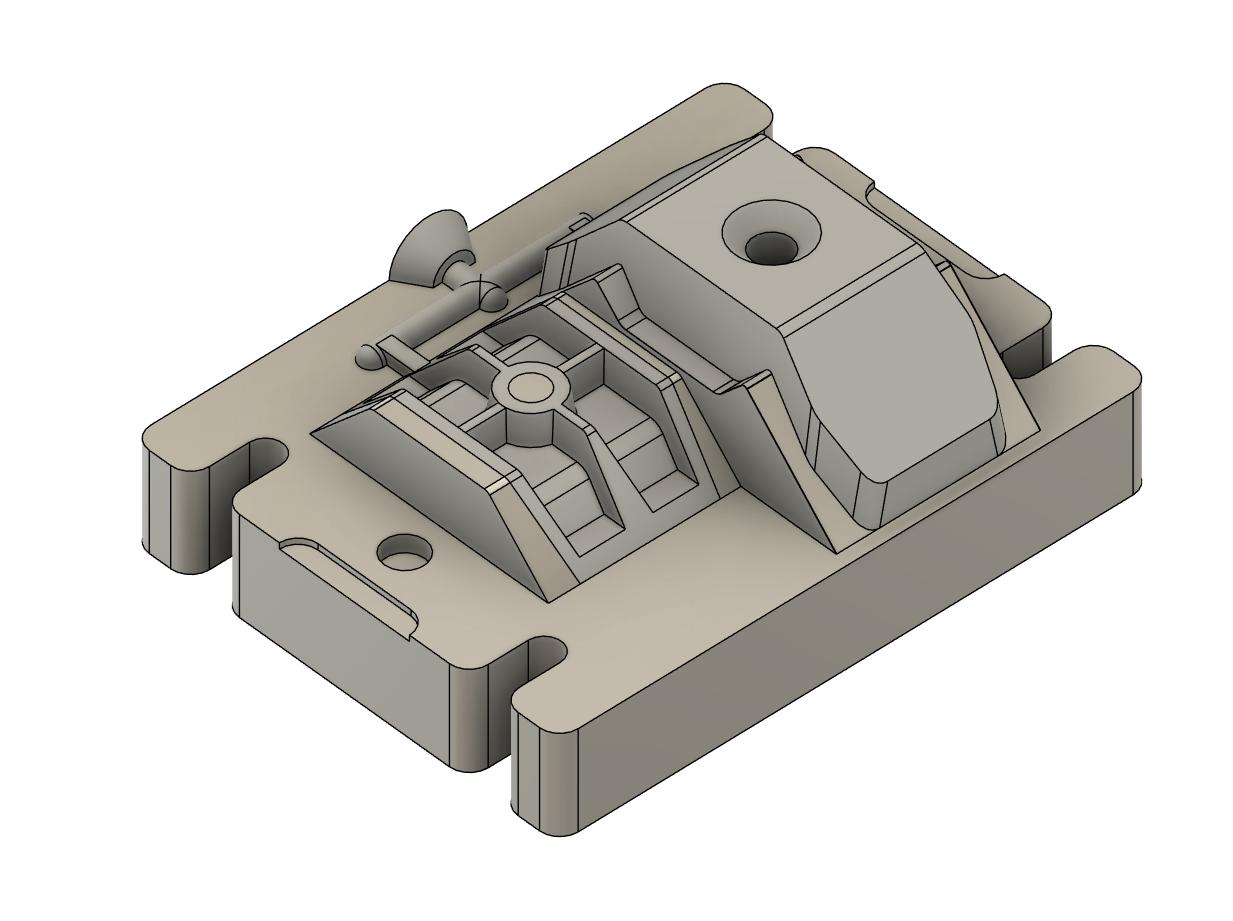
Now that we have decided on the product design. its time to start the mould design phase.
In this phase draft angles are key as we know there will be alot of webbing in the design to increase the product strength while also reducing the product volume.
One fo the key considerations is reducing the injection volume as much as possible to reduce fabrication times and as a result reduce overal costs.
Through these reductions we were able to get the part down to 36g per injection which includes all the sprues and gates.
At this time we haven't publically shared the mould files as these are fairly expensive to make, and since its untested we would hate for others to make the same mistakes (if there are any).
5
Mould Complete
Published 1yPublished over 1 year ago
We now have completed the mould and its finally ready to test!
Two unique halves made from high quality aluminium and machines on our professional CNC machine.

6
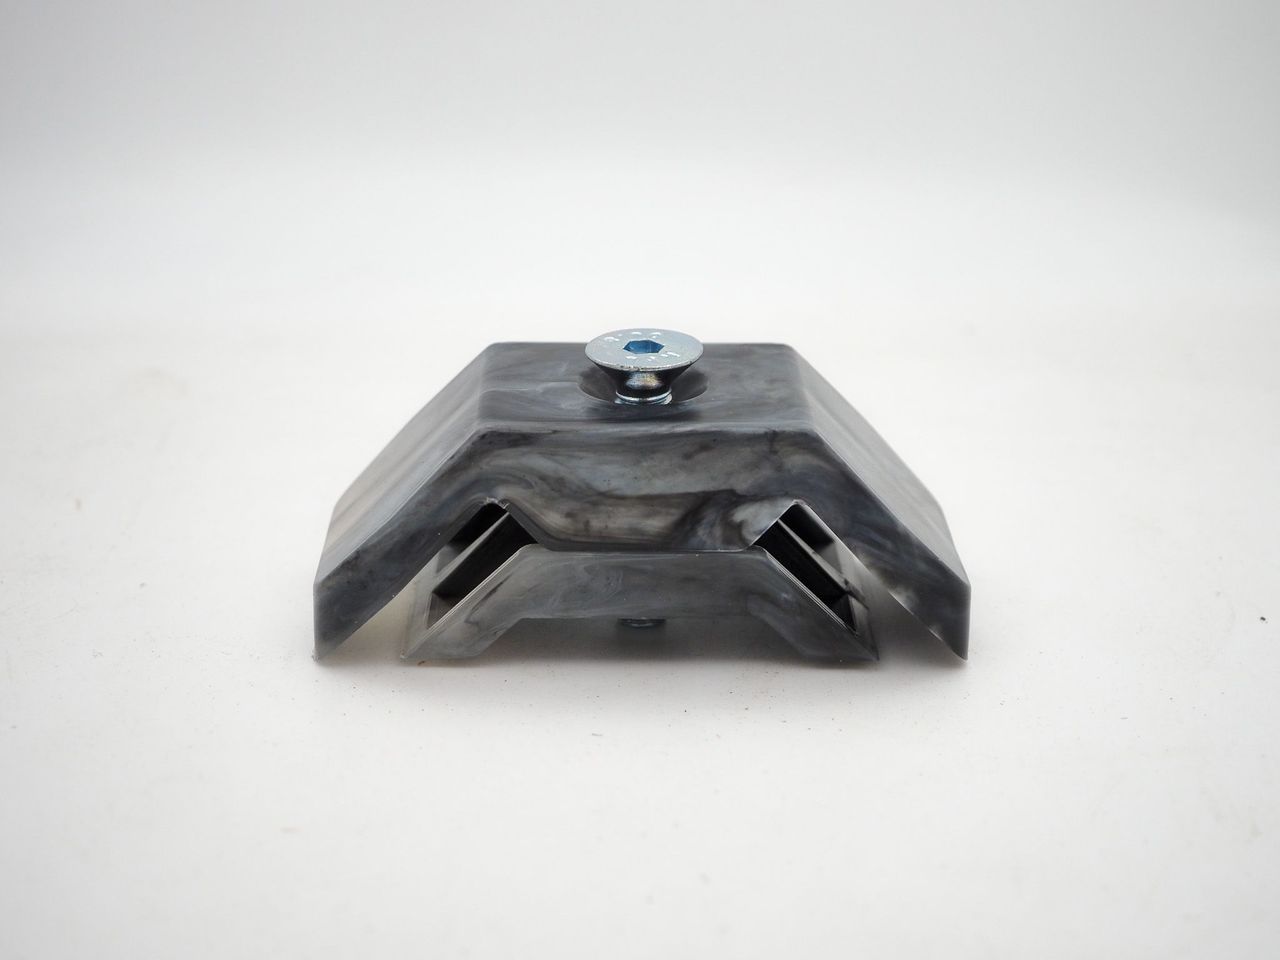
First Product Injection Tests.
Published 1yPublished over 1 year ago
Our first product tests are a success (in terms of the injection process).
These items were injected with PP, and we used our Injection Mini for the first injection. Results are good, with limited flashing. Getting the product out of the mould wasn't too hard to do either.
The next phase will be to cut some wood up, inject 7 more and build something to check the overall userbility and strength of the design.


7
First Element Built!
Published 1yPublished over 1 year ago
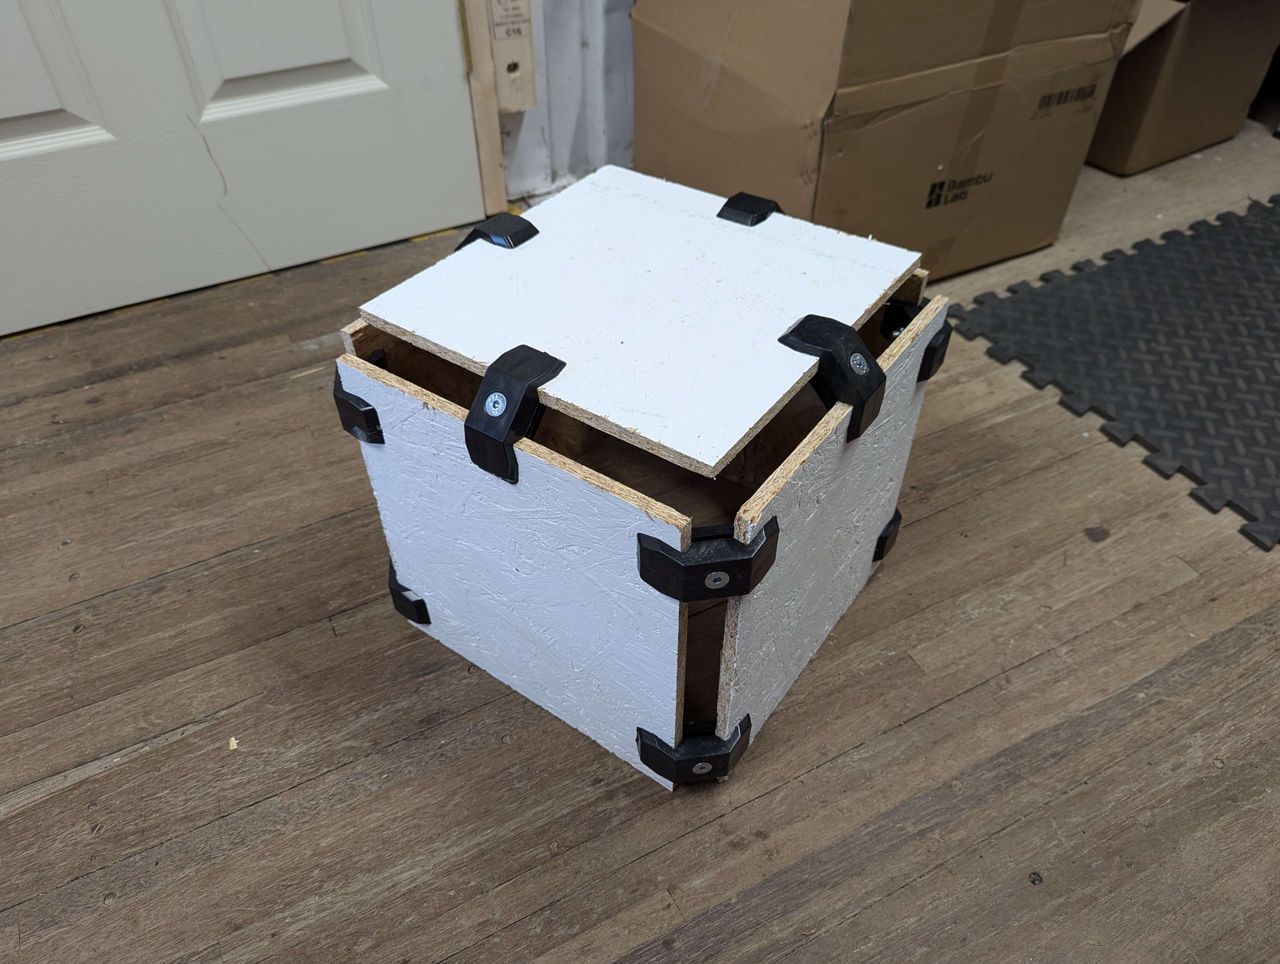
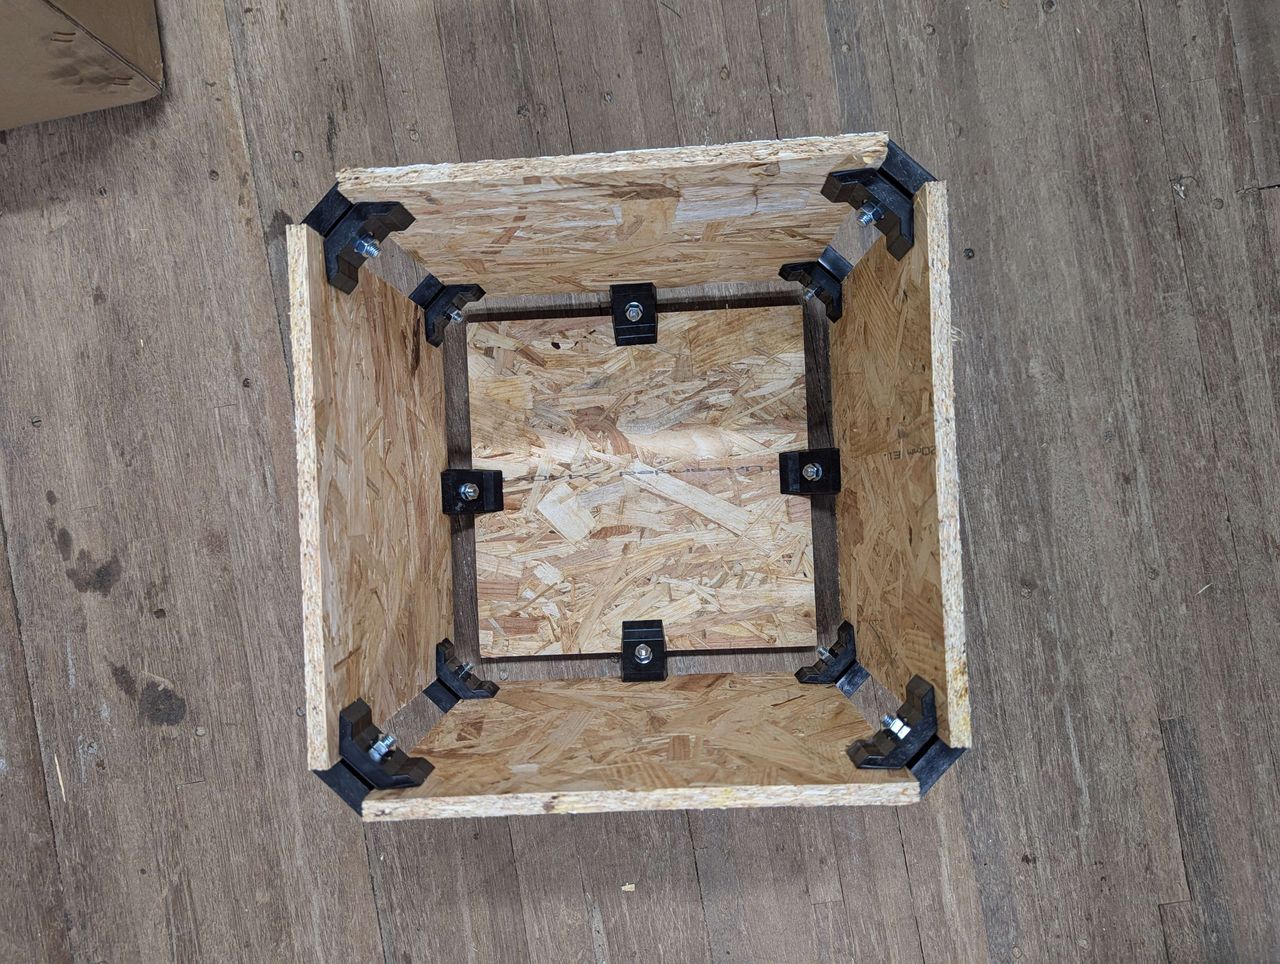
After injecting the rest and cutting some scrap chipboard into 30cm x 30cm squares we were successfully able to create a basic but simple stool for testing.
The injection process was easy, even under low pressures and melting temperatures. Mould removal was always easy and the quality of the final products always turned out good.
Overall this design appears to be very strong. As a result we are ready to come up with a few prototype designs and start writing the final how too.
8
Adding A Few Design Options
Published 1yPublished over 1 year ago
Since the modularity of the component is key we have decided to do a few digital explorations of basic layouts and the parts required.
Currently, we don't have time to inject all of these clips, however it gives a good impression on how someone might go about expanding an existing shelf design over time.
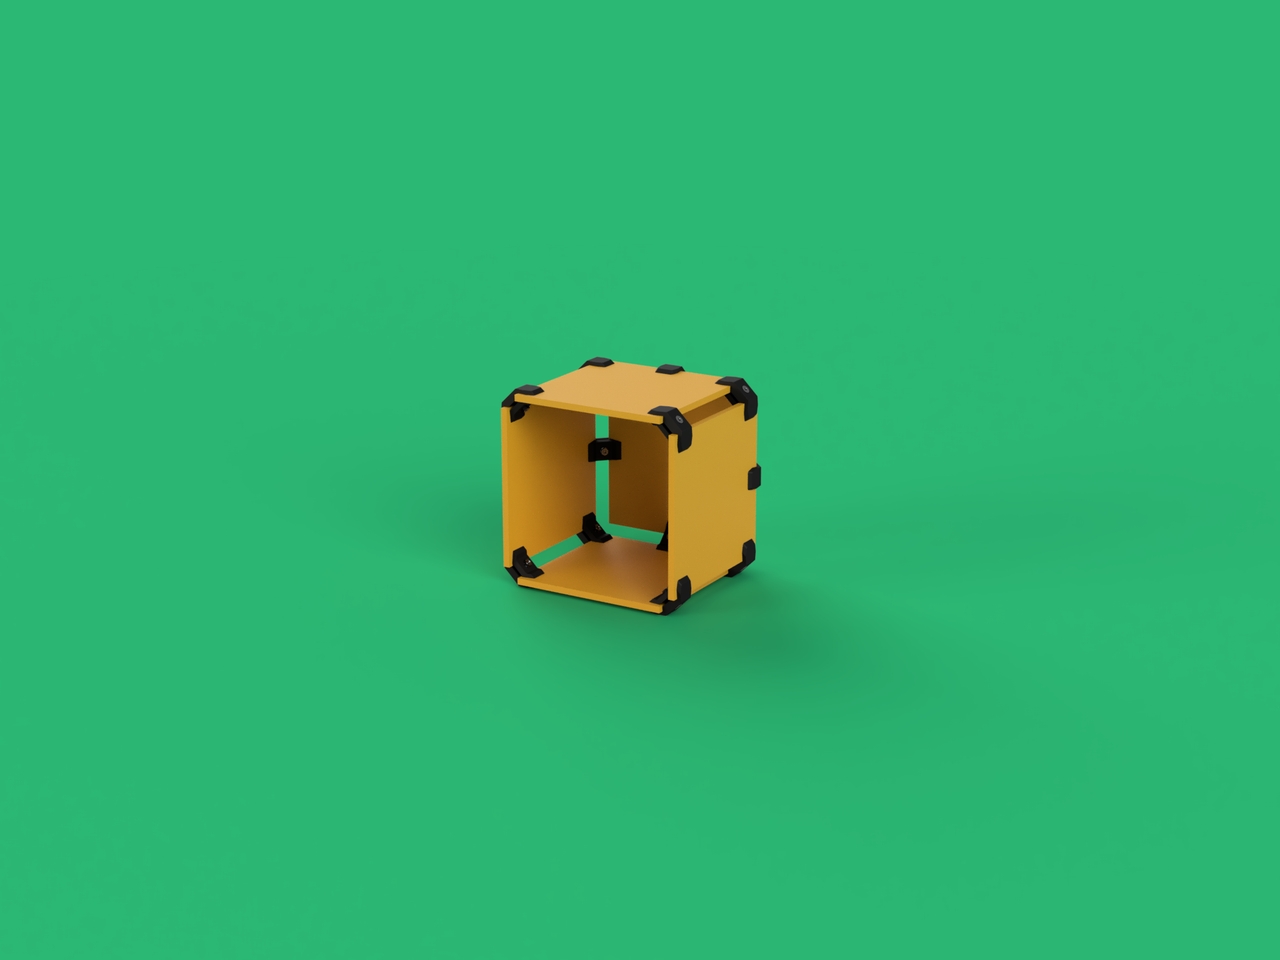
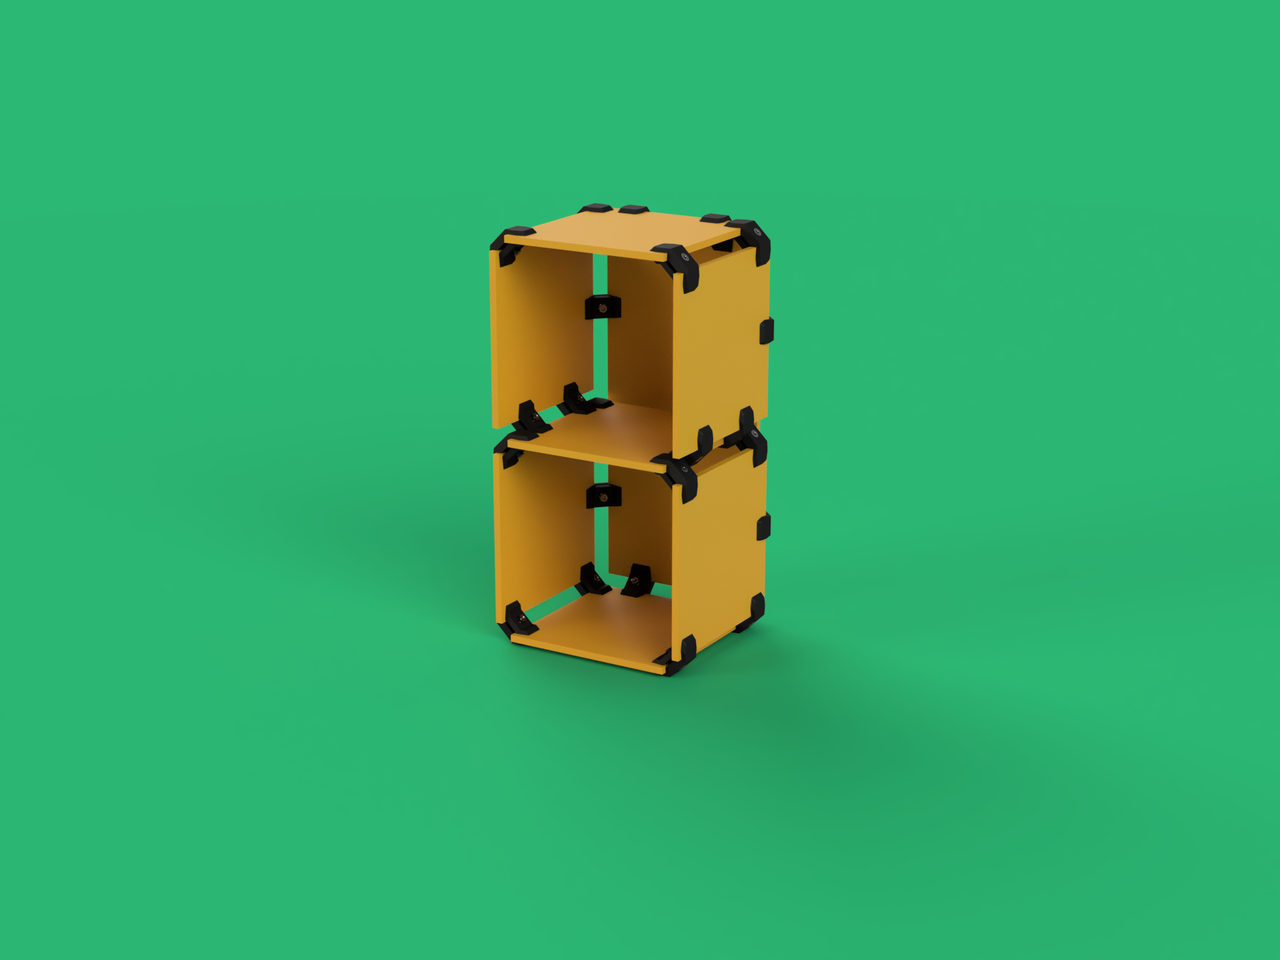
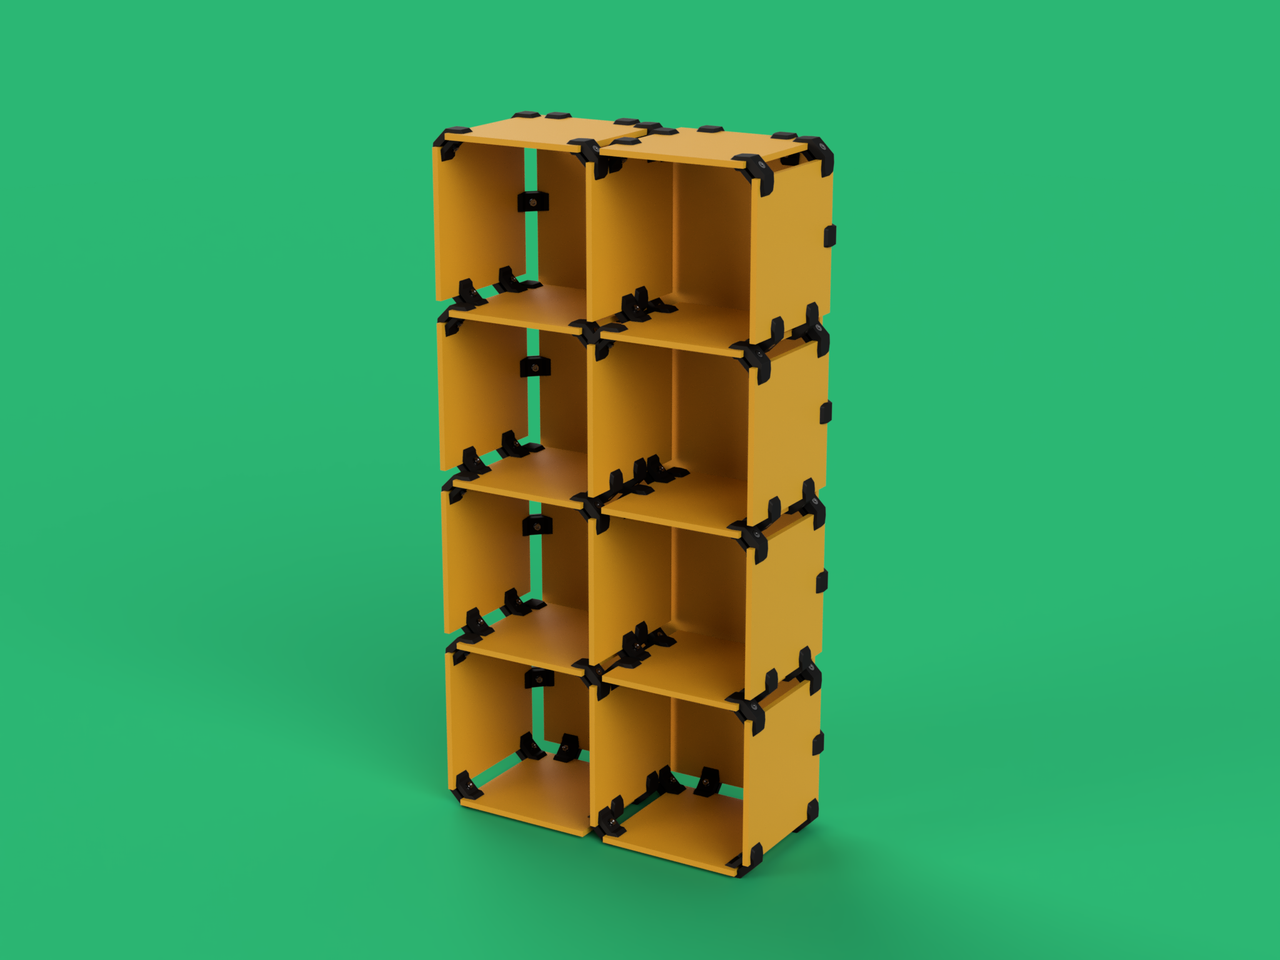
Below are 4 examples 1x1, 1x2, 2x2 and 2x4.
Each of these designs uses the following pieces:
1x1:
5x (300x300x12mm) Panels
12x Clips
1x2:
7x (300x300x12mm) Panels
1x (300x646x12mm) Panels
24x Clips
2x2:
14x (300x300x12mm) Panels
1x (646x646x12mm) Panels
42x Clips
2x4:
26x (300x300x12mm) Panels
1x (646x1338x12mm) Panels
74x Clips
We are confident from our testing that this is now likely ready to be released and the teams focus will now be on the creation of a How to document.


9
How To Complete!
Published 1y. Edited 1yPublished over 1 year ago. Last edit over 1 year ago
The How To has now been completed and can be found here!
https://community.preciousplastic.com/library/make-a-modular-furniture-clip--mould
%20--%3e%3csvg%20version='1.1'%20id='Layer_1'%20xmlns='http://www.w3.org/2000/svg'%20xmlns:xlink='http://www.w3.org/1999/xlink'%20x='0px'%20y='0px'%20viewBox='0%200%2064%2063'%20style='enable-background:new%200%200%2064%2063;'%20xml:space='preserve'%3e%3cstyle%20type='text/css'%3e%20.st0{fill:%2320B7EB;}%20.st1{fill:%23E9475A;}%20.st2{fill:%23FECE4E;}%20%3c/style%3e%3cdesc%3eCreated%20with%20Sketch.%3c/desc%3e%3cg%20id='Page-1'%3e%3cg%20id='OA-Logo-Black-Background'%3e%3cpath%20id='Shape'%20class='st0'%20d='M14.1,30.1c-1.5-0.8-8.6-3.8-14.1-7.8c1.8-3.4,3.1-5.6,5-9.1c2.7,1.1,1.9,0.5,4.6,1.7%20c0.8,0.4,10.1,4.5,13.8,6.2c2.4,1.1,4.7,2.2,7,3.3L43,30.5l8.1,3.9c4,2,7.2,3.5,11.3,5.5c0.5,0.3-3.7,9.4-3.7,9.4%20c-1.7-0.6-3.9-1.8-5.5-2.5c-4.7-2.1-9-3.9-13.7-6c-4-1.8-6.7-2.9-10.8-4.5C25,34.9,17.1,31.6,14.1,30.1z'/%3e%3cpath%20id='Shape_1_'%20class='st1'%20d='M12.1,54.9c-0.8,0.6-1.6,1.2-2.5,1.6c-0.4-0.5-0.9-1-1.3-1.5c-0.3-1.2-2.3-4.9-2.7-6.2%20c-0.1-0.4-0.7-2.2-0.8-2.6c0,0,5-3.4,8.2-5.9c3.2-2.6,6.2-5,9.3-7.5c1.4-1.1,3.9-2.5,5.3-3.5c2.5-1.7,13-9.1,15.6-10.5%20c5.4-3.3,11.1-6.3,16.8-9c1.7,3.5,1.8,3,3.8,6.9c0,0-17.8,13.5-22.7,17.1c-3.8,2.8-7.5,5.7-11.3,8.5c-1.7,1.3-3.5,2.4-5.2,3.7'/%3e%3cpath%20id='Shape_2_'%20class='st2'%20d='M20.8,2.9l-0.2-0.8C25,0,31.2-0.3,31.4,0.2c0.4,1.1,0.9,2.2,1.2,3.4c1.4,4.4,2.7,8.7,4,13.1%20c0.4,1.4,2.8,10,2.9,10.5c0.5,2.8,1.2,5.6,1.6,8.4c0.8,4.7,1.4,8.6,2.3,13.3c0.6,3.1,1.3,6.3,2.3,11.3c0,0-5.8,1.4-7.5,1.8%20c-0.8,0.2-1.5,0.4-2.4,0.6c-0.3-1.1-0.2-1.2-0.5-2.1c-0.9-3.7-1.8-7.3-2.6-11c-1.5-6.4-3-12.9-4.4-19.3%20c-1.2-5.4-2.6-10.7-4.4-15.9c-1-3.1-1.8-6.3-2.7-9.5C21.1,3.8,21,3.8,20.8,2.9z'/%3e%3c/g%3e%3c/g%3e%3c/svg%3e)