
Fully Automatic Injection Machine
Started 2y. Edited 8moStarted about 2 years ago. Last edit 8 months ago
Machines
Completed
researchother machineinjectionmould
More Information


%20--%3e%3csvg%20version='1.1'%20id='Layer_1'%20xmlns='http://www.w3.org/2000/svg'%20xmlns:xlink='http://www.w3.org/1999/xlink'%20x='0px'%20y='0px'%20viewBox='0%200%2064%2063'%20style='enable-background:new%200%200%2064%2063;'%20xml:space='preserve'%3e%3cstyle%20type='text/css'%3e%20.st0{fill:%23231F20;}%20%3c/style%3e%3cdesc%3eCreated%20with%20Sketch.%3c/desc%3e%3cg%20id='Page-1'%3e%3cg%20id='OA-Logo-Black-Background'%3e%3cpath%20id='Shape'%20class='st0'%20d='M14.1,30.1c-1.5-0.8-8.6-3.8-14.1-7.8c1.8-3.4,3.1-5.6,5-9.1c2.7,1.1,1.9,0.5,4.6,1.7%20c0.8,0.4,10.1,4.5,13.8,6.2c2.4,1.1,4.7,2.2,7,3.3L43,30.5l8.1,3.9c4,2,7.2,3.5,11.3,5.5c0.5,0.3-3.7,9.4-3.7,9.4%20c-1.7-0.6-3.9-1.8-5.5-2.5c-4.7-2.1-9-3.9-13.7-6c-4-1.8-6.7-2.9-10.8-4.5C25,34.9,17.1,31.6,14.1,30.1z'/%3e%3cpath%20id='Shape_1_'%20class='st0'%20d='M12.1,54.9c-0.8,0.6-1.6,1.2-2.5,1.6c-0.4-0.5-0.9-1-1.3-1.5c-0.3-1.2-2.3-4.9-2.7-6.2%20c-0.1-0.4-0.7-2.2-0.8-2.6c0,0,5-3.4,8.2-5.9c3.2-2.6,6.2-5,9.3-7.5c1.4-1.1,3.9-2.5,5.3-3.5c2.5-1.7,13-9.1,15.6-10.5%20c5.4-3.3,11.1-6.3,16.8-9c1.7,3.5,1.8,3,3.8,6.9c0,0-17.8,13.5-22.7,17.1c-3.8,2.8-7.5,5.7-11.3,8.5c-1.7,1.3-3.5,2.4-5.2,3.7'/%3e%3cpath%20id='Shape_2_'%20class='st0'%20d='M20.8,2.9l-0.2-0.8C25,0,31.2-0.3,31.4,0.2c0.4,1.1,0.9,2.2,1.2,3.4c1.4,4.4,2.7,8.7,4,13.1%20c0.4,1.4,2.8,10,2.9,10.5c0.5,2.8,1.2,5.6,1.6,8.4c0.8,4.7,1.4,8.6,2.3,13.3c0.6,3.1,1.3,6.3,2.3,11.3c0,0-5.8,1.4-7.5,1.8%20c-0.8,0.2-1.5,0.4-2.4,0.6c-0.3-1.1-0.2-1.2-0.5-2.1c-0.9-3.7-1.8-7.3-2.6-11c-1.5-6.4-3-12.9-4.4-19.3%20c-1.2-5.4-2.6-10.7-4.4-15.9c-1-3.1-1.8-6.3-2.7-9.5C21.1,3.8,21,3.8,20.8,2.9z'/%3e%3c/g%3e%3c/g%3e%3c/svg%3e)


1
Initial CAD Design
Published 2yPublished about 2 years ago
*Note: this update is about steps that were completed before the sharing the project here*
This project started off with developing a 3D CAD model of the initial version machine (check the picture!). This is the result of quite some weeks of engineering and getting lots of feedback from peers. If you're interested, you can download the .STEP model through the link below. Please note, this is an initial version and has not yet been validated!
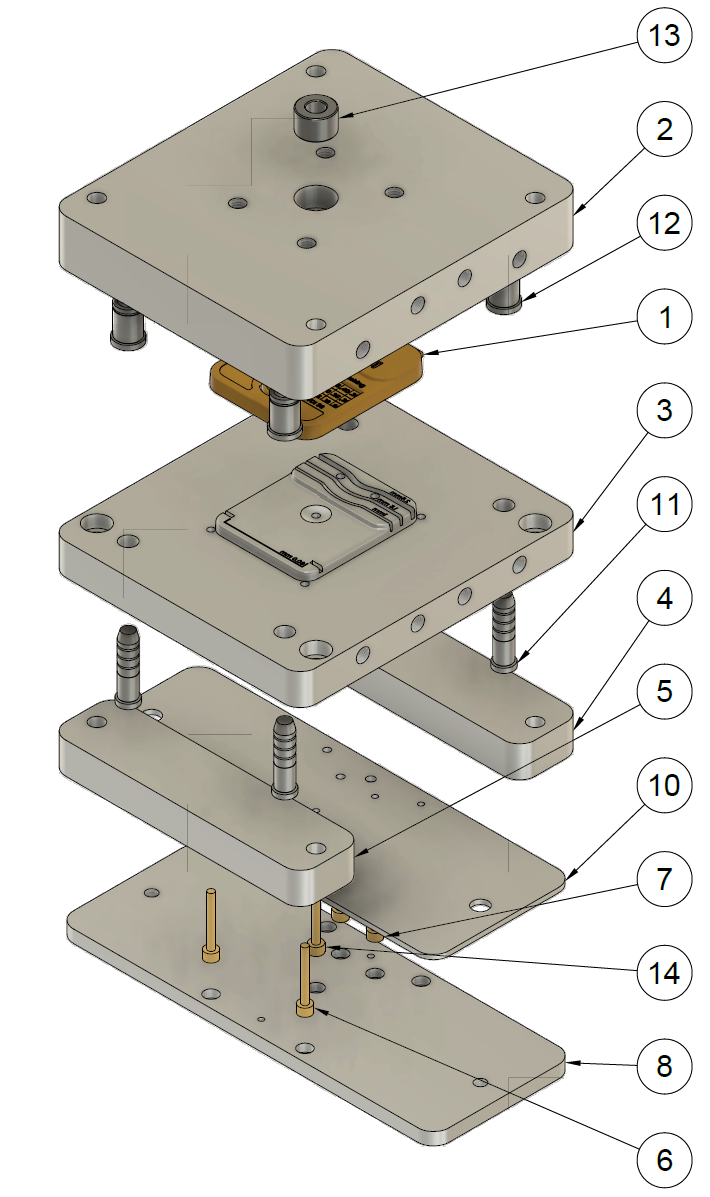
In short, the machine has key parts (starting from top to bottom):
1) The pneumatic air cylinder with a plunger, generating the injection pressure
2) A feed hopper, able to deposit plastic flakes into the barrel
3) An electronic box, controlling all mechatronics
3) The barrel, very similar to the existing injection machine
4) The valve, making sure plastic can only enter the mold when desired
5) The mold plates, where the two mold halves will be mounted
6) The mold clamp system, able to move the bottom mold plate and clamp it down
X - Joost

%20--%3e%3csvg%20version='1.1'%20id='Calque_1'%20xmlns='http://www.w3.org/2000/svg'%20xmlns:xlink='http://www.w3.org/1999/xlink'%20x='0px'%20y='0px'%20viewBox='0%200%2027.2%2027.8'%20style='enable-background:new%200%200%2027.2%2027.8;'%20xml:space='preserve'%3e%3ctitle%3eicon%20redirect%20new%3c/title%3e%3cg%3e%3cpath%20d='M27.2,26.5c-0.1-5-0.3-10-0.4-15c0-0.7-0.6-1.2-1.2-1.2s-1.2,0.6-1.2,1.2c0.1,4.6,0.3,9.1,0.4,13.7%20c-3.9-0.2-7.7-0.6-11.6-0.4c-3.3,0.2-6.7,0.5-10,0.4C2.8,19.5,2.7,13.7,2.5,8c2.9-0.1,5.8-0.8,8.6-0.7c1.6,0.1,1.6-2.4,0-2.5%20C7.8,4.6,4.5,5.7,1.2,5.5c-0.6,0-1,0.3-1.1,0.7C0,6.3,0,6.4,0,6.6c0,0,0,0.1,0,0.1c0,0,0,0,0,0.1c0.2,6.6,0.4,13.2,0.5,19.7%20c0,0.6,0.4,1.3,1.2,1.4c3.8,0.1,7.5-0.2,11.3-0.4c4.4-0.3,8.6,0.2,12.9,0.4c0.6,0,1-0.3,1.1-0.7C27.1,26.9,27.2,26.7,27.2,26.5z'/%3e%3cpath%20d='M12,12.6c-0.2,0.7,0.2,1.4,0.9,1.5c0.7,0.2,1.4-0.2,1.5-0.9v0c0.6-2.2,1.4-4.5,3.1-6c1.3-1.2,3-1.9,4.7-2.7%20c-0.4,1.3-0.8,2.6-1.4,3.8c-0.6,1.5,1.8,2.1,2.4,0.7c0.8-1.9,1.5-3.9,2-5.9c0-0.1,0-0.2,0-0.3c0.3-0.6,0.1-1.5-0.7-1.8%20C22.3,0.4,20,0,17.7,0c-0.7,0-1.2,0.6-1.2,1.2s0.6,1.2,1.2,1.2c0.9,0,1.7,0.1,2.6,0.2c-1.7,0.8-3.4,1.7-4.8,3%20C13.6,7.6,12.7,10.1,12,12.6z'/%3e%3c/g%3e%3c/svg%3e)
2
Early Testing - Valve
Published 2y. Edited 2yPublished about 2 years ago. Last edit about 2 years ago
*Note: this update is about steps that were completed before the sharing the project here*
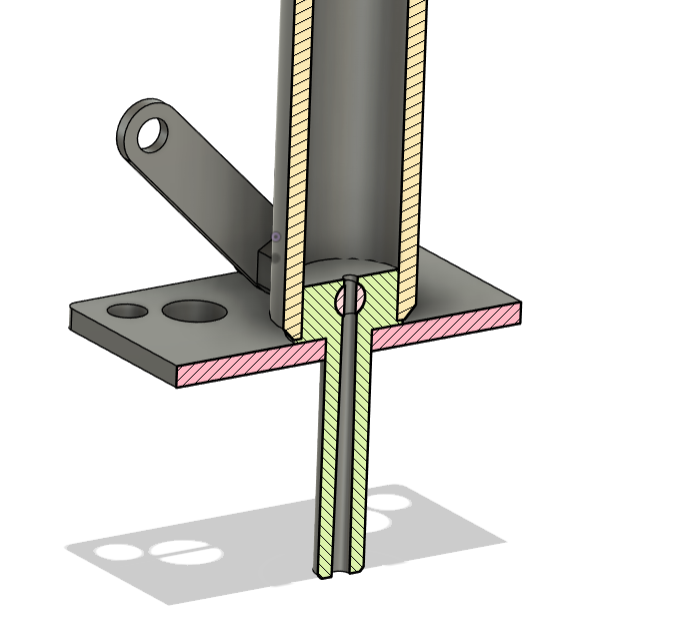
To make sure we're going in the right direction, some key components of the machine were tested. The main showstopper is the valve, which should make sure that molten plastic only enters the mold at the right time. If plastic is able to enter the mold at any time, it can solidify at the gate and form an obstruction for properly filling the mold.
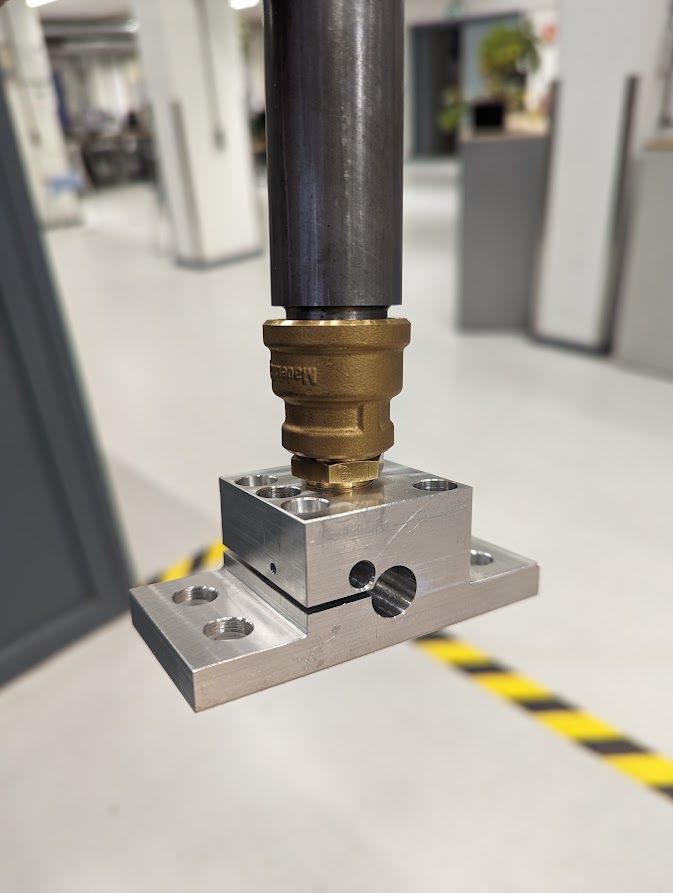
The first idea for a gate valve was to make a small rotatable rod with a hole in the middle, which is placed in a valve block (picture 1). This would work similar to a plug valve. After testing, this design seemed to have three main issues: Poor heat conduction into the core, high chance of leaking and complex geometry to machine.
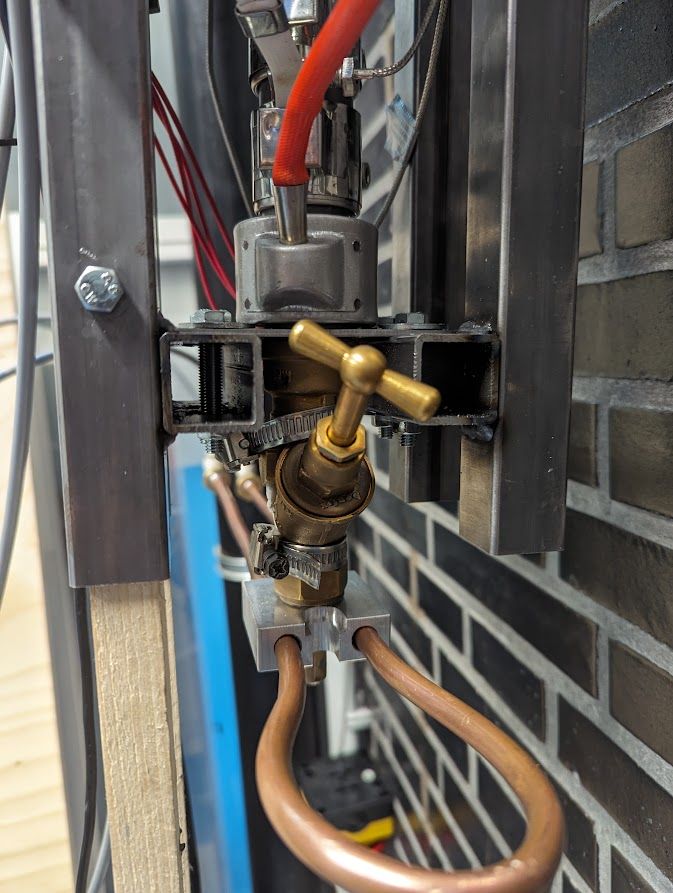
The valve block was replaced by a simple brass water faucet with a modified insert (picture 2), following a globe valve-like design. Testing this idea was very successful and ensured an easy-to-remove sprue.
3
First prototype!
Published 2yPublished about 2 years ago
*Note: this update is about steps that were completed before the sharing the project here*
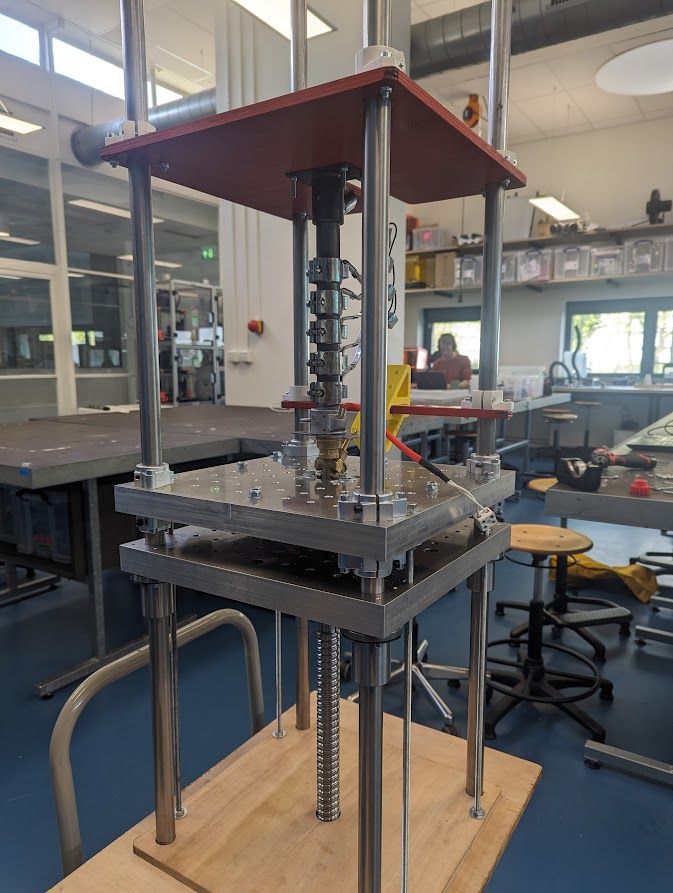
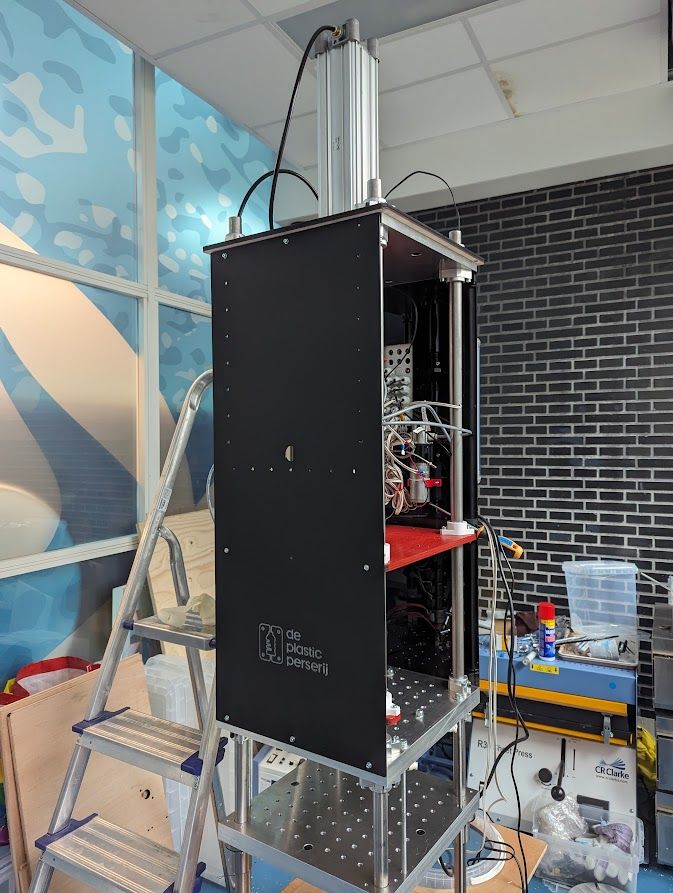
The first prototype is here! Apart from a few last components, the machine is fully assembled and ready for the first full-system tests. VERY exiting :D Check the pics below!
Maybe you're currently thinking: "So.. if you're already done building, is this project finished already?". Far from it - Let me tell you what this project will look like from now on:
1) Single-Shot testing || With a conventional mold, we'll test all the basic machine features and tweak where necessary.
2) Developing a mold with ejection pins || After opening the mold, the part will need to be pushed out of the mold cavity. This requires a special type of mold which is currently in development
3) Multiple-Shot testing || If everything works in a single shot, we'll try running multiple shots sequentially.
4) Creating documentation || When all testing is done, we'll make technical documentation for sharing.
X - Joost

4
Time for testing...
Published 1yPublished almost 2 years ago
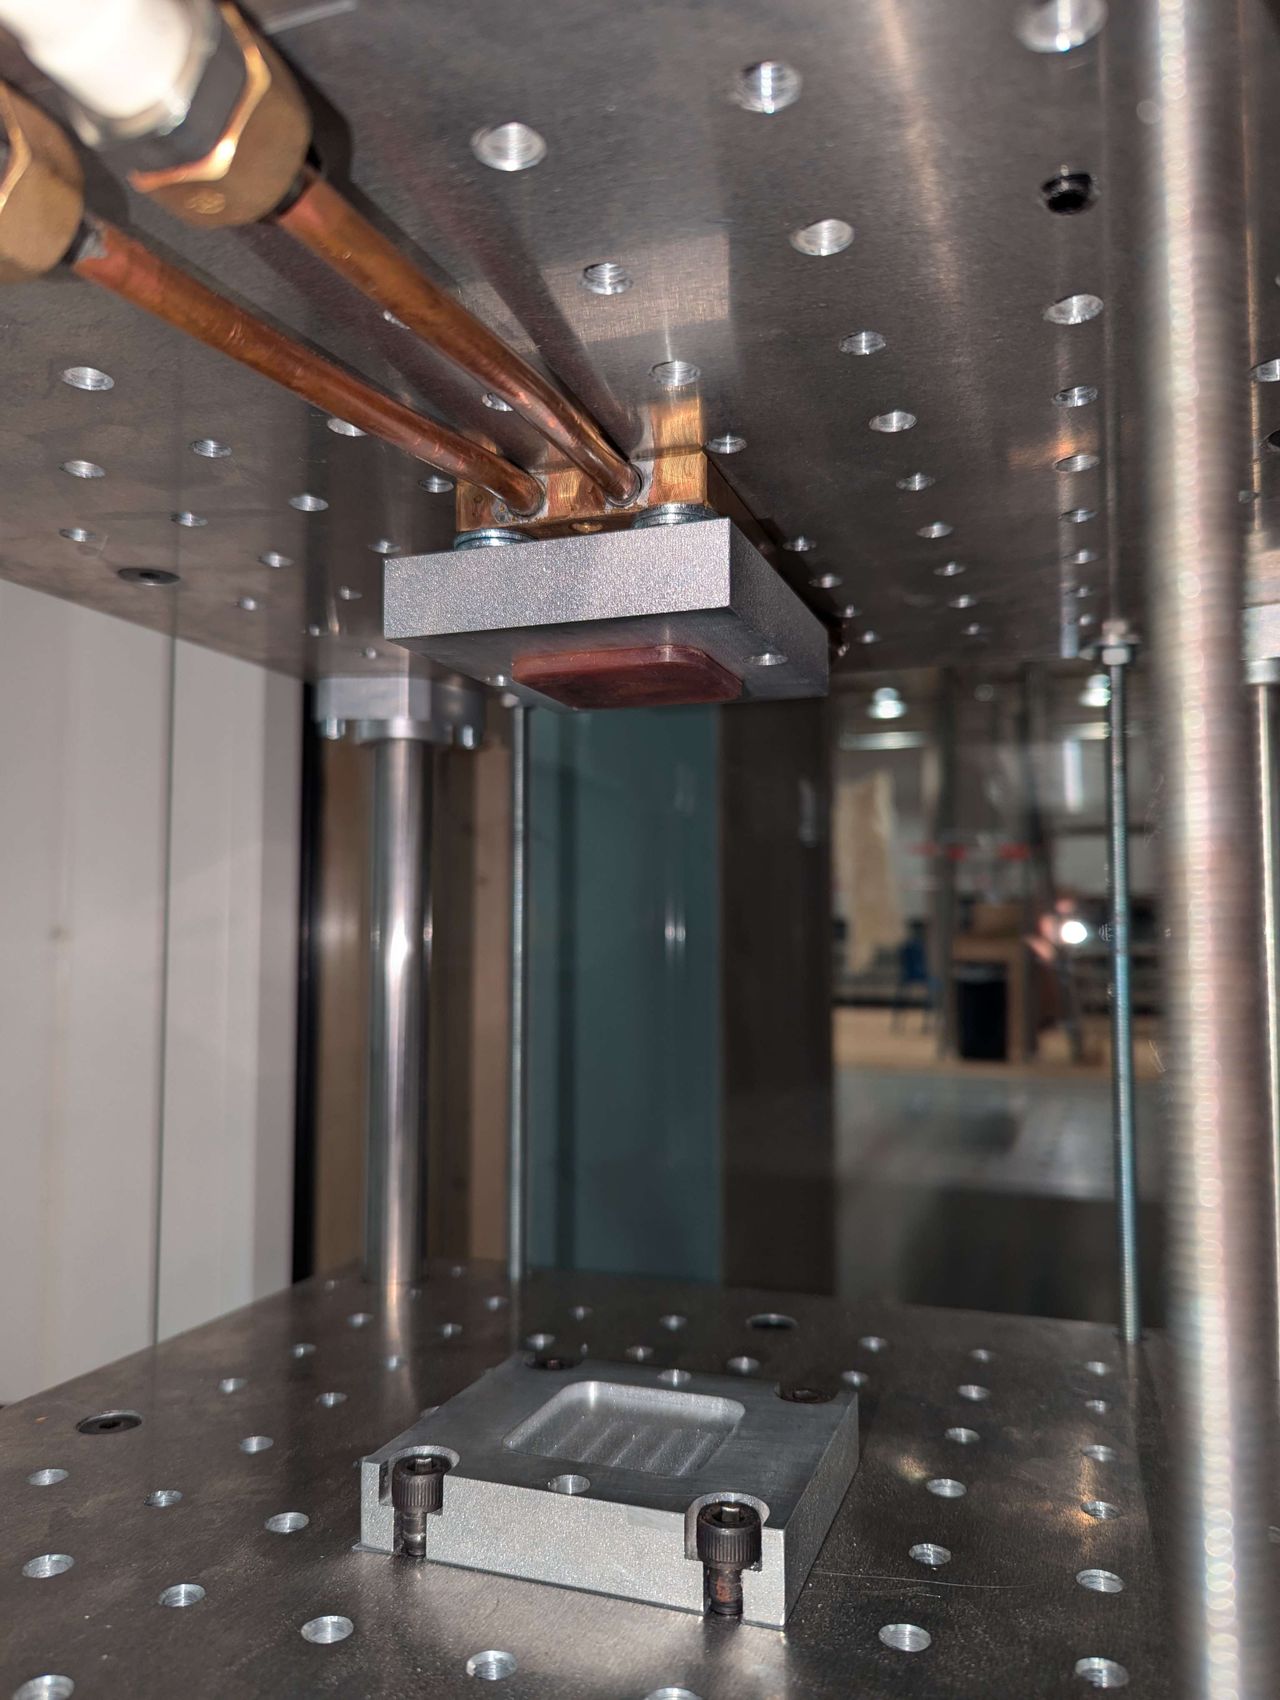
Good news: we're ready for the first round of testing!
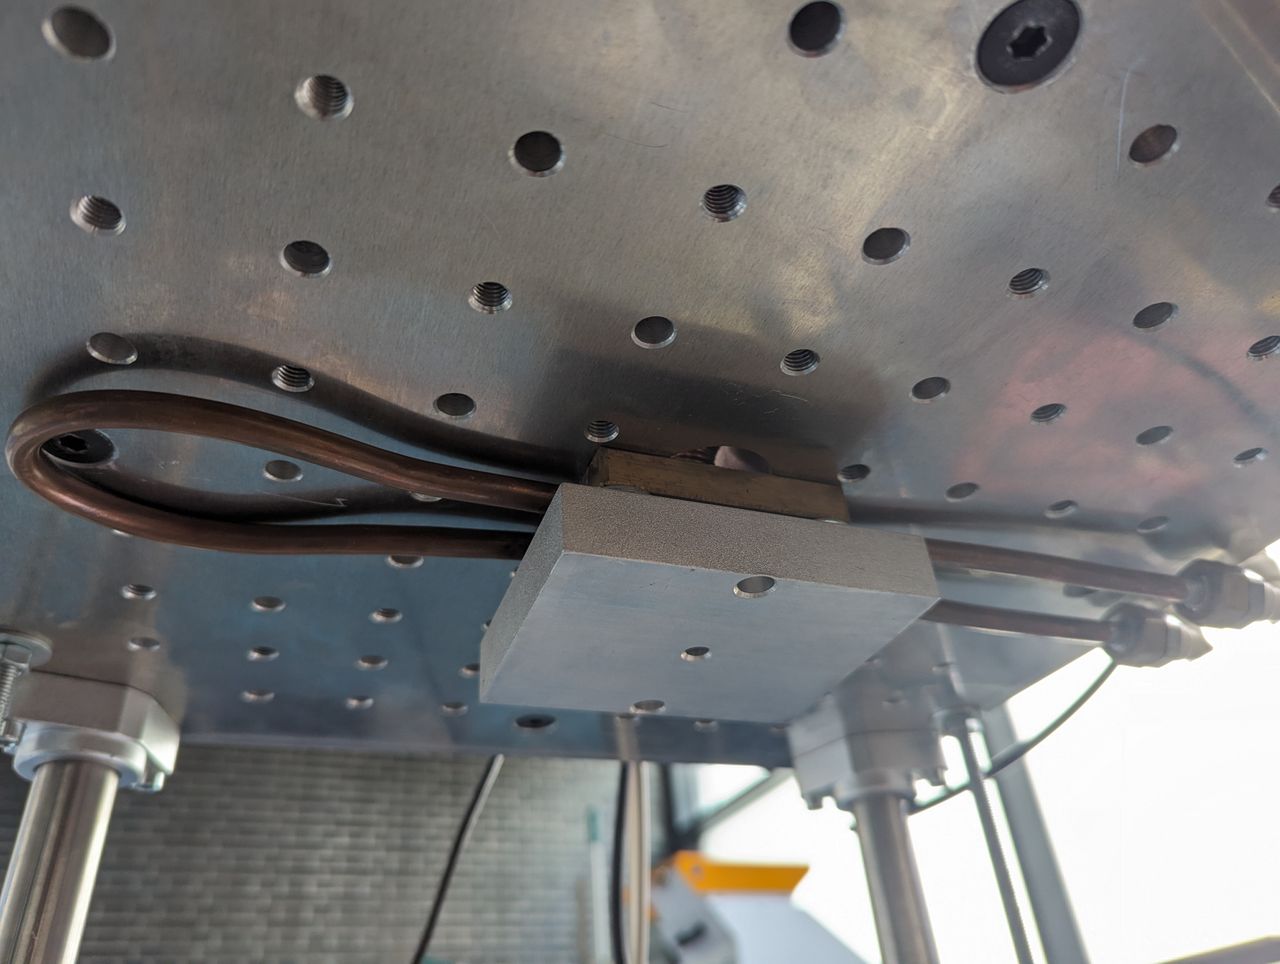
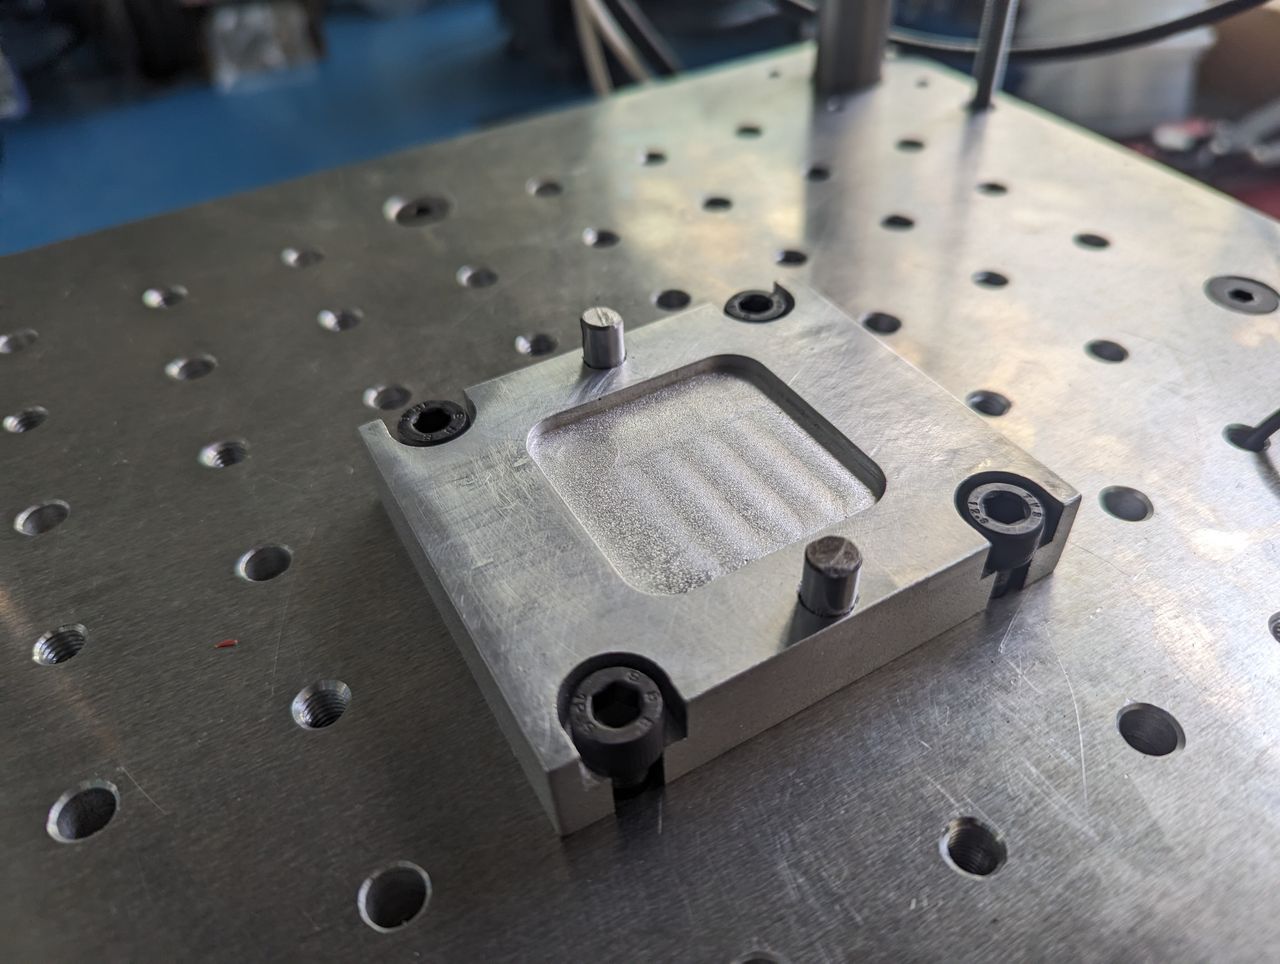
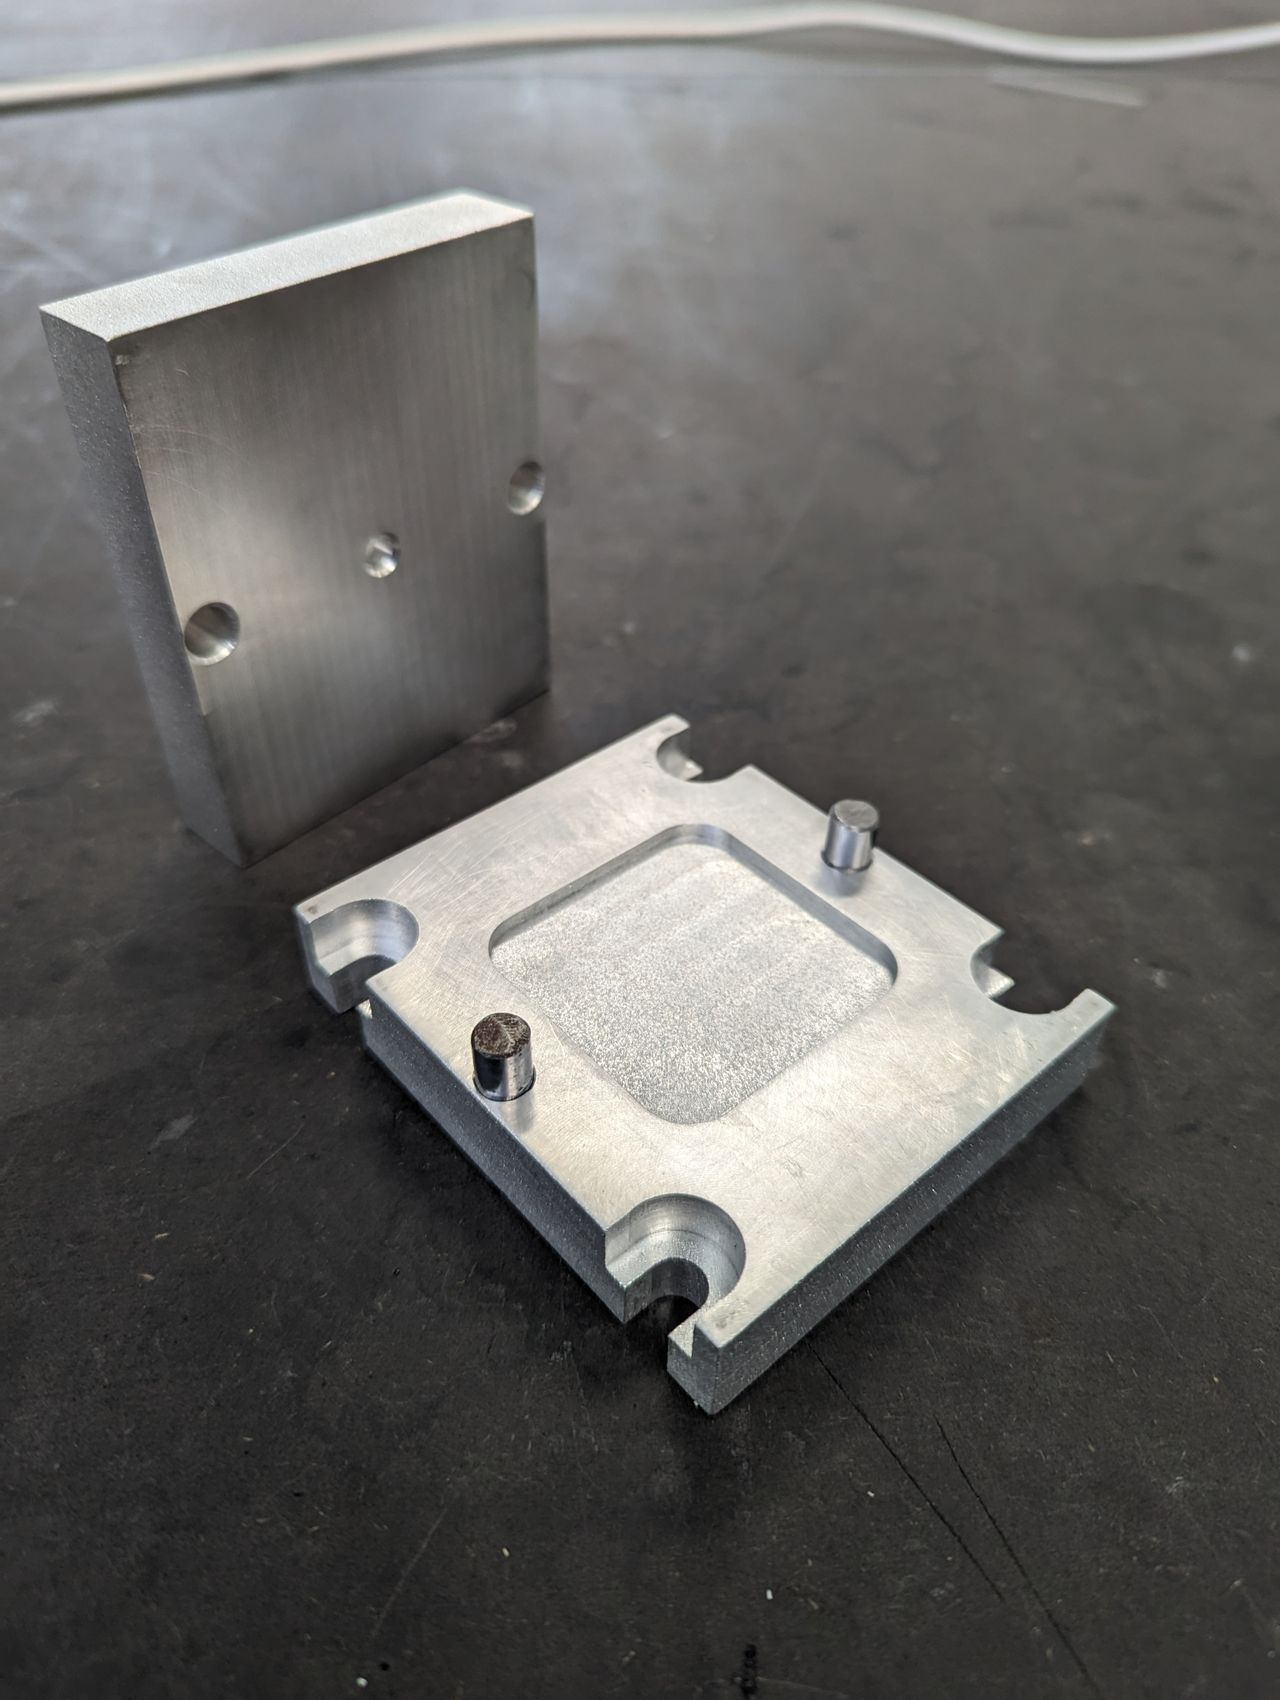
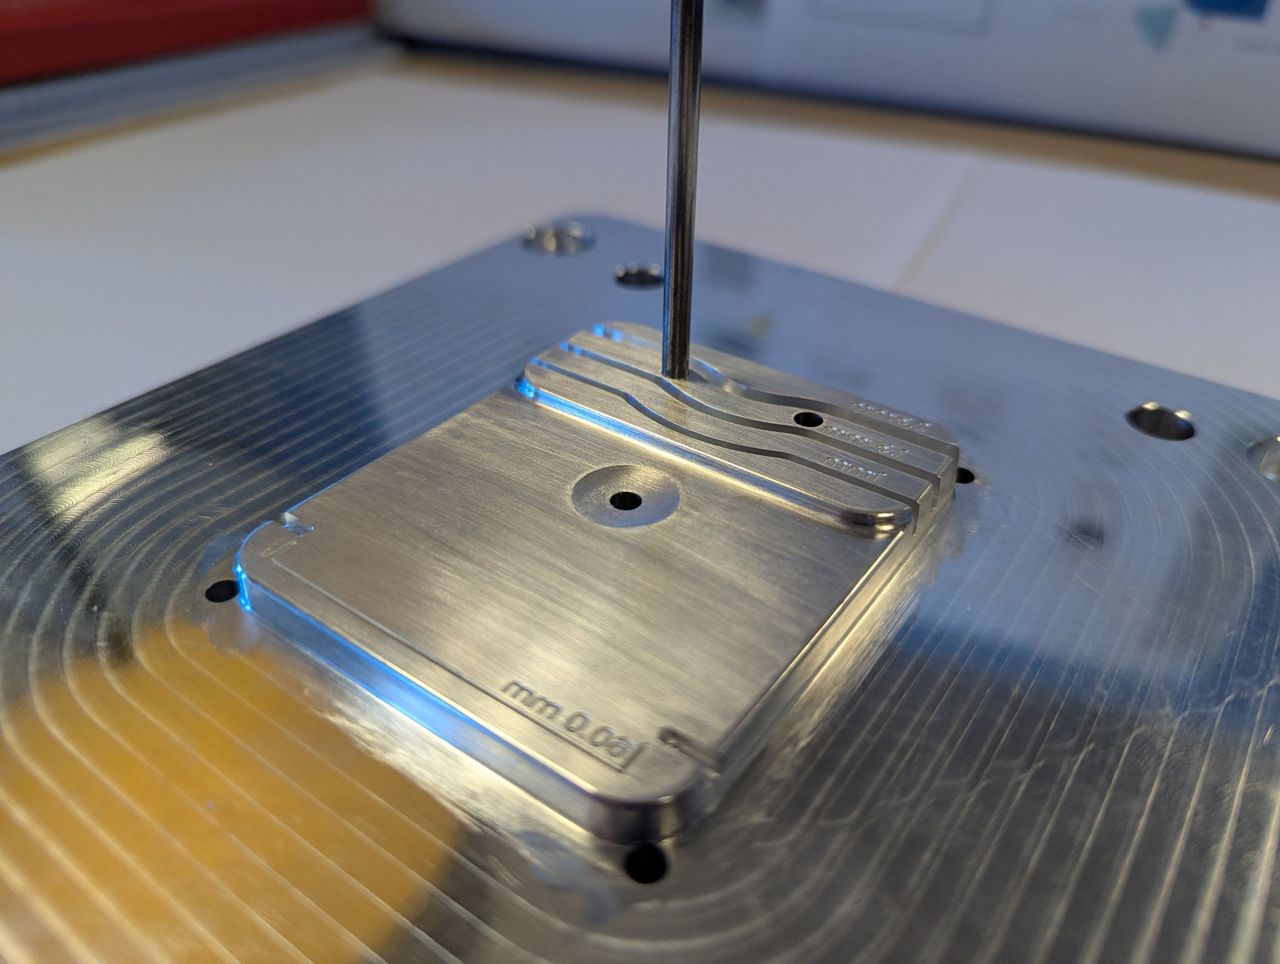
For this first tests, a very simple mold was milled consisting of just a simple flat square (to be used as material samples later on). Nothin' too fancy, just a simple testmold that we'll use to understand the machines' performance better. The plan is to check if the basic functions work properly, like:
- Does the automatic valve at the bottom of the barrel work?
- Do we actually have enough injection pressure?
- Will the plastic flake dispensing system work?
- Does the mold clamping system have enough pressure?
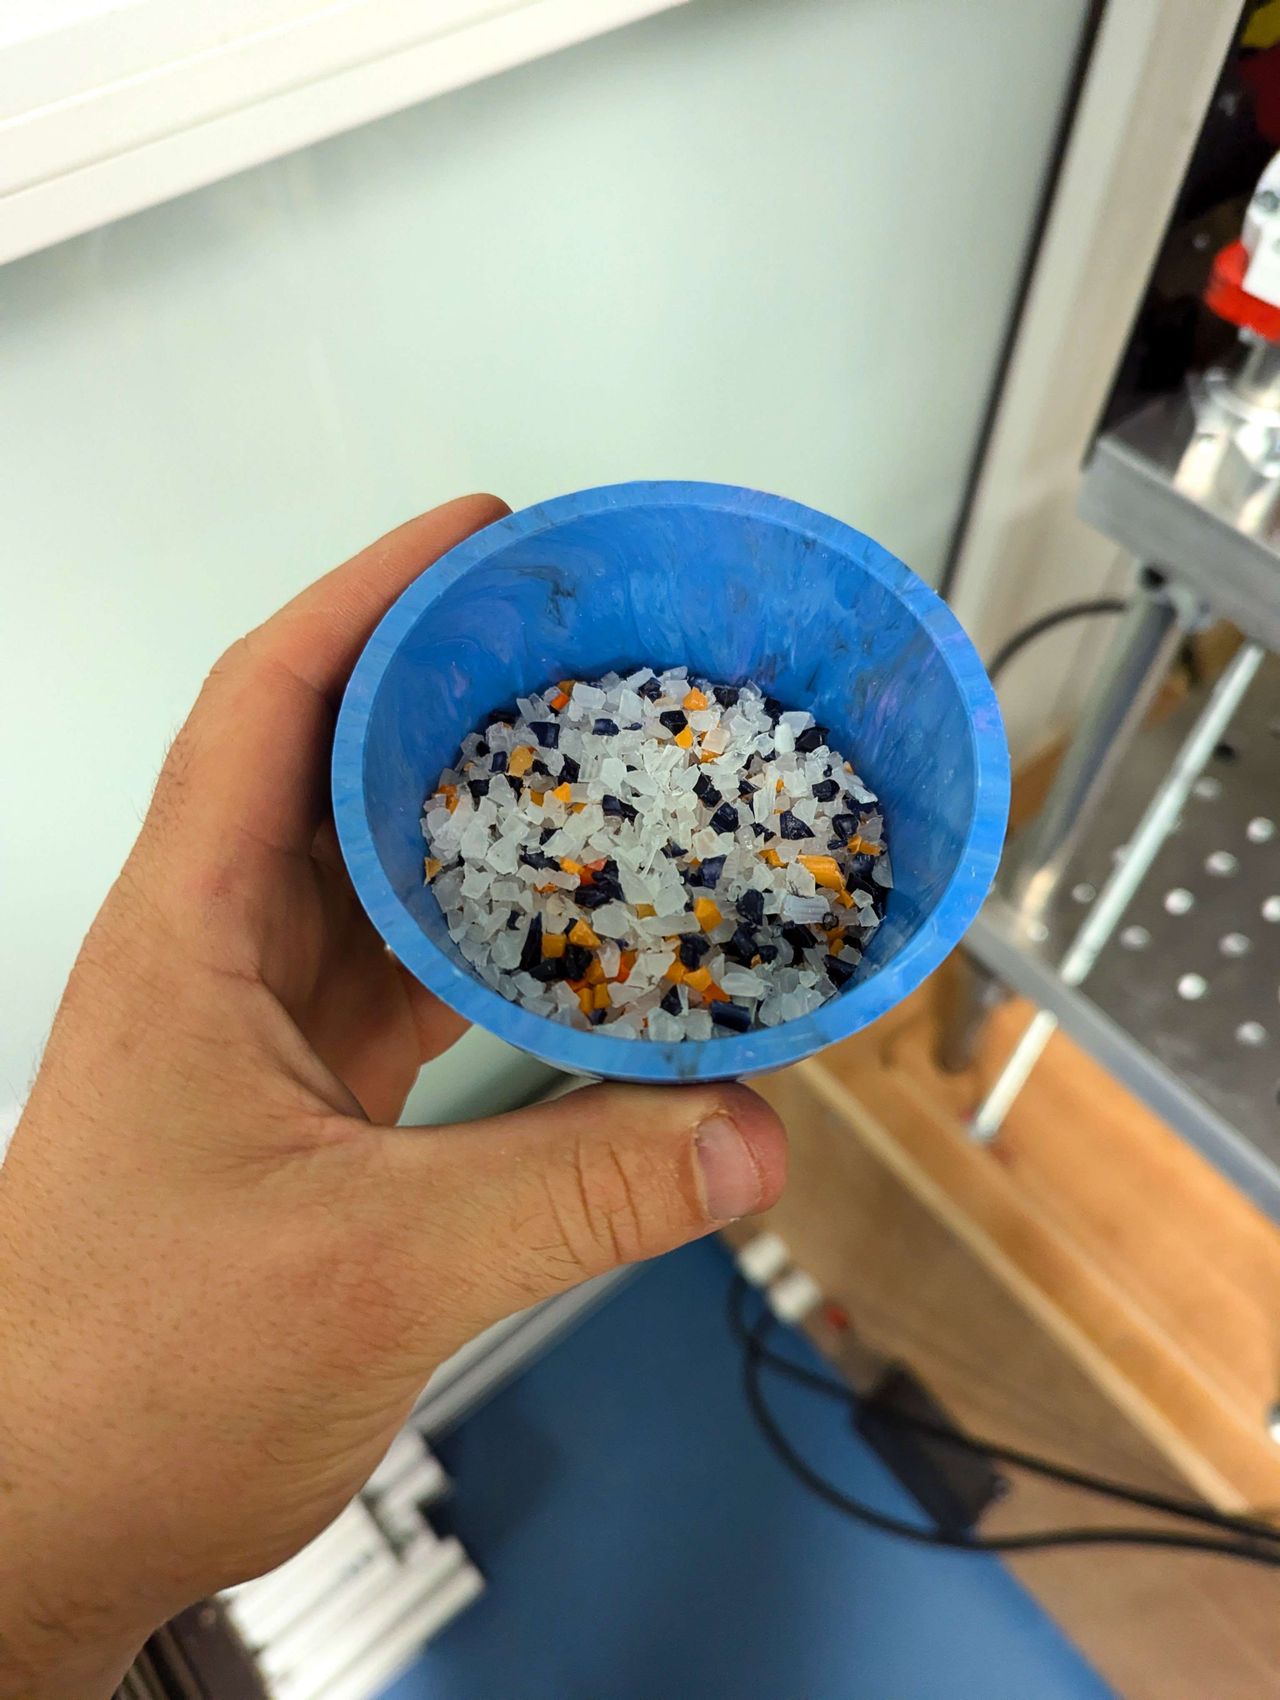
I'm still a bit unsure what material I'll test with, probably either PP or HDPE. Let me know in the comments if you have an opinion on this!
Hopefully, I'll soon be able to show you a succesfull first sample :)))
X - Joost
5
CAD of testmold 2 (holiday update)
Published 1yPublished almost 2 years ago
I started designing the second testmold!
I know I know, by now I promised to share the testing results of the first testmold (see last update). However, due to my holidays I've been unable to test yet. A bit of patience here..
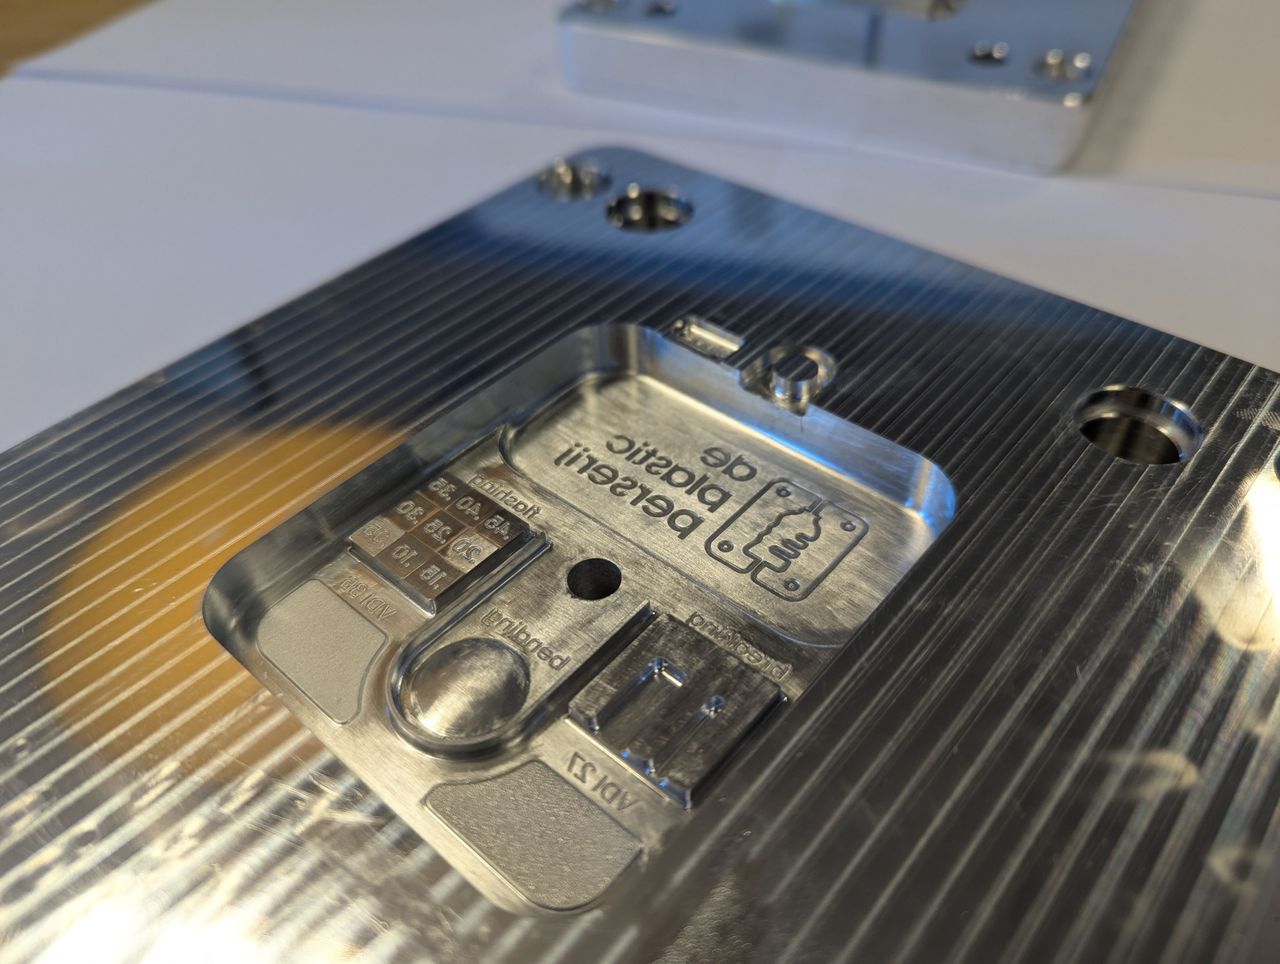
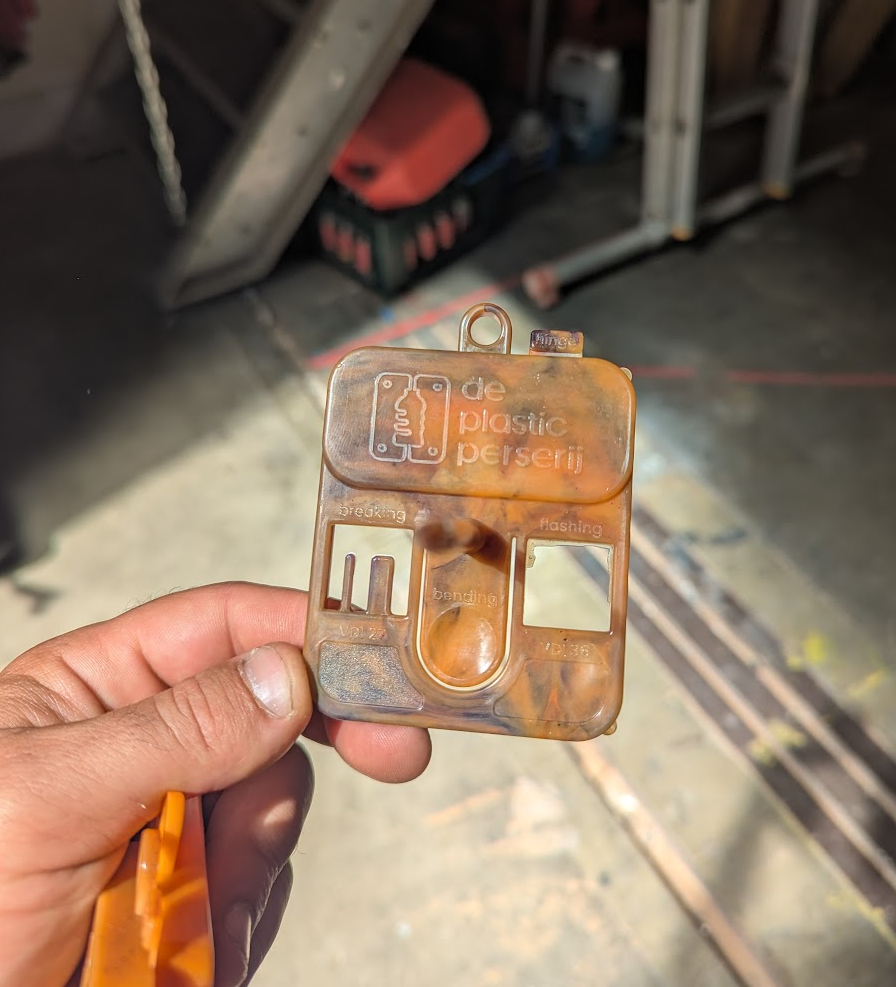
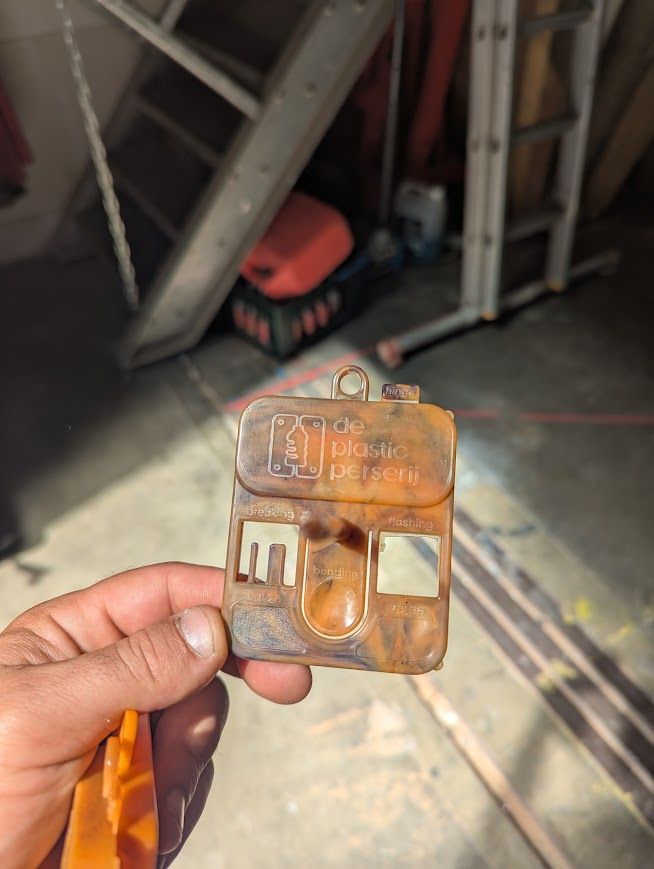
However, I did want to show you the CAD of the second testmold, which will be the testmold with actual ejection pins (see update 3). I've decided this mold will be used for a sample product, that I and others can use to test material properties. Check out the picture below!
The material sample will have the following features:
- A bending tester
- A tab breaking tester
- A flash tester with different thicknesses (0.45 to 0.05mm)
- VDI27 and VDI39 textures
- A living hinge tester
- Ribs with different thicknesses
- A warp distance checker
Let me know your thoughts, and hopefully I'll be able to show you the results of testmold 1 soon.


6
Still on holiday
Published 1yPublished almost 2 years ago
Hey everyone! Unfortunately no progress update this time, as I'm still on a holiday (in Norway 🇳🇴). I'm back in about a week and will share a longer and more exciting update then :)

7
First machine test ✨
Published 1y. Edited 1yPublished over 1 year ago. Last edit over 1 year ago
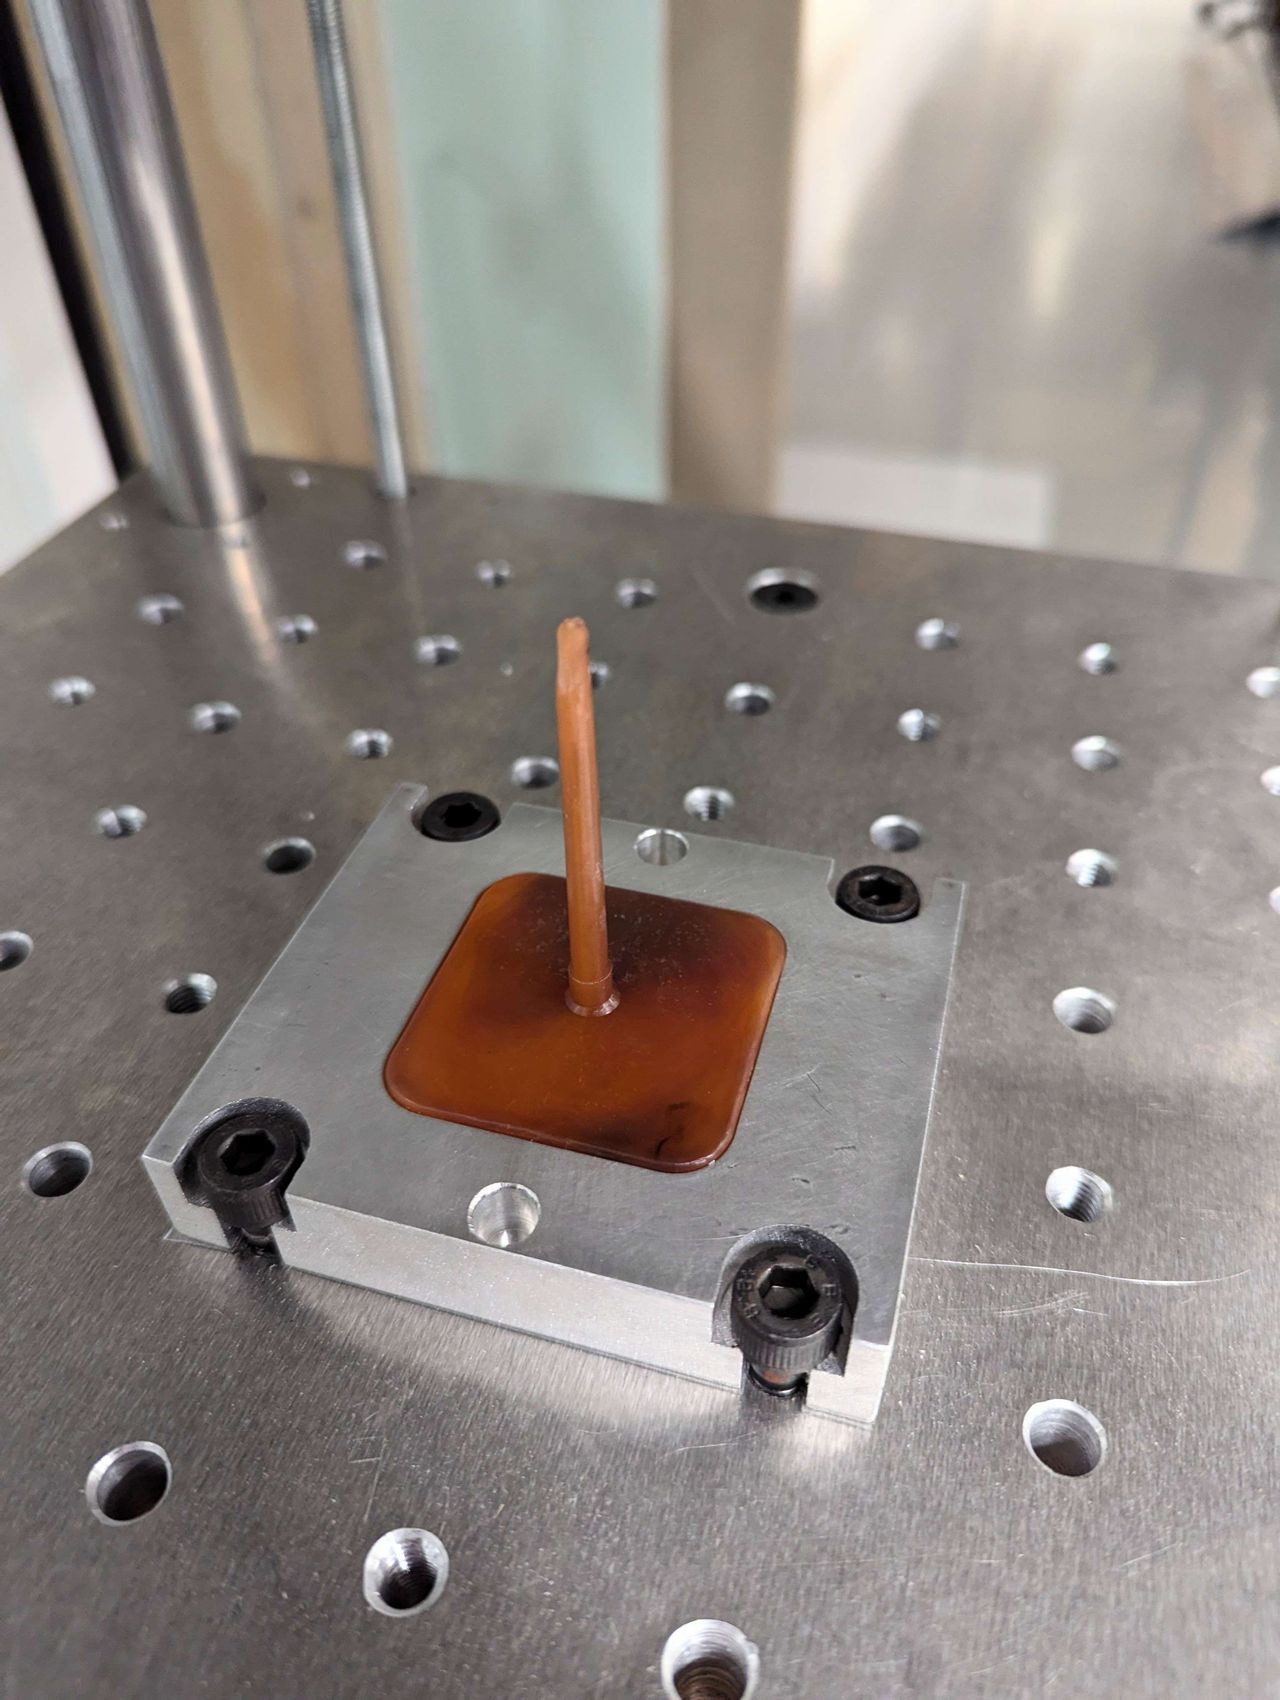
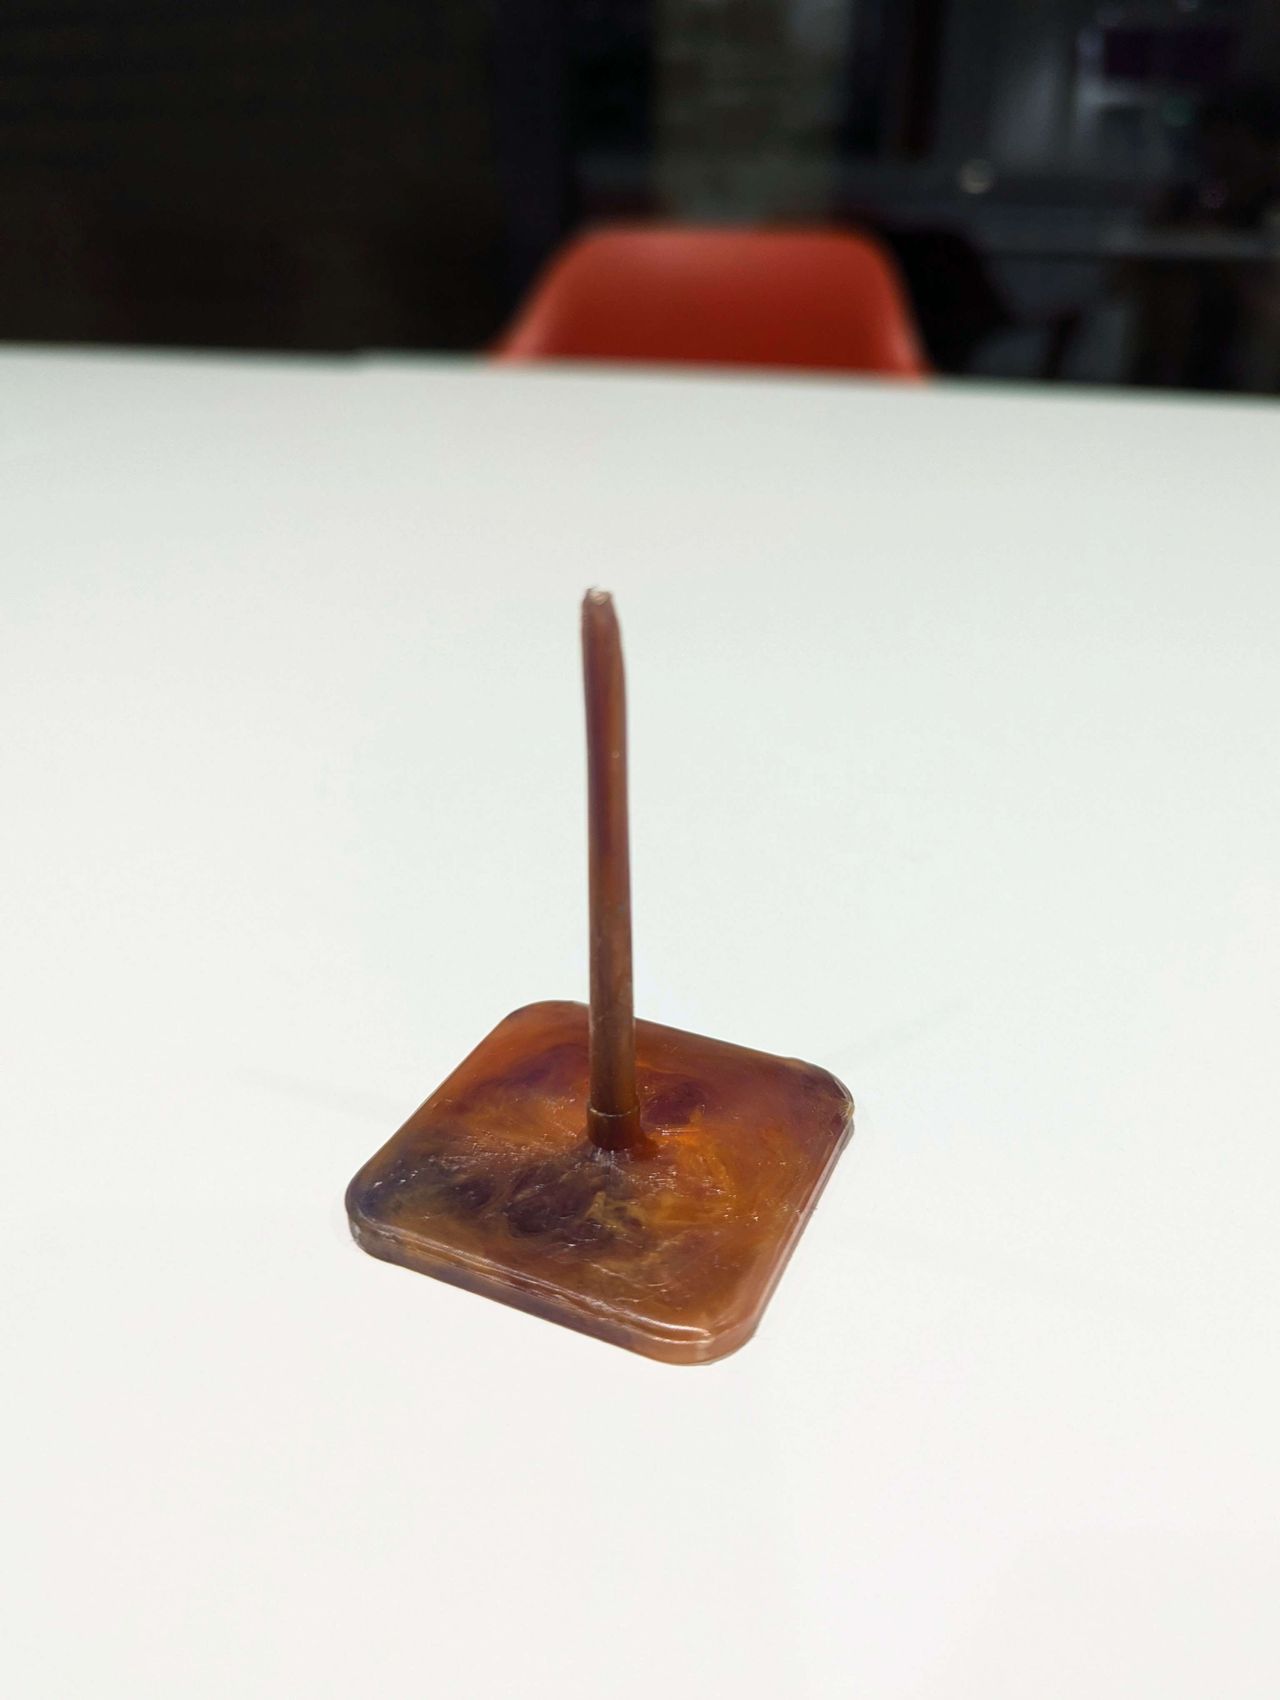
Very good news - the first partial test of the autoinjection is a success! Apart from refilling the flakes and the automatic part ejection, the full part cycle was run (mold closing, mold clamping, sprue gate opening, injecting, gate closing, mold opening).
- The sprue releases very easily when removing it by hand. This gives me a lot of confidence that the upcoming mold with ejector pins will work.
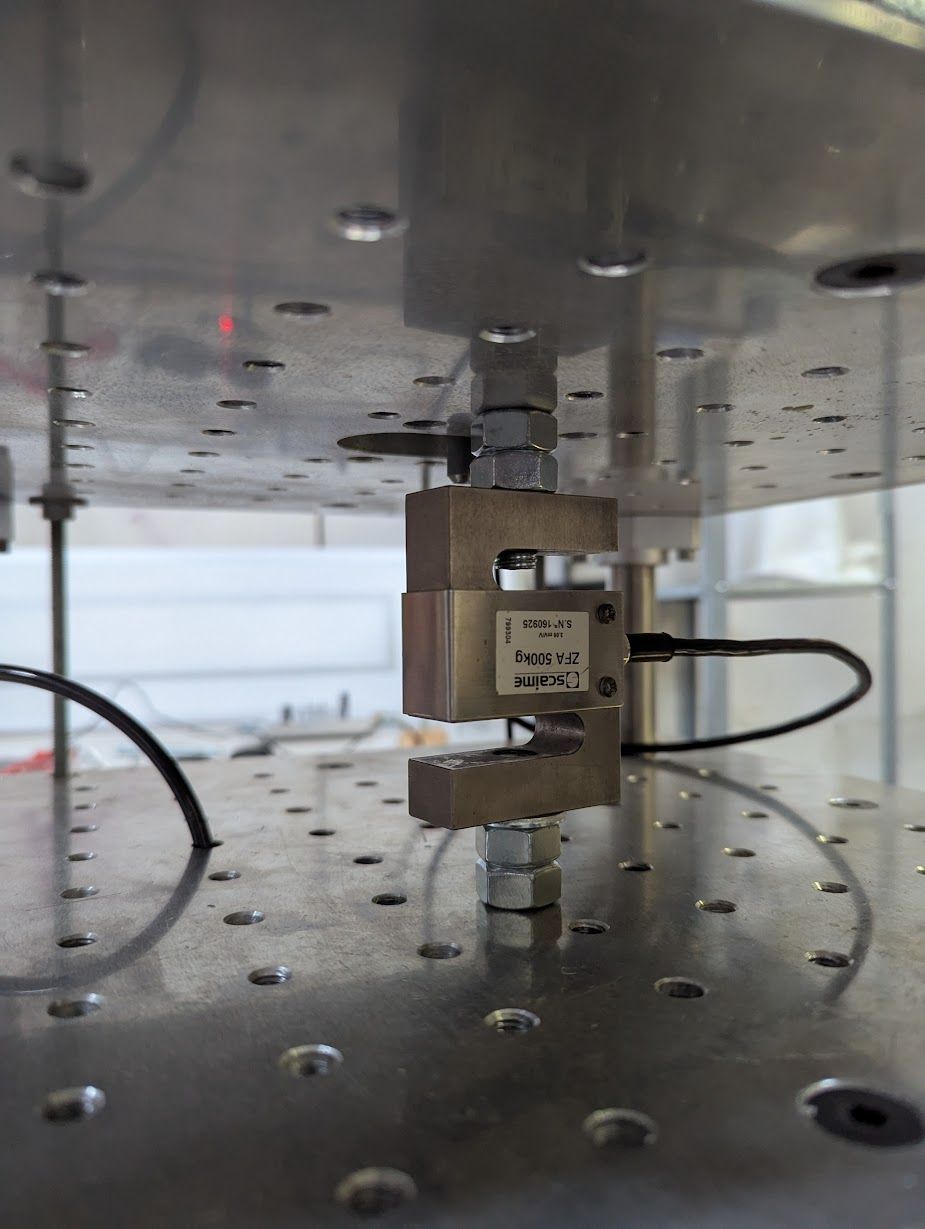
- The mold clamping works well, but is not yet perfectly calibrated. Towards the end of injection, the mold is pushed open a tiny bit (not causing flashing though). I'm planning to measure the clamping force with a load cell soon which should help in calibration.
- The sprue gate valve opened and closed, but not as smoothly as I hoped. This is probably due to the motor not being strong enough, which should be tweaked.
I'm planning to do a walkthrough of the full machine with all it's parts in a video in a few weeks, that will help understanding the above terms a bit better.
For now, things are looking very very good :)
- Joost
8
First machine test ✨ - video
Published 1yPublished over 1 year ago
The video shows the mold opening and closing
9
Upgrades..
Published 1yPublished over 1 year ago
Whoops, this post is a bit too late.. sorry!
After the first round of testing (see previous update), I took some time to look into improving some aspects of the design.
- The original sprue gate valve design did not reliably open and close, leading to a 'leaky valve'. To fix this, I made a redesign of the valve which should fix this. I'm making a prototype right now of the new design, when this is done I'll show you the differences between the old and new design.
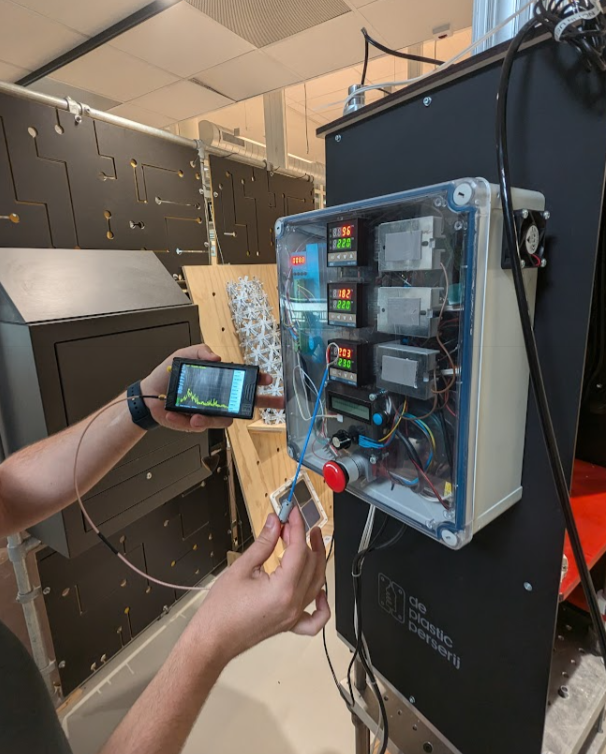
- I had some weird behaviour of the electronics, which I suspected might be due to Electromagnetic interference (EMI). To check, a friend came over with his tester kit to look into this. Indeed, there seems to be some weird behaviour, but it looks mostly fixable by moving some components around and to be a bit more carefull in wiring. Currently I'm contemplating to potentially make a custom PCB to fix the wiring mess, or alternatively use PLC's to simplify things.
- I made a quick-and-dirty FDM printed prototype of the testmold. Although this is a **very** improper way of testing molds, it did allow me to get a feeling for the moldflow. I'm currently finishing the final details of the mold before it's ready for ordering at Fritz from EasyMolds (who has been so kind to supply a lot of thoughts and feedback along the way!)
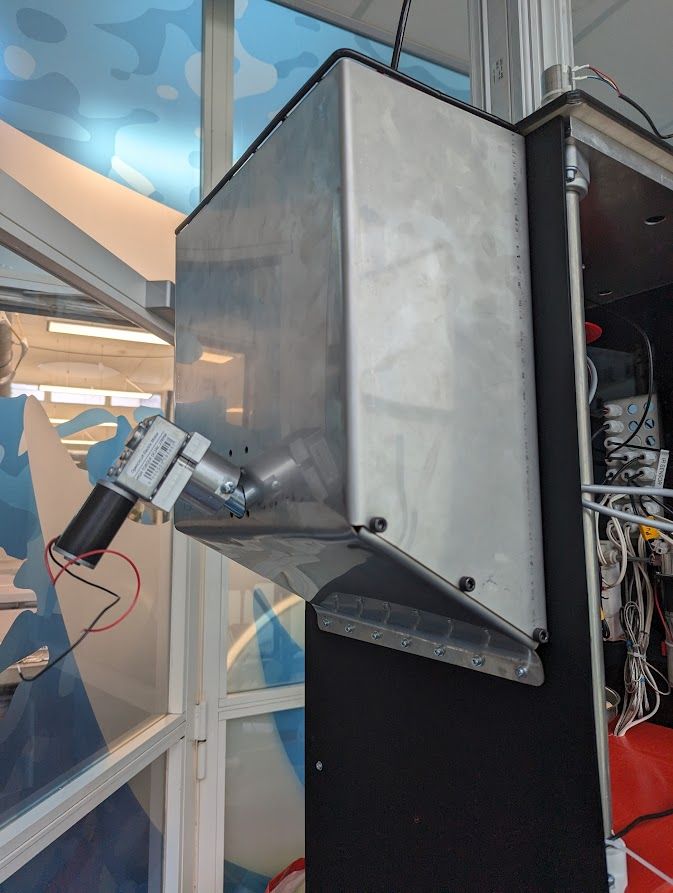
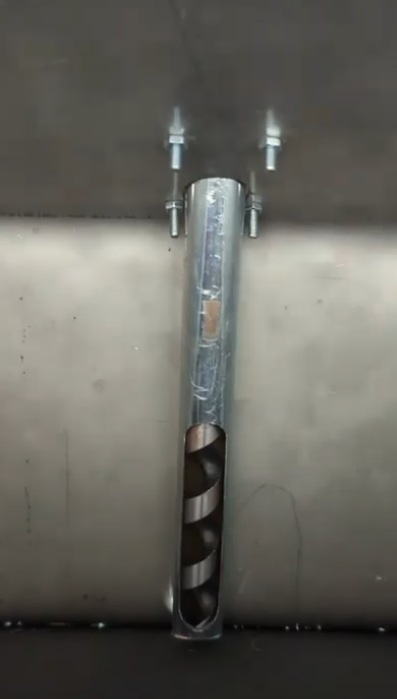
- I tested the 'plastic feeder' aka the unit that should dispense plastic flakes into the barrel. This unfortunately failed spectacularly, as the flakes kept getting stuck in the auger screw. I've ordered parts for a new vibrationmotor-based design, which should work much better.
I'm very curious how the upgraded electronics, better flake dispenser and new sprue gate valve will behave! If everything goes according to plan, we can soon to the first fully automatic testrounds :)
Best, Joost

10
Moving and building
Published 1yPublished over 1 year ago
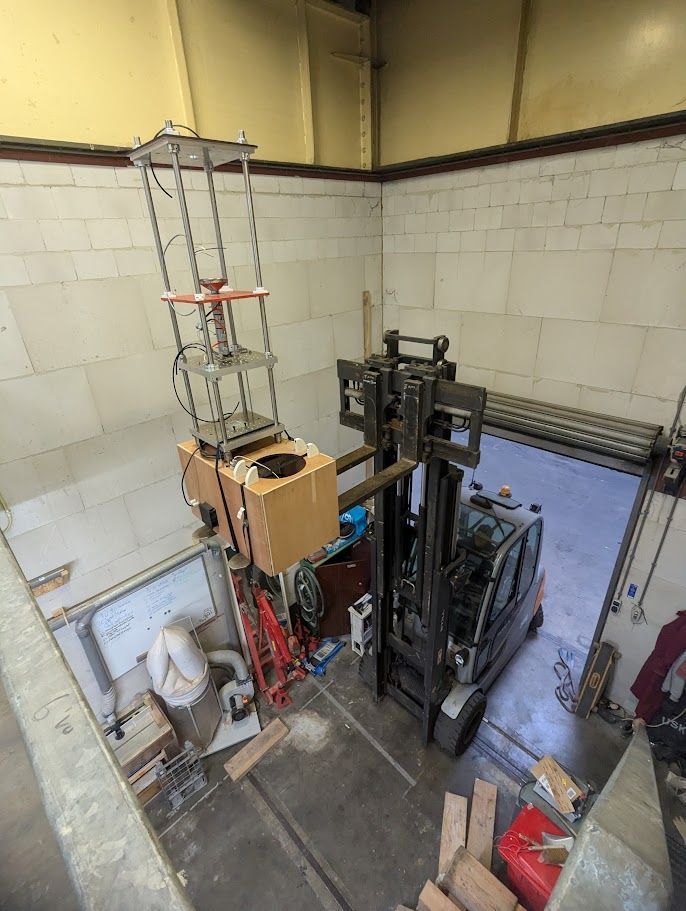
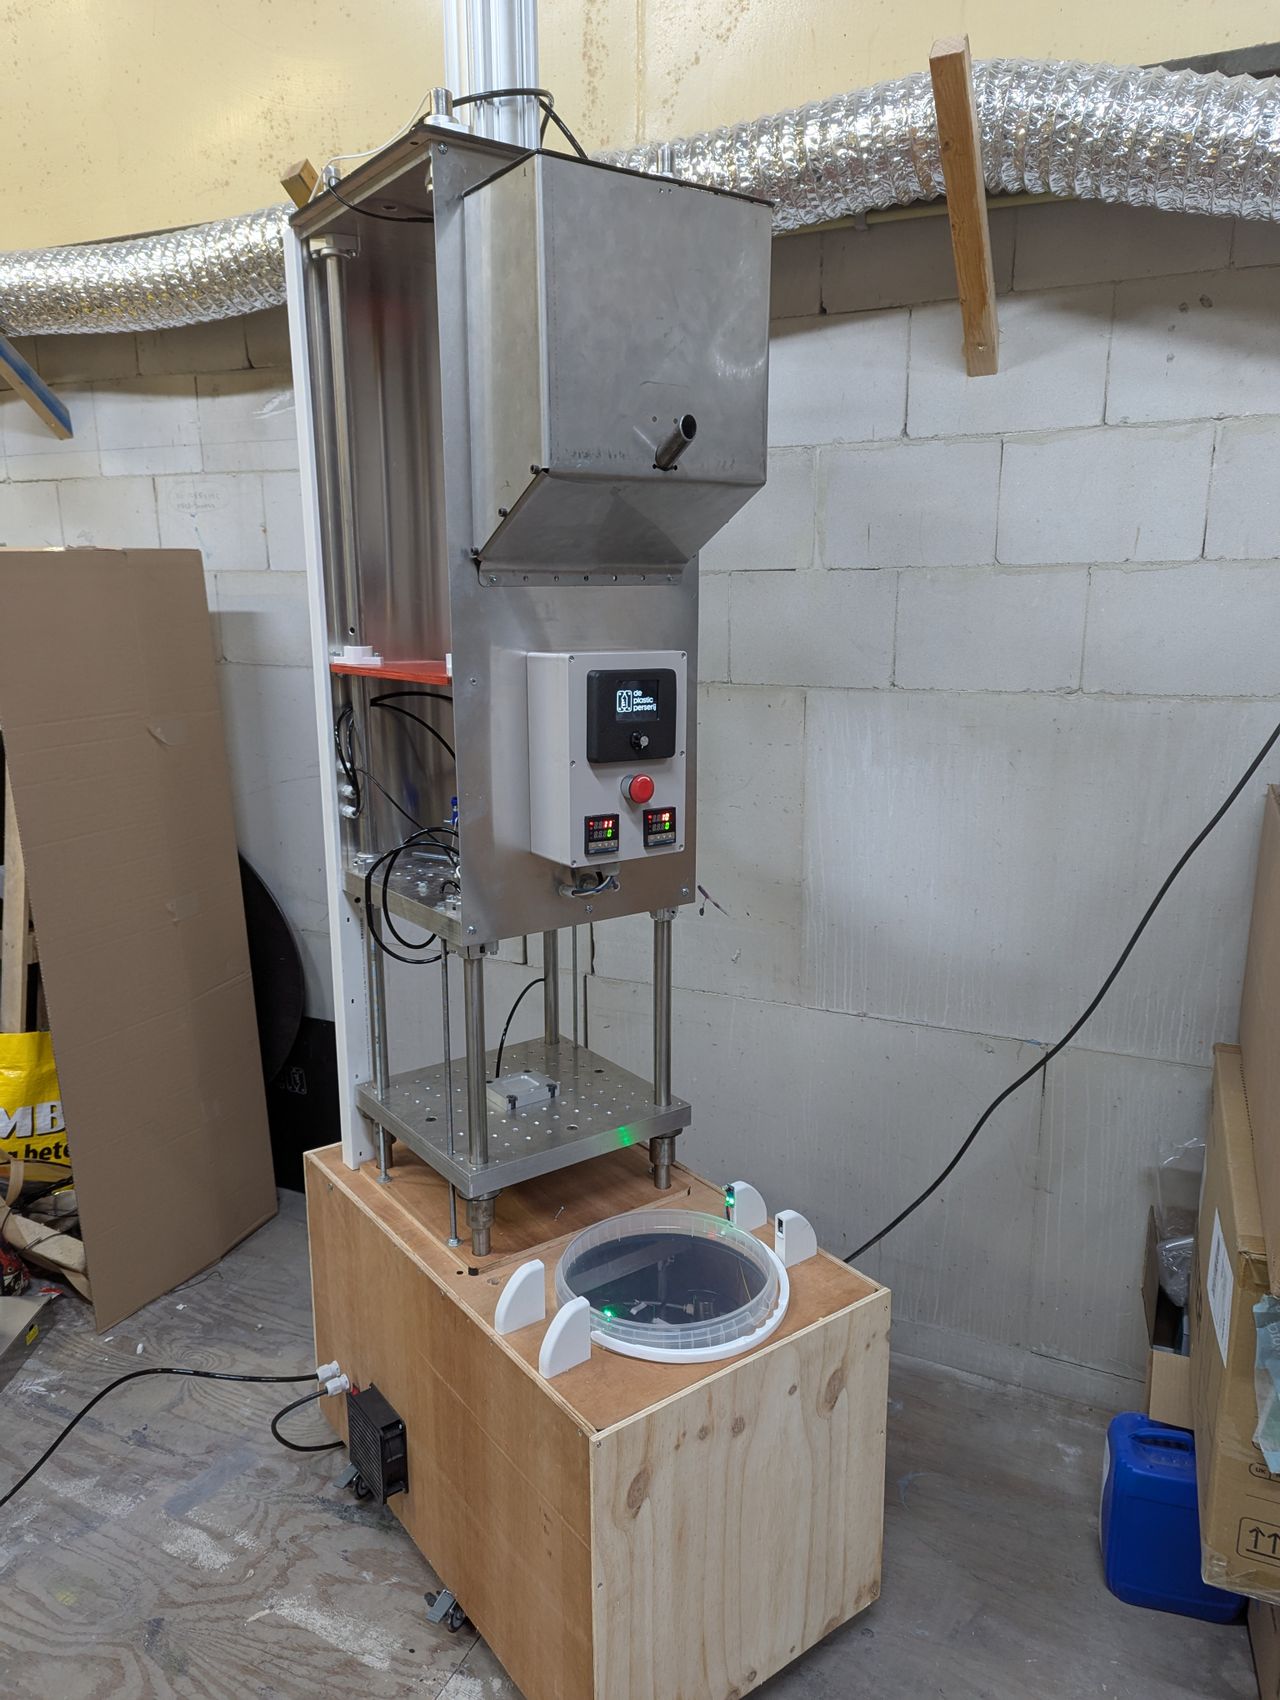
Last month was a hectic one as I spend most my time with relocating! Up until now, I've been working in a shared workspace at TU Delft, but as of two weeks I have a place of my own. Moving the machine was quite a challenge, but a friendly fork-lift owner made moving a 100kg machine quite a bit easier (pic 1).
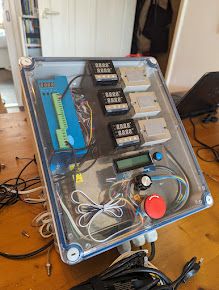
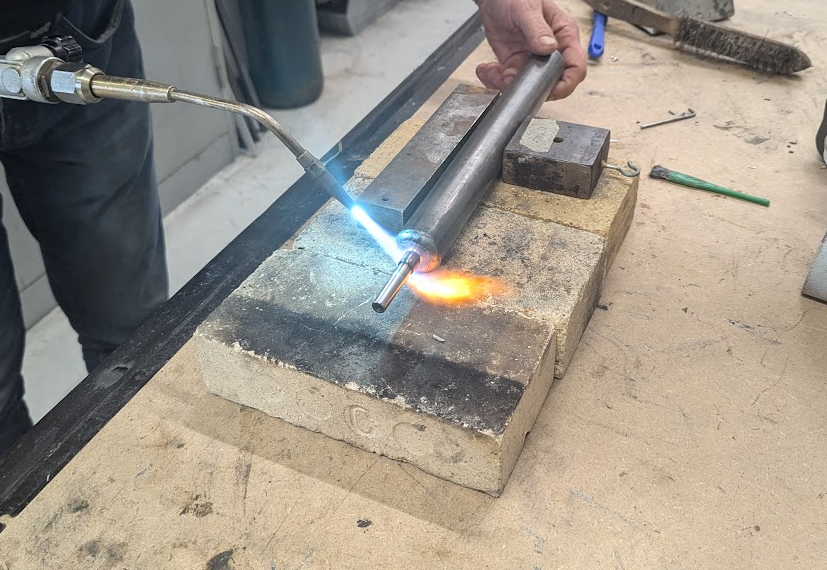
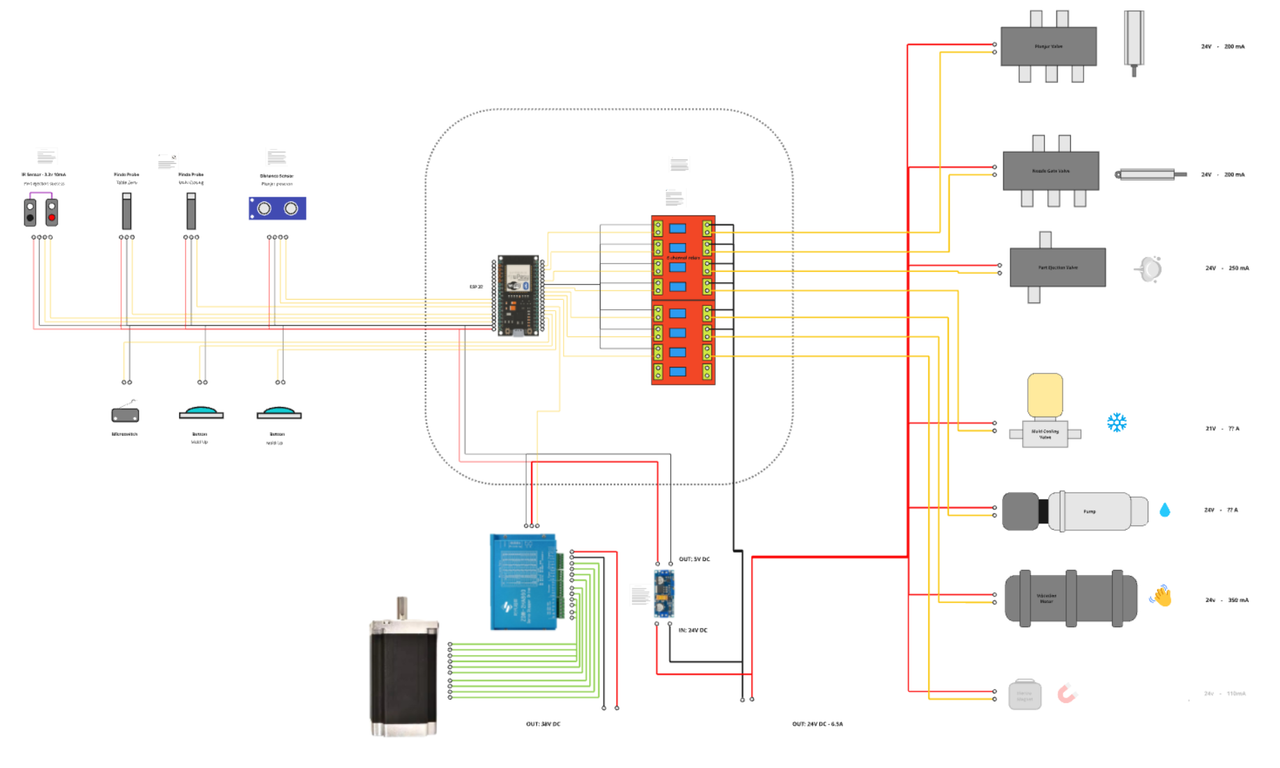
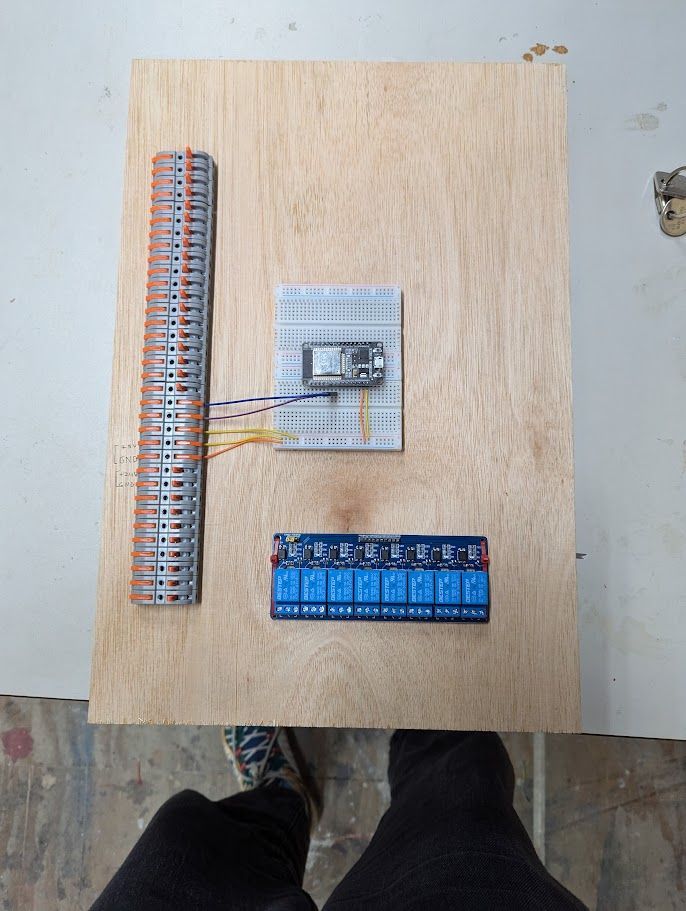
Nevertheless, I was able to start building the improvements I mentioned in the last update. I made two new barrel tubes (pic 2), the later of which appears to quite well! The nozzle of the barrel is now welded to the main tube, which makes for a much less complex part. Note to self: Check purchased metal parts for hardness before ordering ;) The first tests are promising, it appears the practical injection pressure is also much higher: With the same settings as earlier, quite some flashing appeared (pic 3). I also made a new schematic for the electronics (pic 4) and started building it (pic 5).
When these updates are implemented I’ll do the promised video walkthrough of the machine, I’m looking forward to it 🙂
11
Upgrades and videos
Published 1y. Edited 1yPublished over 1 year ago. Last edit over 1 year ago
I finished the upgraded parts, with (mostly) succes!
- The redesign of the valve seems to work right. At first, it seems my sprue hole was to small, which caused a shortage of injection pressure. A larger diameter of around 5mm seems to do the job, will be verified with the final testmold.
- The electronics are done and work perfectly. In the process, I added a small screen to facilitate a nice User Interface (more on this later). This feels like a much more solid foundation to continue testing.
- The vibration-based plastic feeder works a little too well 😅. It now keeps oozing plastic flakes when it shouldn't, so I need to add some kind of stopping mechanism. This will probably be a solenoid opening and closing a lid at the end of the tube, so nothing too fancy.
As promised, I shot some videos of the machine in action! They should give you a better insight of the different parts of the machine.
Overview: https://youtube.com/shorts/XtQ57nY2Y1o
Vibration motor: https://youtube.com/shorts/-K8Tvuki0Io
As mentioned, this is currently sealed off with ducttape to prevent oozing.
Plunjer: https://youtube.com/shorts/et3UQ45jsUs
Nothing new here, but nice to see how smoothly this component functions :)
Cooling and electronics: https://youtube.com/shorts/l3Neg7Au1sc
A quick peek below the hood, showing the cooling system for the mold and some of the electronics.
GUI: https://youtube.com/shorts/f-Z2mbYY_rk
This is the user interface. It will be used to program the amount of shots and some parameters.
Part detection: https://youtube.com/shorts/Gxh6O6zO7Ms
This video shows the sensor checking when a part is ejected properly. This is important, the machine needs to be sure that a part is ejected before continuing.
Part ejection: https://youtube.com/shorts/OiM3nDGoBSY
This shows how the part will be removed from the mold after it is released by the ejection pins. Needs to be designed properly, but the basic proof-of-principle is here.
Valve: https://youtube.com/shorts/dsX1R-RPq2M
This shows how the gate valve is opened and closed. The working principle is explained in a previous post

12
Improved user interface
Published 1yPublished over 1 year ago
Hey guys!
This month I honed my C++ skills and programmed the User Interface. This thing was quite a pain to program, but a crucial step: now, the machine can be operated as a standalone unit and not only through an external laptop.
Also, I did some extra testing on the automatic gate valve, which seems to work very good. Next is finally ordering the automatic mold, hopefully I can show you more on that next update :)
All the best,
Joost
13
Fully Automatic Mold Ordered
Published 1yPublished over 1 year ago
I ordered the fully automatic test mold!
After some final tweaks to the mold design, I finished the design and placed the order at EasyMolds. @@{:0023}Fritz, thanks a lot for thinking along and providing feedback, this was very much appreciated!
On the image below, you can see the mold design and the part it will produce. As I described in an earlier update, the part will be both a machine performance tester and a a sample product, featuring things like ribs in different thicknesses, a flash testing zone, textured areas and more complex injection features. The mold features 5 ejector pins that will (hopefully) push the part out from the core, after which the injection machine will remove it from the mold area through an air jet. If all goes well, the mold will arive in about 2 weeks, so stay tuned 🙂
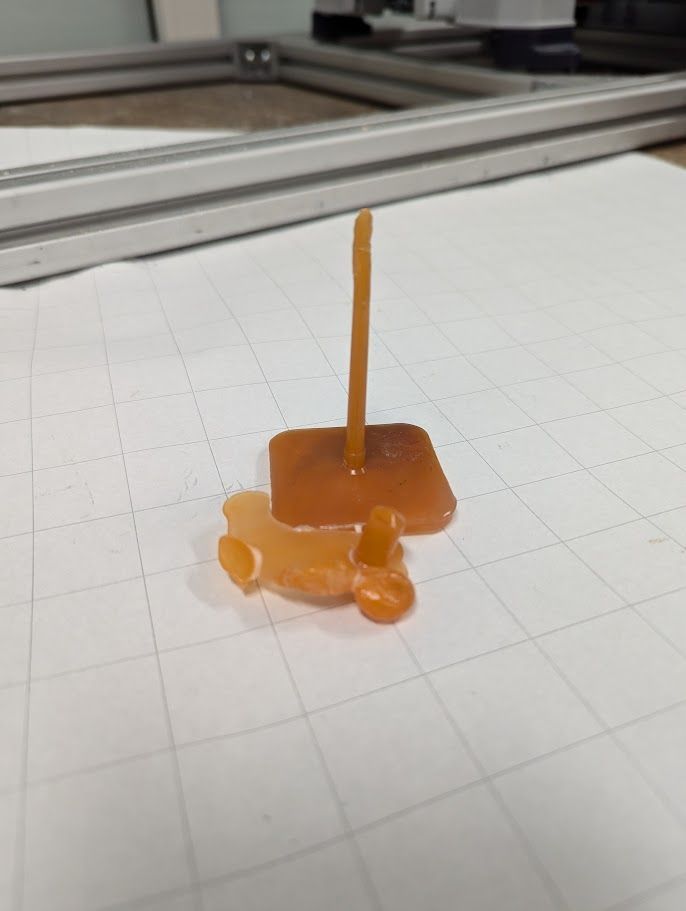
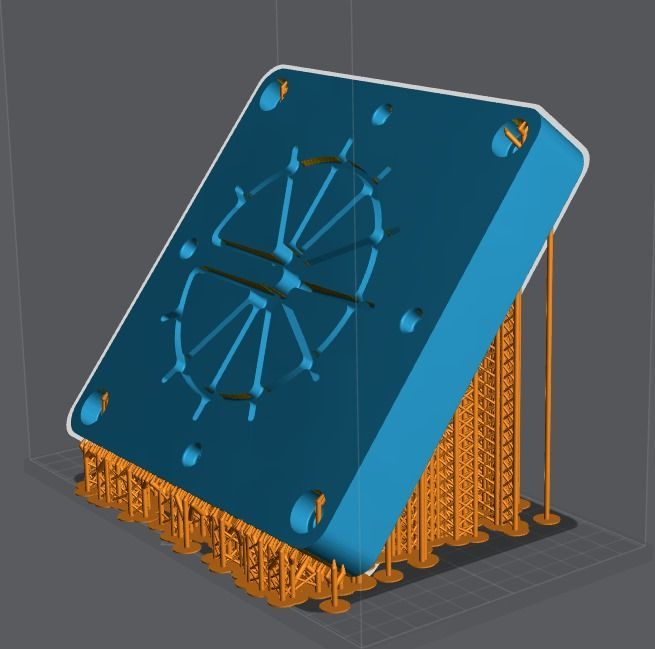
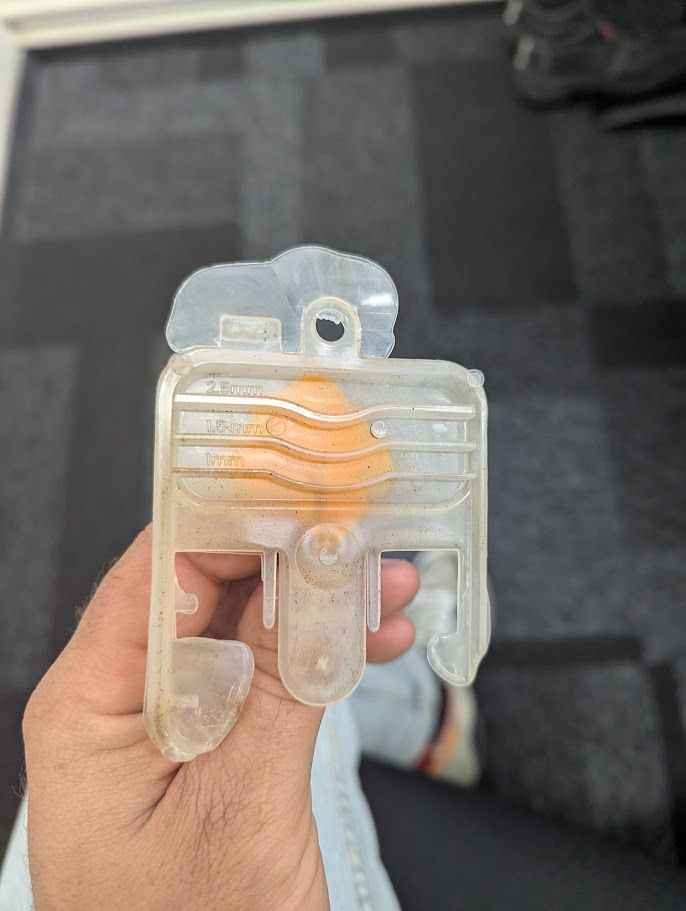
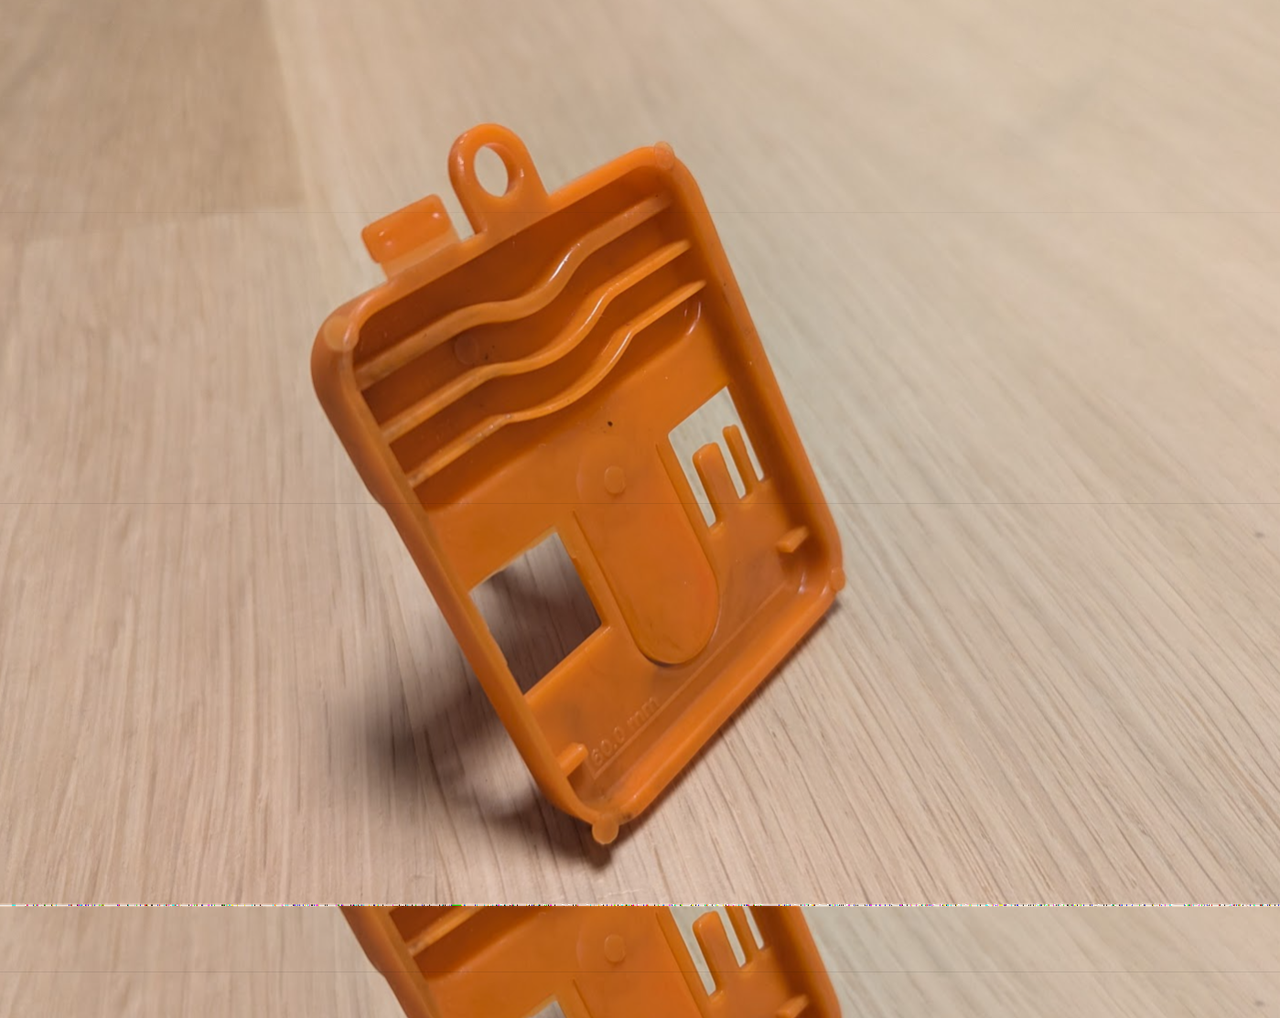
As a side project, I’m also collaborating with a friend on a resin-printed mold. This mold will be for a rebar spacer and will be non-automatic (e.g. no ejector pins). If any of you have experience with this, let me know!
All the best,
Joost
14
Molds, molding and more molds :)
Published 1yPublished about 1 year ago
A lot of cool things happened this month!
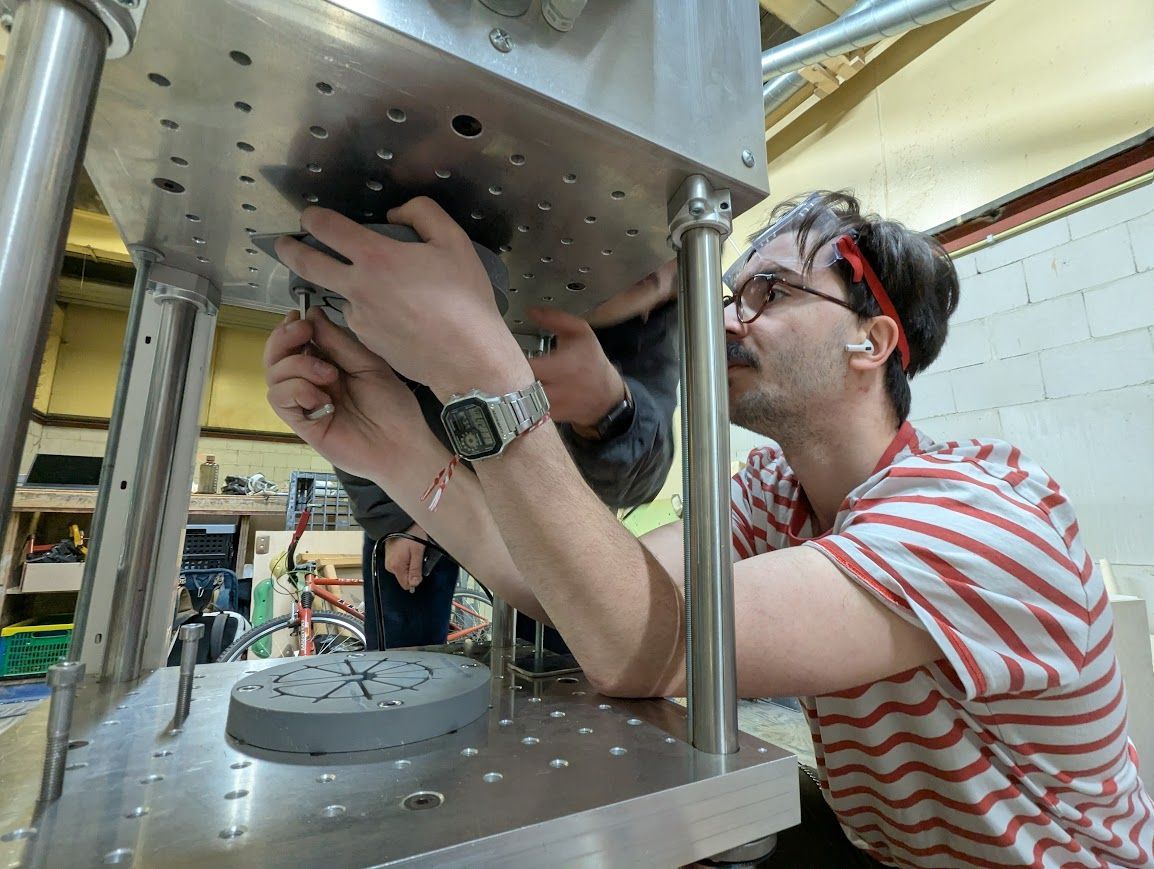
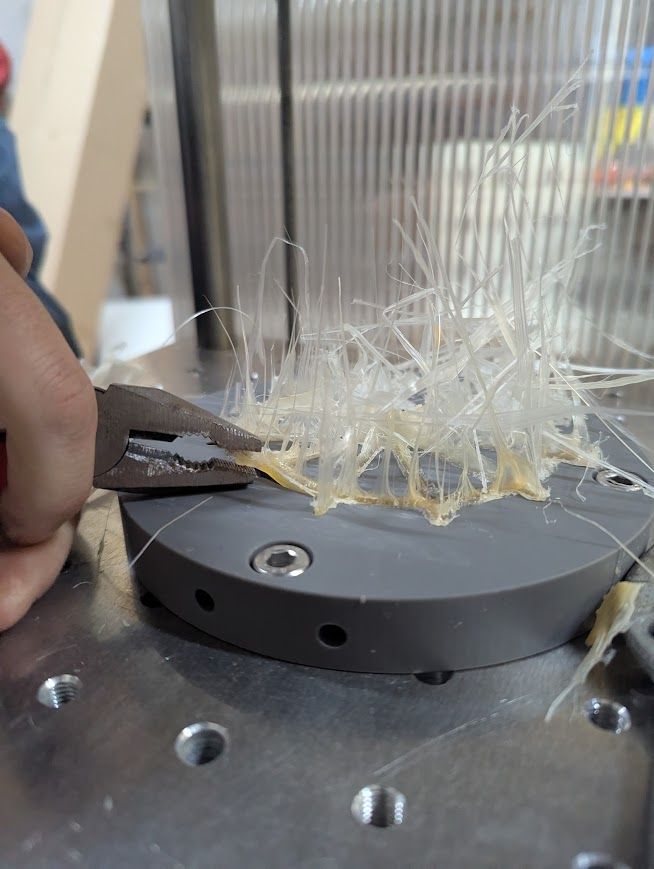
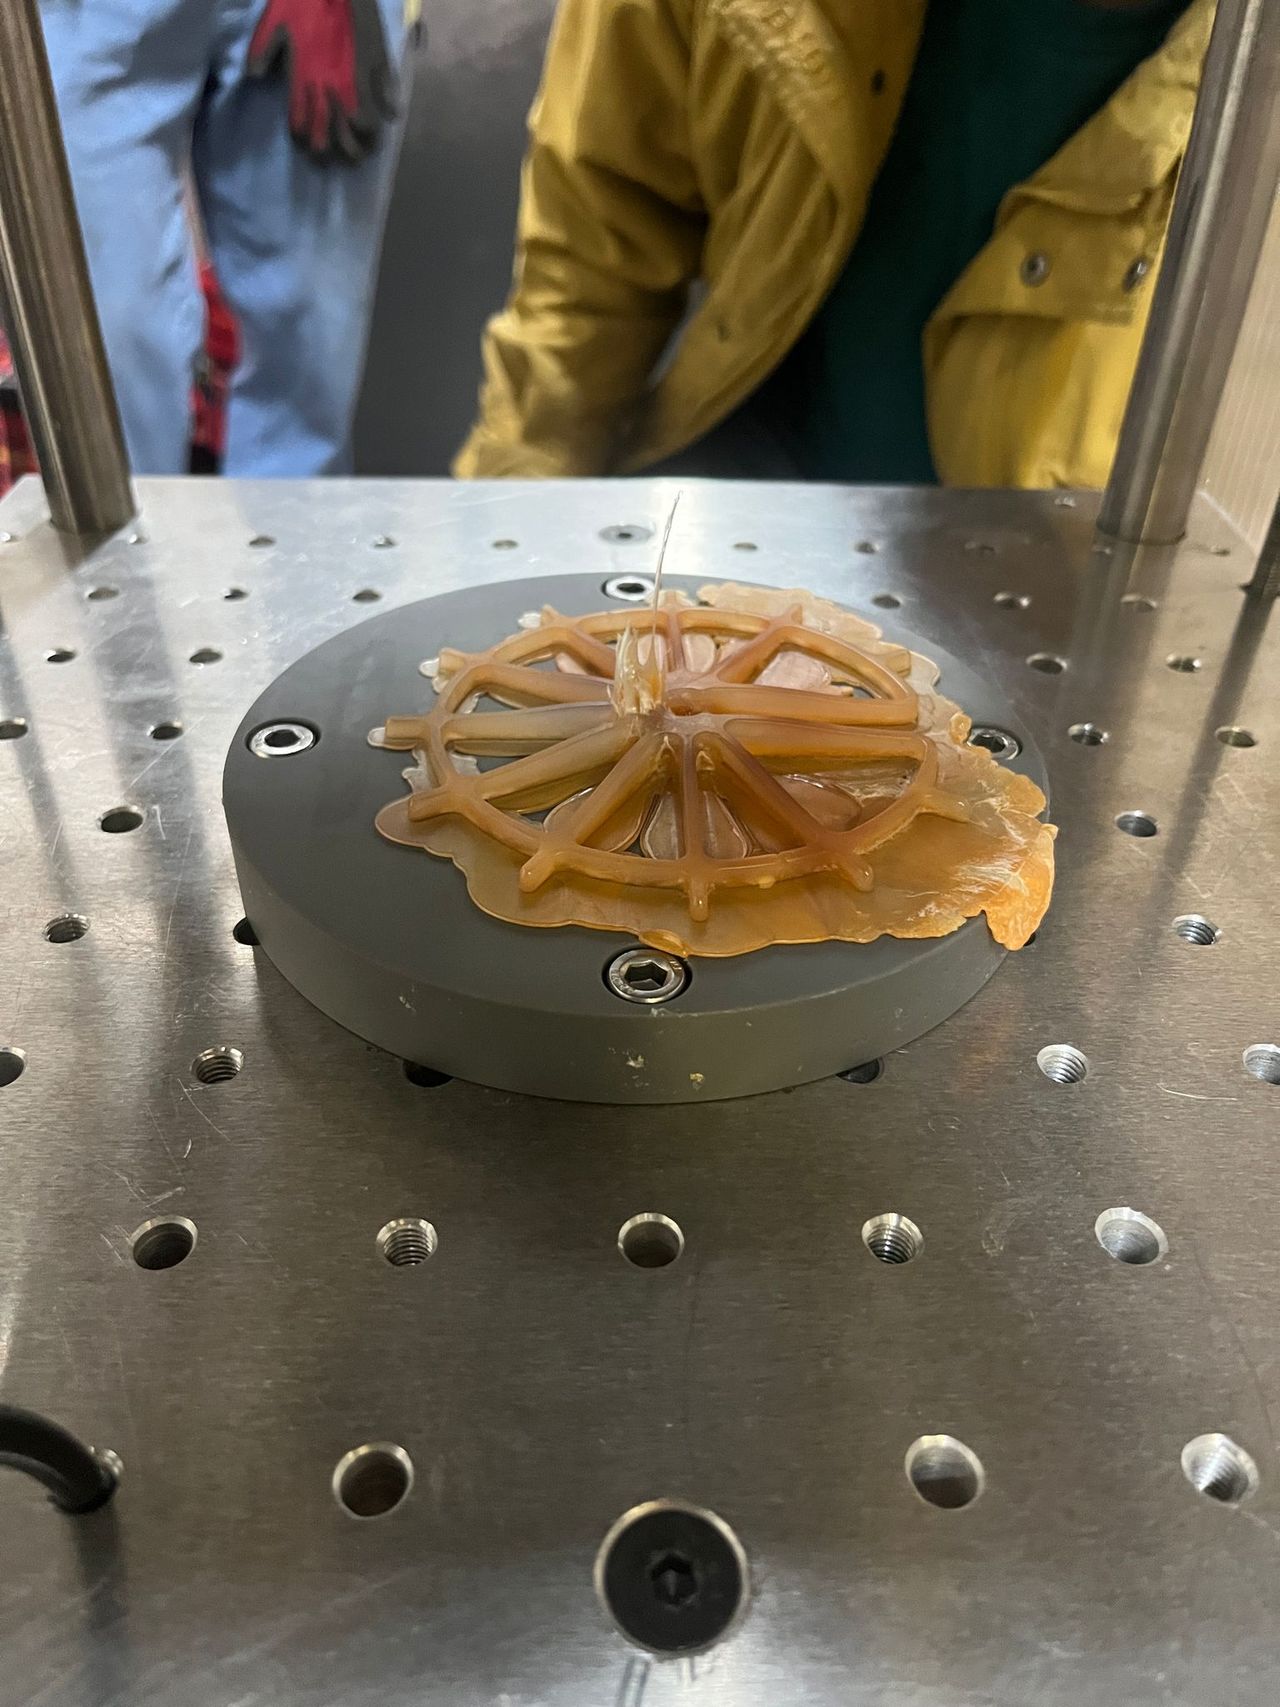
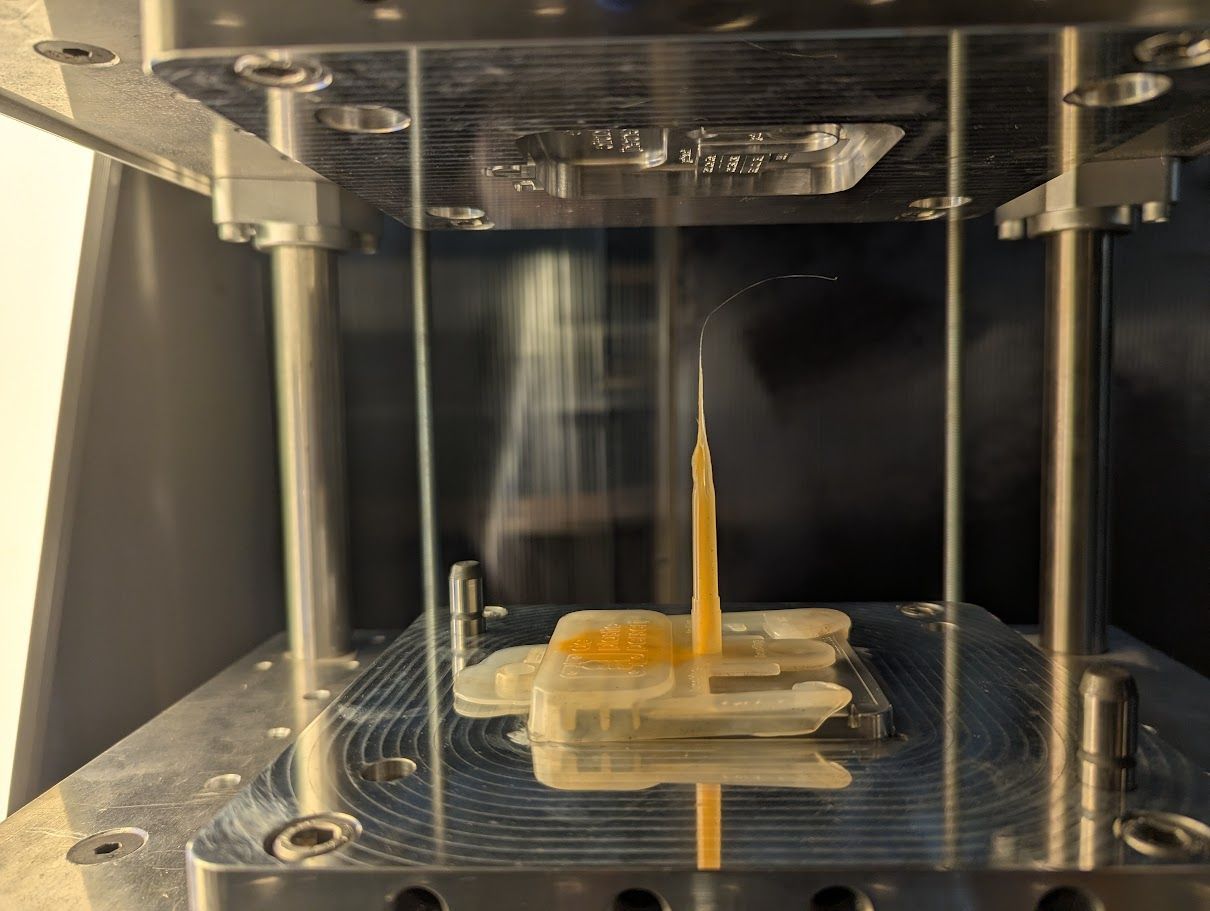
First, I did some test shots using a resin-printed mold. This was a new process for me, and I ran into a few quirks—mainly that resin has much lower thermal conductivity than aluminum. Because of that, the plastic didn’t fully solidify before I opened the mold. Still, the results were super promising! The injection machine generated enough pressure to fill the mold with ease every time, which is a really good sign. Also, all subsystems like the gate valve and the cooling loop worked reliably throughout the tests.
And more good news—the custom mold from EasyMolds arrived! The mold looks really nice and well-made. One thing I had to keep an eye on was the tolerance of the ejector pins, but everything seems to align and function properly now. I’m really curious to see how the first shots will turn out with this one. Can’t wait to give it a go 🙂
15
Prepping the automatic mold
Published 1yPublished about 1 year ago
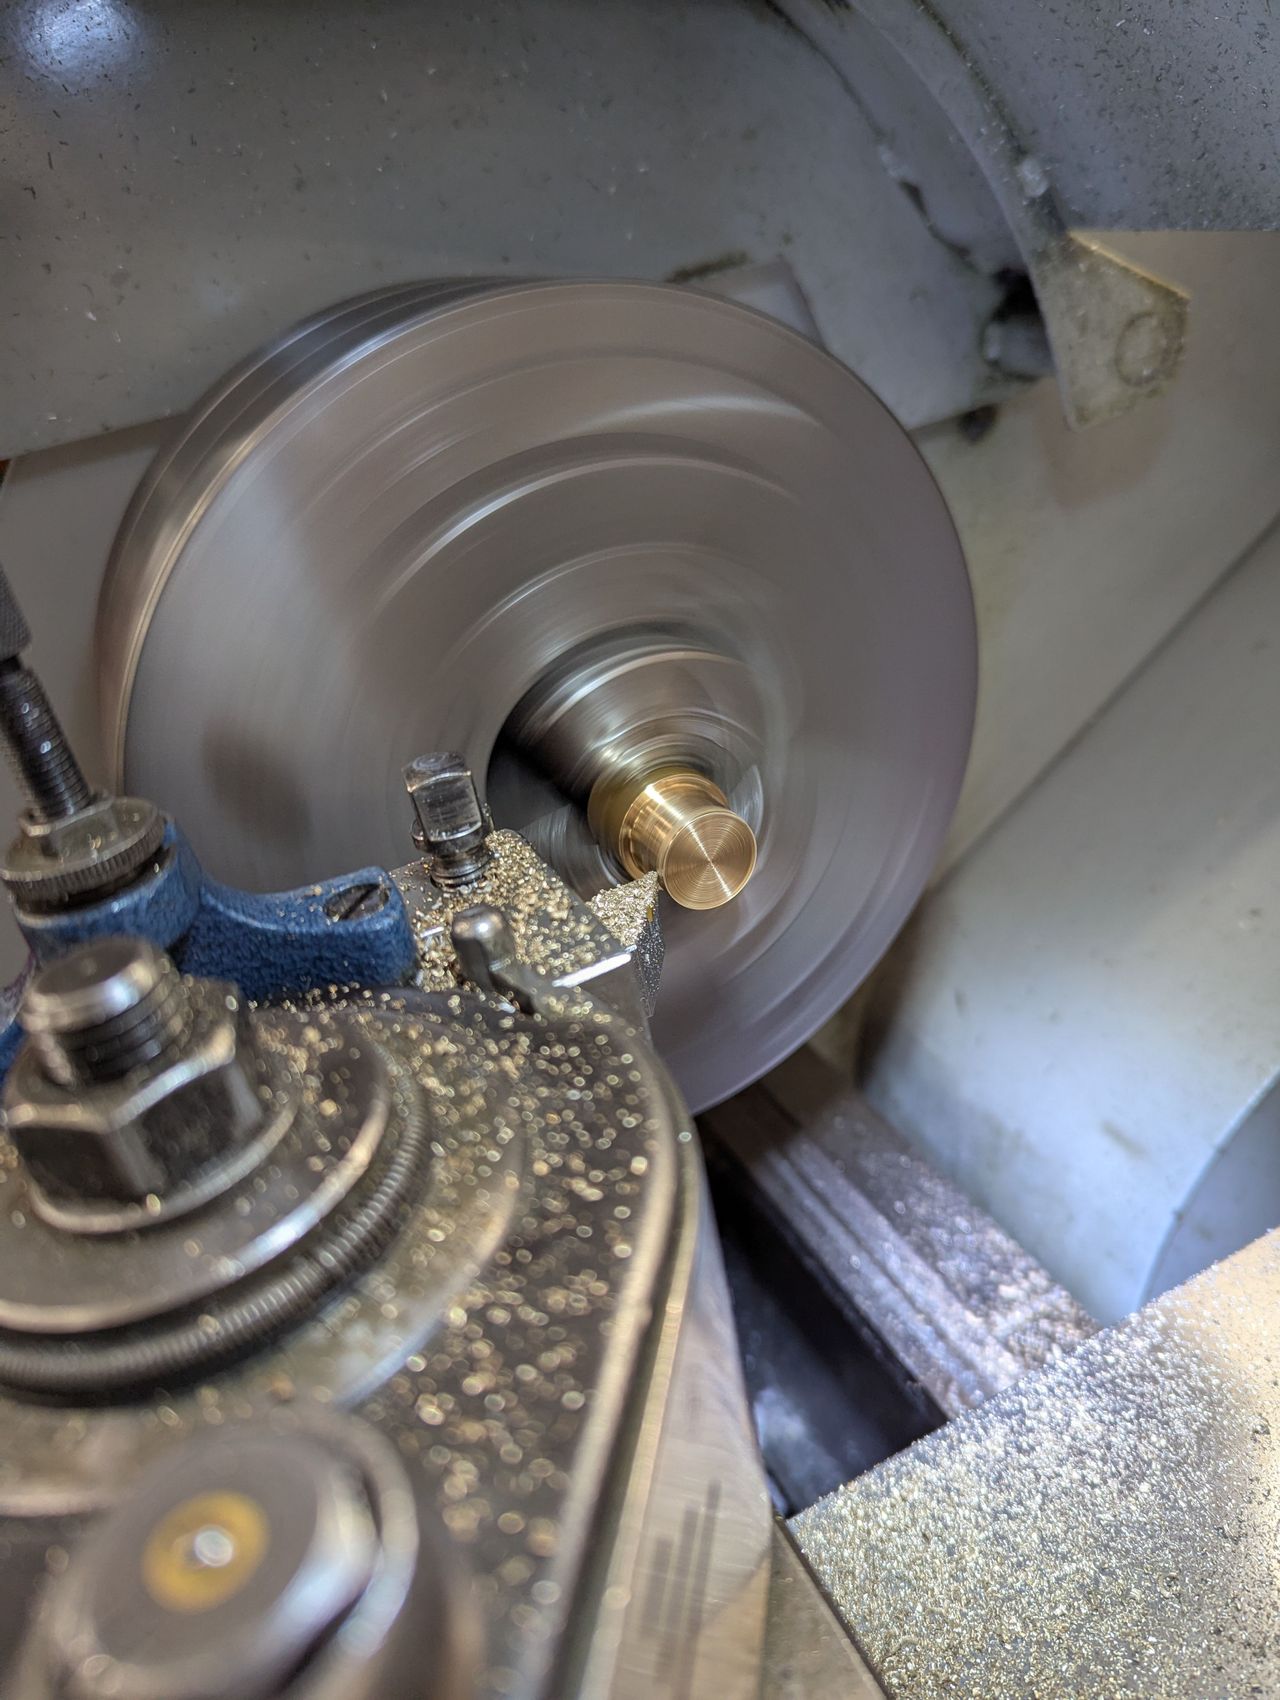
This month I spent most time preparing the mold. The fit on the ejection pin holes was just a bit to tight, so I reamed these to the correct size. I also turned the ejection pins to the correct length on a lathe, which was a LOT of turning, measuring, turning, measuring and so on and so forth. I also encountered a small hickup with the nozzle connector size, which I probably didn't face properly.
I had hoped to have the first test shot done by now, but this gives you something to look out for :)
All the best,
Joost
16
Testing the automatic injection mold
Published 11moPublished 12 months ago
Hey everyone!
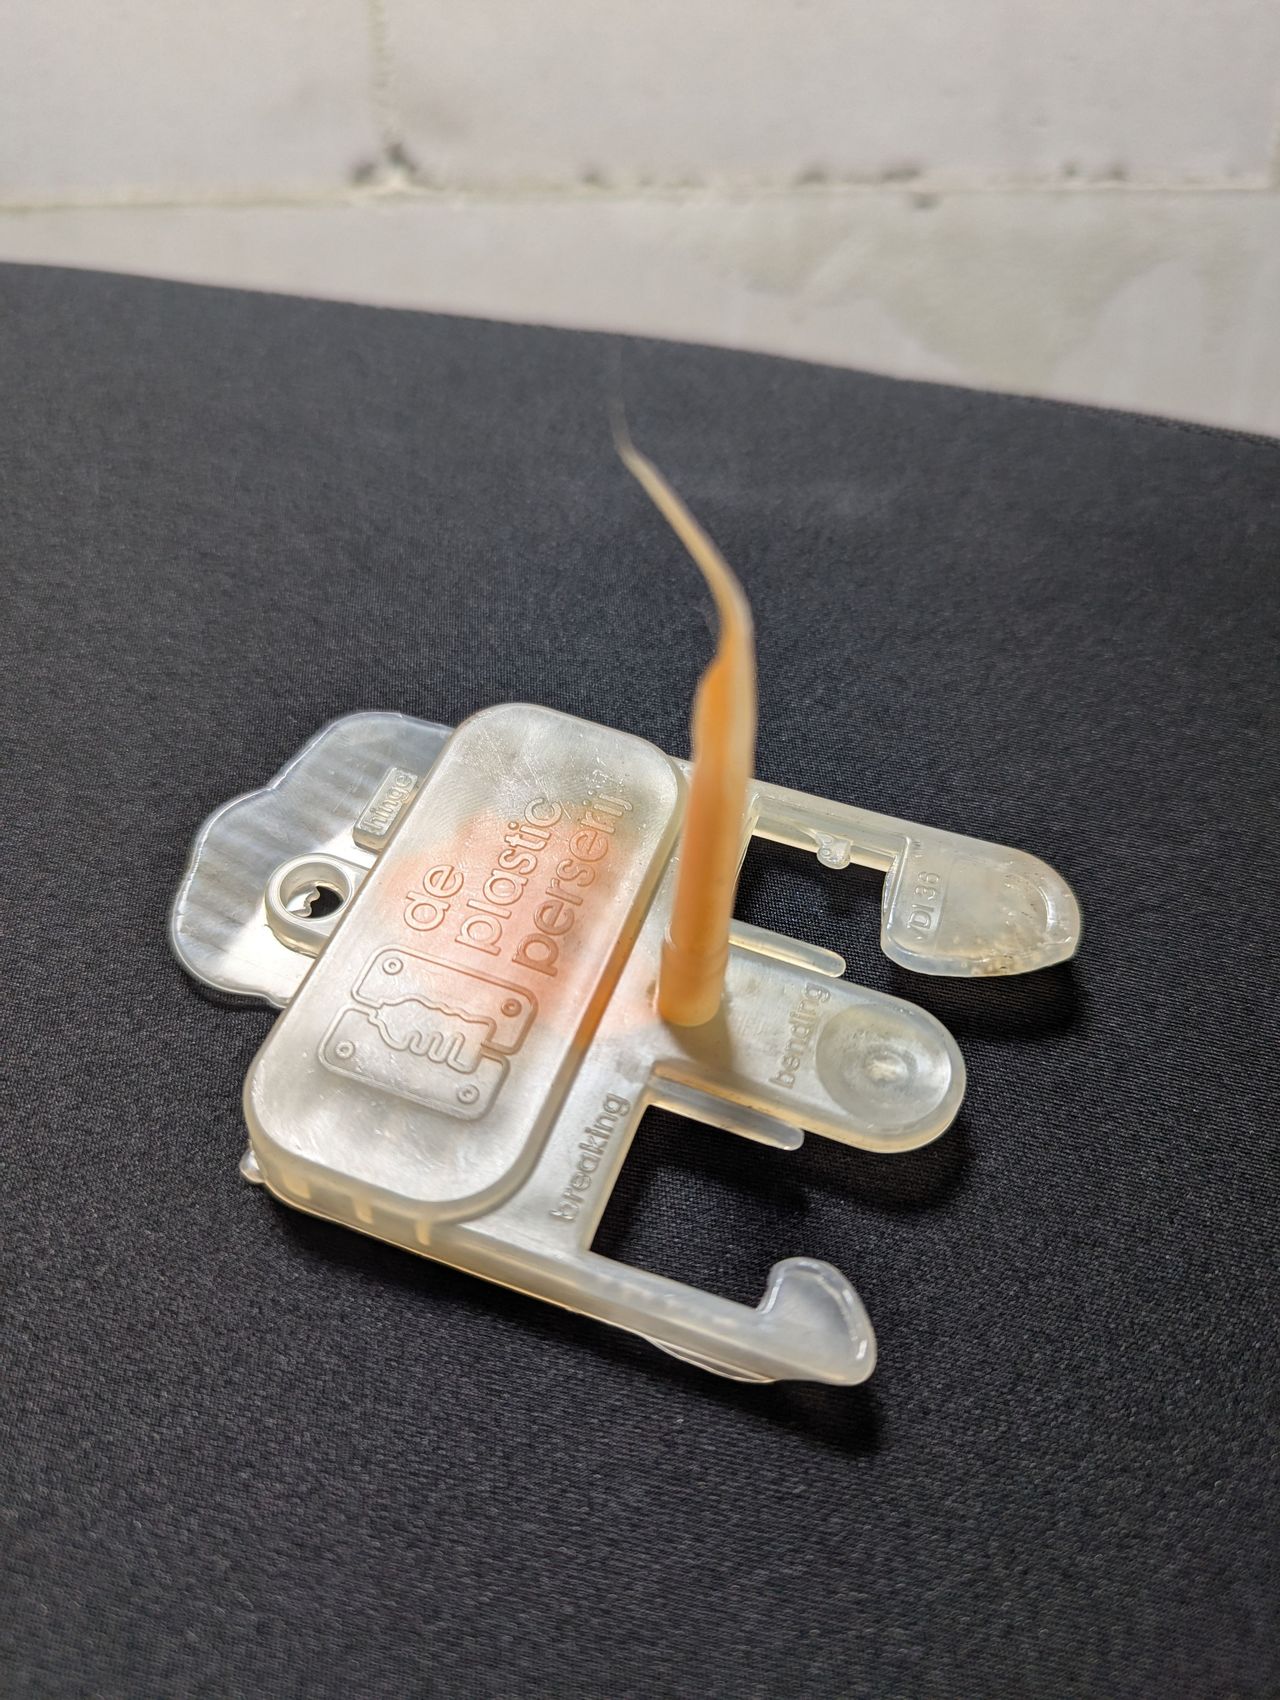
A bit late, but I have quite a cool update: I did the first tests with the ejection pin mold! Even though the mold is not fully filled, I'm very happy with the first results (videos below!). Some things to discuss:
- I learned that ejection pins are quite hard to machine! The material is very hard, so cutting them to length on a regular lathe is not doable. I ended up doing rough cuts with an angle grinder and then trimming them to their precise length with a grinding wheel. If anyone has a good suggestion on DIYing this, let me know!
- The mold was not completely filled because I only dared testing with low injection- and clamping force up until now. This test was done with an estimated injection pressure of around 4MPa at a melt temperature of around 210 degrees (PP). Increasing both these parameters will likely fill the mold.
- I don't have a video of the ejection pins pushing the part off the mold core, but went relatively easily. The ejection marks are quite visible on the bottom side of the part, but this not too much of a distraction.
- For now, this test mainly shows that a lot of key things of the automatic injection machine work: Part ejection, sprue release, mold opening and closing all seem to work fine. The next step is to do a bit more testing on finding the optimal temperature and clamping force settings and then put all these steps after each other to finally achieve fully automatic injection molding :)
Trimmed ejection pins:
https://youtube.com/shorts/Mx8QCX9BZGY
Mold closing:
https://youtu.be/uV8n0uvWMgc
Mold opening with first shot:
https://youtu.be/tWNySSFBqWk
17
Testing and Learning
Published 11mo. Edited 11moPublished 11 months ago. Last edit 11 months ago
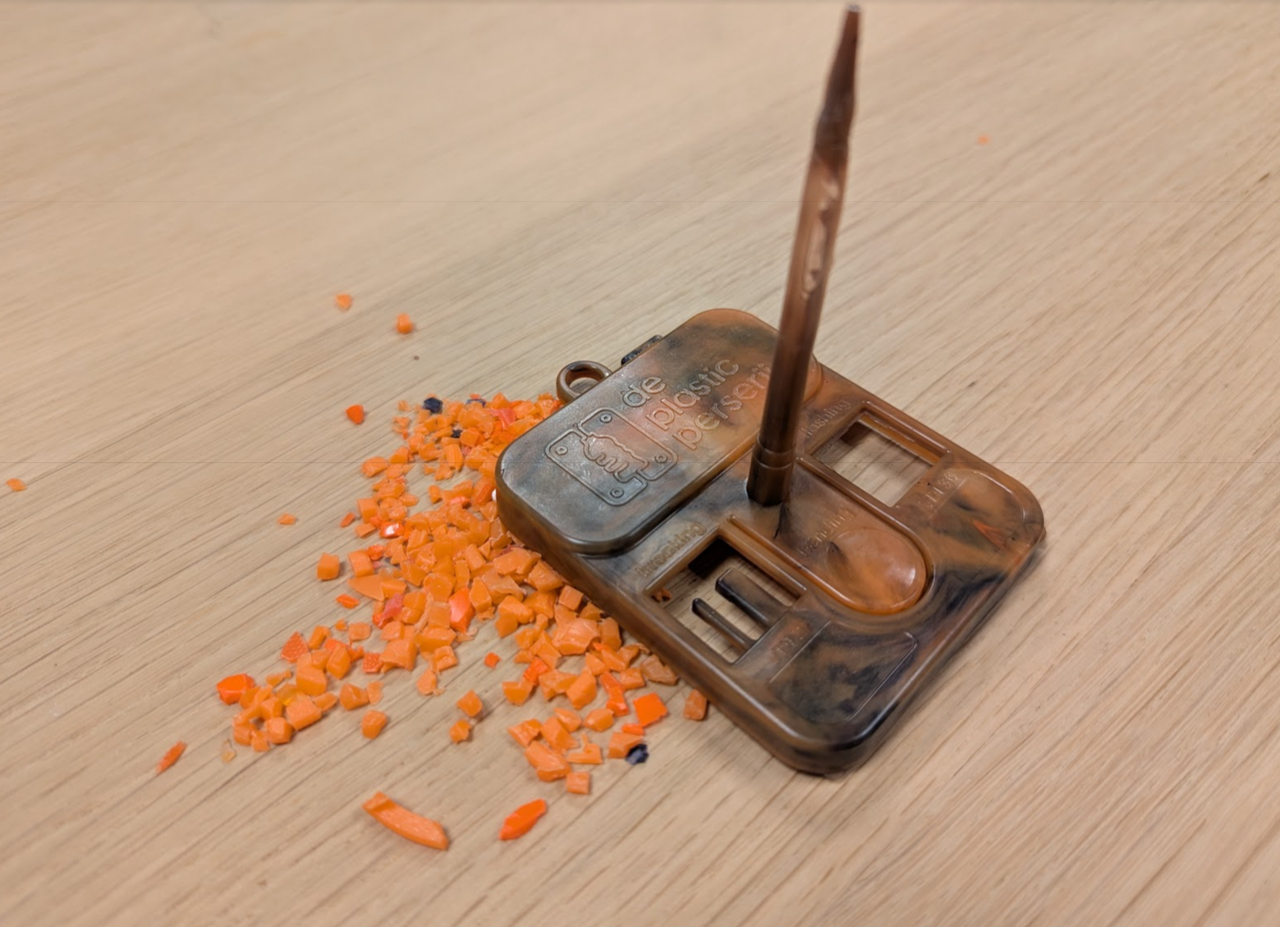
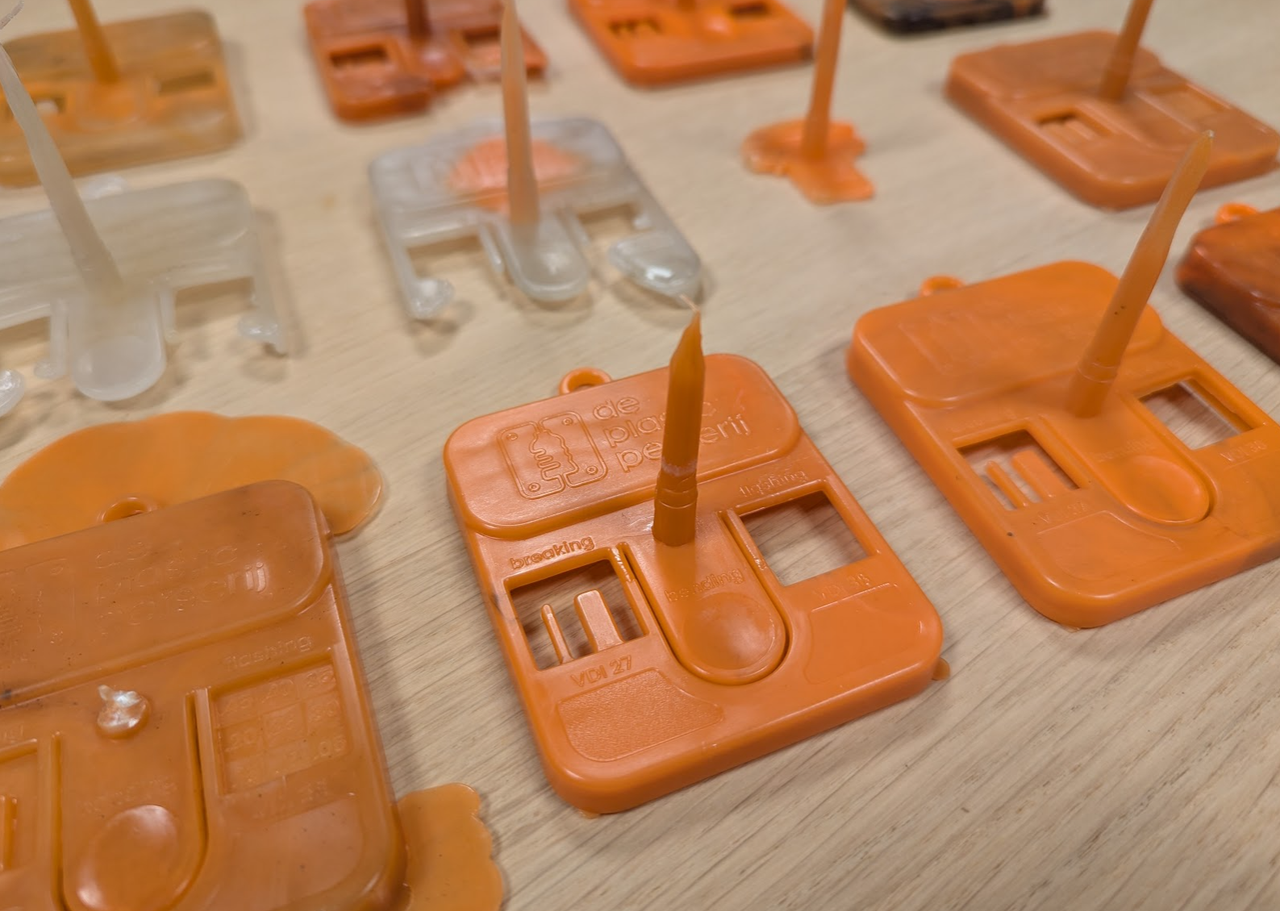
A lot of progress this month! I got the testmold fully setup and did around 20 testshots (check out the pictures!). I'm ver happy with the results :). Some things that I learned:
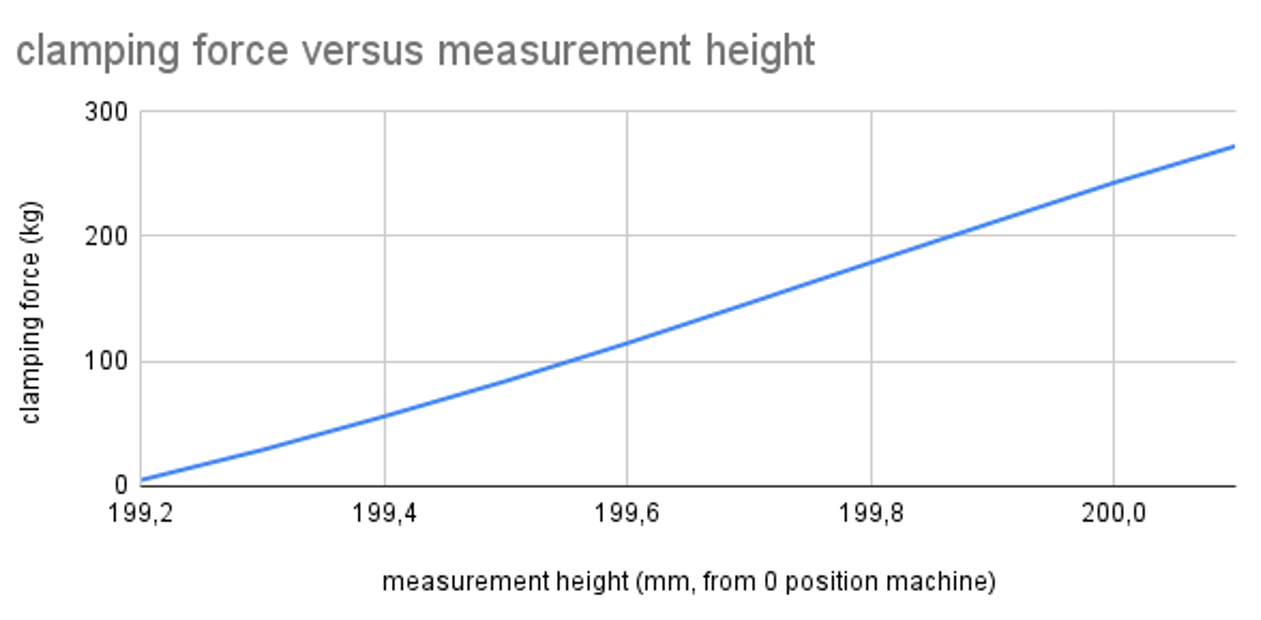
- With a load cell, I checked the ratio between stepper motor steps and clamping pressure. To clamp the mold, I'm directing the stepper motor to set an additional amount of steps when the mold is closed to properly clamp it, but up until now I had no idea how much force this was applying to the mold. The graph shows that this behaviour is quite linear, which makes it quite predictable. At the motor limits, I was able to generate about 20kN of clamping force, which is quite good.
- I did a bunch of testing to find the optimum machine settings for this mold. For this mold with Polypropylene, it turns out the following gives the best results:
- Injection Pressure: 5MPa
- Temperature: 245 degrees (according to PID, probably ~30 deg lower in real life)
- Clamping force: 10kN
- Packing time: 10 seconds (time between nozzlegate opening and closing)
- Cooling time: 0 seconds (time between nozzlegate closing and mold opening)
This resulted in a well filled part, with as little sinkmarks or deformation as possible. I havent tested cooling yet and still need to check the actual injection temperature of the plastic.
- I installed the system for automatically ejecting the part (https://www.youtube.com/shorts/wqnY9FlCQz8). Small issue with this is that the part always 'jumps' off the core, which not easy to overcome. This is an issue, because when the part randomly ends up anywhere in the mol area its hard to eject in a controlled way. This spoils my envisioned ejection method (ejection with air pressure), so I need to think of something different.
Now that the basic testing of this mold is done, this project is nearing the finishline. In the coming weeks, I'm planning to do the following:
- Redesign the part ejection system. I have some ideas on how to do this, but let me know in the comments if you have a good idea!
- Once the part ejection works, I can test multiple shots after another. I know all individual tasks (injection, plastic feeding, detection) work, but I'm curious what happens after some time.
- Start with documentation for Open Source sharing.
18
Part Ejection
Published 10moPublished 10 months ago
Last month, the main remaining issue with the machine was removing the finished part from the mold area. This is now fixed!
https://youtube.com/shorts/-vHaG3mN1E0?si=iDiVerirP_l-caNb
With 2 servos and a 3D printed gripper, I can successfully remove every part. Because the gripper attaches to the sprue on the part, I have a solid anchor point which I know every injected part will have.
With the new system, I did a test run of 15 shots. This worked flawelessly and took about 1:40h, which nears 6 minutes per shot.
So.. what next? Actually, this project is now really nearing completion. I still have a bit of testing to do with the system that adds plastic flakes: this is the only part of the machine that doesn't function yet, but only because I haven't programmed that into the machine yet. After that, it's time to document! I'm going on a holiday this coming month, so the documentation package will take a bit of time.
Will keep you posted!
19
Holiday & Documentation
Published 9moPublished 9 months ago
Hey guys, short update this week because I'm on holiday this month, so no major updates. I've started work on documentation for the How-To, this will be the final delivery of this project. Will show you soon :)
Best,
Joost
20
Is this the end?
Published 8moPublished 8 months ago
Hi everyone!
Just now, I posted the How-To of this build that concludes this project:
https://community.preciousplastic.com/library/fully-automatic-injection-machine-10
Here, you can find all files and documentation that you need to replicate the project.
With this, the official research on this machine is completed. I'm very proud on the prototype I made and to have proven that automatic injection moulding is possible. I cannot thank Precious Plastic and you all for all your contributions to this project, both in feedback as financially.
As I'm writing in the How-To, the machine was mainly designed to test the concept of automatic injection molding. For this reason, some elements in the design are still quite.. prototypey ;). For this reason, I really want to look into building a second version. There is a huge leap to make in the design now that the existing prototype has proven a number of working principles. I'm currently looking for a budget to make this version 2 happen, about which I'll keep posting here. So stay tuned!
For now, ciao and many, many thanks :)
All the best, Joost
%20--%3e%3csvg%20version='1.1'%20id='Layer_1'%20xmlns='http://www.w3.org/2000/svg'%20xmlns:xlink='http://www.w3.org/1999/xlink'%20x='0px'%20y='0px'%20viewBox='0%200%2064%2063'%20style='enable-background:new%200%200%2064%2063;'%20xml:space='preserve'%3e%3cstyle%20type='text/css'%3e%20.st0{fill:%2320B7EB;}%20.st1{fill:%23E9475A;}%20.st2{fill:%23FECE4E;}%20%3c/style%3e%3cdesc%3eCreated%20with%20Sketch.%3c/desc%3e%3cg%20id='Page-1'%3e%3cg%20id='OA-Logo-Black-Background'%3e%3cpath%20id='Shape'%20class='st0'%20d='M14.1,30.1c-1.5-0.8-8.6-3.8-14.1-7.8c1.8-3.4,3.1-5.6,5-9.1c2.7,1.1,1.9,0.5,4.6,1.7%20c0.8,0.4,10.1,4.5,13.8,6.2c2.4,1.1,4.7,2.2,7,3.3L43,30.5l8.1,3.9c4,2,7.2,3.5,11.3,5.5c0.5,0.3-3.7,9.4-3.7,9.4%20c-1.7-0.6-3.9-1.8-5.5-2.5c-4.7-2.1-9-3.9-13.7-6c-4-1.8-6.7-2.9-10.8-4.5C25,34.9,17.1,31.6,14.1,30.1z'/%3e%3cpath%20id='Shape_1_'%20class='st1'%20d='M12.1,54.9c-0.8,0.6-1.6,1.2-2.5,1.6c-0.4-0.5-0.9-1-1.3-1.5c-0.3-1.2-2.3-4.9-2.7-6.2%20c-0.1-0.4-0.7-2.2-0.8-2.6c0,0,5-3.4,8.2-5.9c3.2-2.6,6.2-5,9.3-7.5c1.4-1.1,3.9-2.5,5.3-3.5c2.5-1.7,13-9.1,15.6-10.5%20c5.4-3.3,11.1-6.3,16.8-9c1.7,3.5,1.8,3,3.8,6.9c0,0-17.8,13.5-22.7,17.1c-3.8,2.8-7.5,5.7-11.3,8.5c-1.7,1.3-3.5,2.4-5.2,3.7'/%3e%3cpath%20id='Shape_2_'%20class='st2'%20d='M20.8,2.9l-0.2-0.8C25,0,31.2-0.3,31.4,0.2c0.4,1.1,0.9,2.2,1.2,3.4c1.4,4.4,2.7,8.7,4,13.1%20c0.4,1.4,2.8,10,2.9,10.5c0.5,2.8,1.2,5.6,1.6,8.4c0.8,4.7,1.4,8.6,2.3,13.3c0.6,3.1,1.3,6.3,2.3,11.3c0,0-5.8,1.4-7.5,1.8%20c-0.8,0.2-1.5,0.4-2.4,0.6c-0.3-1.1-0.2-1.2-0.5-2.1c-0.9-3.7-1.8-7.3-2.6-11c-1.5-6.4-3-12.9-4.4-19.3%20c-1.2-5.4-2.6-10.7-4.4-15.9c-1-3.1-1.8-6.3-2.7-9.5C21.1,3.8,21,3.8,20.8,2.9z'/%3e%3c/g%3e%3c/g%3e%3c/svg%3e)