
Toddler Sink
A filtering and water circulating sink for toddlers that they can start using from 12 months and up. Save water without limiting your child's play with water. Here's a list of materials needed to construct this sink: **Materials** Ikea Nissafors - A similar tray would do. But we chose this one for the ease of adjusting height, and tray combinations with simple tools. 2 water buckets (suggested around 5 liters each) 3 / 3.5mm /4mm x 15mm screw with nuts Plastic tray from Ikea DC pump (5V) 1m of hose adequate for the pump ** For the Switch Box ** Button for Switch Tupperbox to fit the switch Cables USB-C adapter ** For the Faucet ** Water toy that can be converted to a faucet (Alternatively you can 3d print your faucet using the files we provide) **Tools** Drill and tips for metal and plastic (5.5mm, 3.5mm) Solder iron Hot gluewashing

More Information

%20--%3e%3csvg%20version='1.1'%20id='Layer_1'%20xmlns='http://www.w3.org/2000/svg'%20xmlns:xlink='http://www.w3.org/1999/xlink'%20x='0px'%20y='0px'%20viewBox='0%200%2064%2063'%20style='enable-background:new%200%200%2064%2063;'%20xml:space='preserve'%3e%3cstyle%20type='text/css'%3e%20.st0{fill:%23231F20;}%20%3c/style%3e%3cdesc%3eCreated%20with%20Sketch.%3c/desc%3e%3cg%20id='Page-1'%3e%3cg%20id='OA-Logo-Black-Background'%3e%3cpath%20id='Shape'%20class='st0'%20d='M14.1,30.1c-1.5-0.8-8.6-3.8-14.1-7.8c1.8-3.4,3.1-5.6,5-9.1c2.7,1.1,1.9,0.5,4.6,1.7%20c0.8,0.4,10.1,4.5,13.8,6.2c2.4,1.1,4.7,2.2,7,3.3L43,30.5l8.1,3.9c4,2,7.2,3.5,11.3,5.5c0.5,0.3-3.7,9.4-3.7,9.4%20c-1.7-0.6-3.9-1.8-5.5-2.5c-4.7-2.1-9-3.9-13.7-6c-4-1.8-6.7-2.9-10.8-4.5C25,34.9,17.1,31.6,14.1,30.1z'/%3e%3cpath%20id='Shape_1_'%20class='st0'%20d='M12.1,54.9c-0.8,0.6-1.6,1.2-2.5,1.6c-0.4-0.5-0.9-1-1.3-1.5c-0.3-1.2-2.3-4.9-2.7-6.2%20c-0.1-0.4-0.7-2.2-0.8-2.6c0,0,5-3.4,8.2-5.9c3.2-2.6,6.2-5,9.3-7.5c1.4-1.1,3.9-2.5,5.3-3.5c2.5-1.7,13-9.1,15.6-10.5%20c5.4-3.3,11.1-6.3,16.8-9c1.7,3.5,1.8,3,3.8,6.9c0,0-17.8,13.5-22.7,17.1c-3.8,2.8-7.5,5.7-11.3,8.5c-1.7,1.3-3.5,2.4-5.2,3.7'/%3e%3cpath%20id='Shape_2_'%20class='st0'%20d='M20.8,2.9l-0.2-0.8C25,0,31.2-0.3,31.4,0.2c0.4,1.1,0.9,2.2,1.2,3.4c1.4,4.4,2.7,8.7,4,13.1%20c0.4,1.4,2.8,10,2.9,10.5c0.5,2.8,1.2,5.6,1.6,8.4c0.8,4.7,1.4,8.6,2.3,13.3c0.6,3.1,1.3,6.3,2.3,11.3c0,0-5.8,1.4-7.5,1.8%20c-0.8,0.2-1.5,0.4-2.4,0.6c-0.3-1.1-0.2-1.2-0.5-2.1c-0.9-3.7-1.8-7.3-2.6-11c-1.5-6.4-3-12.9-4.4-19.3%20c-1.2-5.4-2.6-10.7-4.4-15.9c-1-3.1-1.8-6.3-2.7-9.5C21.1,3.8,21,3.8,20.8,2.9z'/%3e%3c/g%3e%3c/g%3e%3c/svg%3e)


1
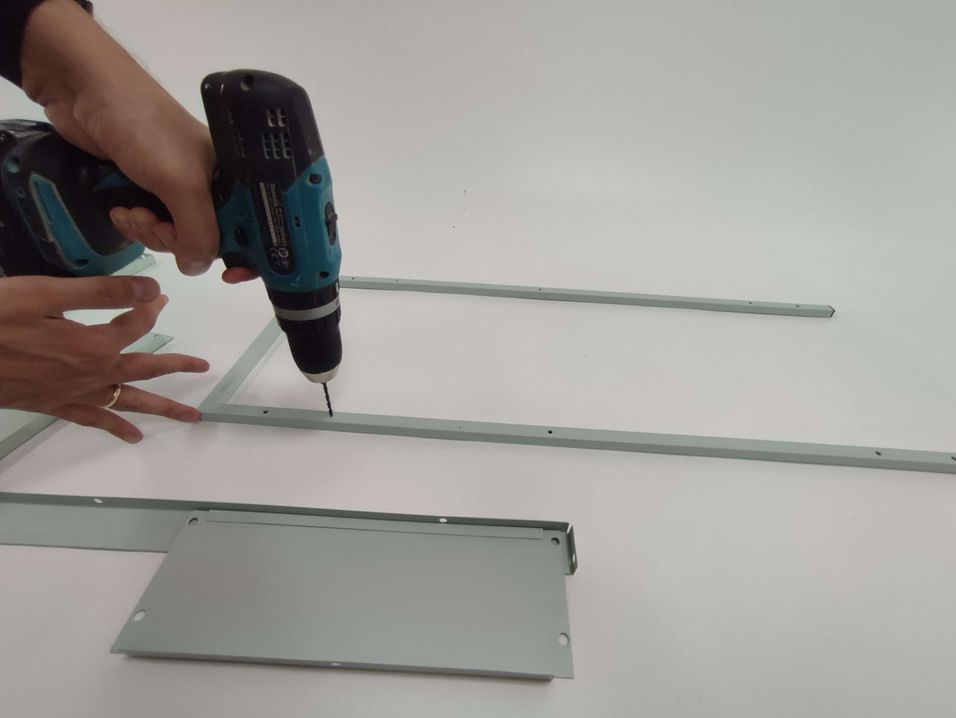
Construct the main structure
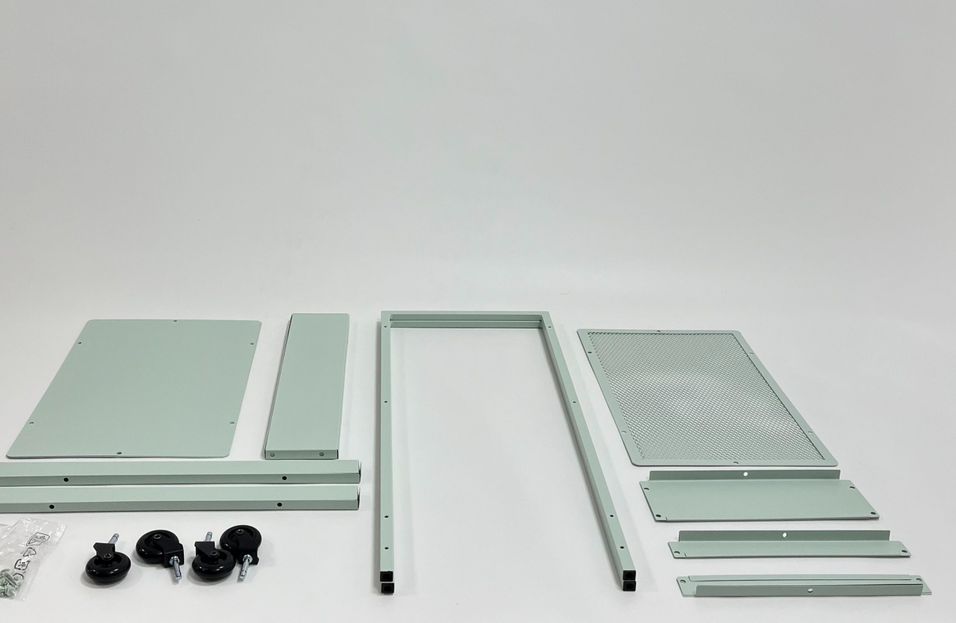
Start with opening the Ikea Nissafors box and unpack the contents.
Follow the steps in the included manual to construct the base structure. There are some changes you need to make in order to customise the piece into a sink:
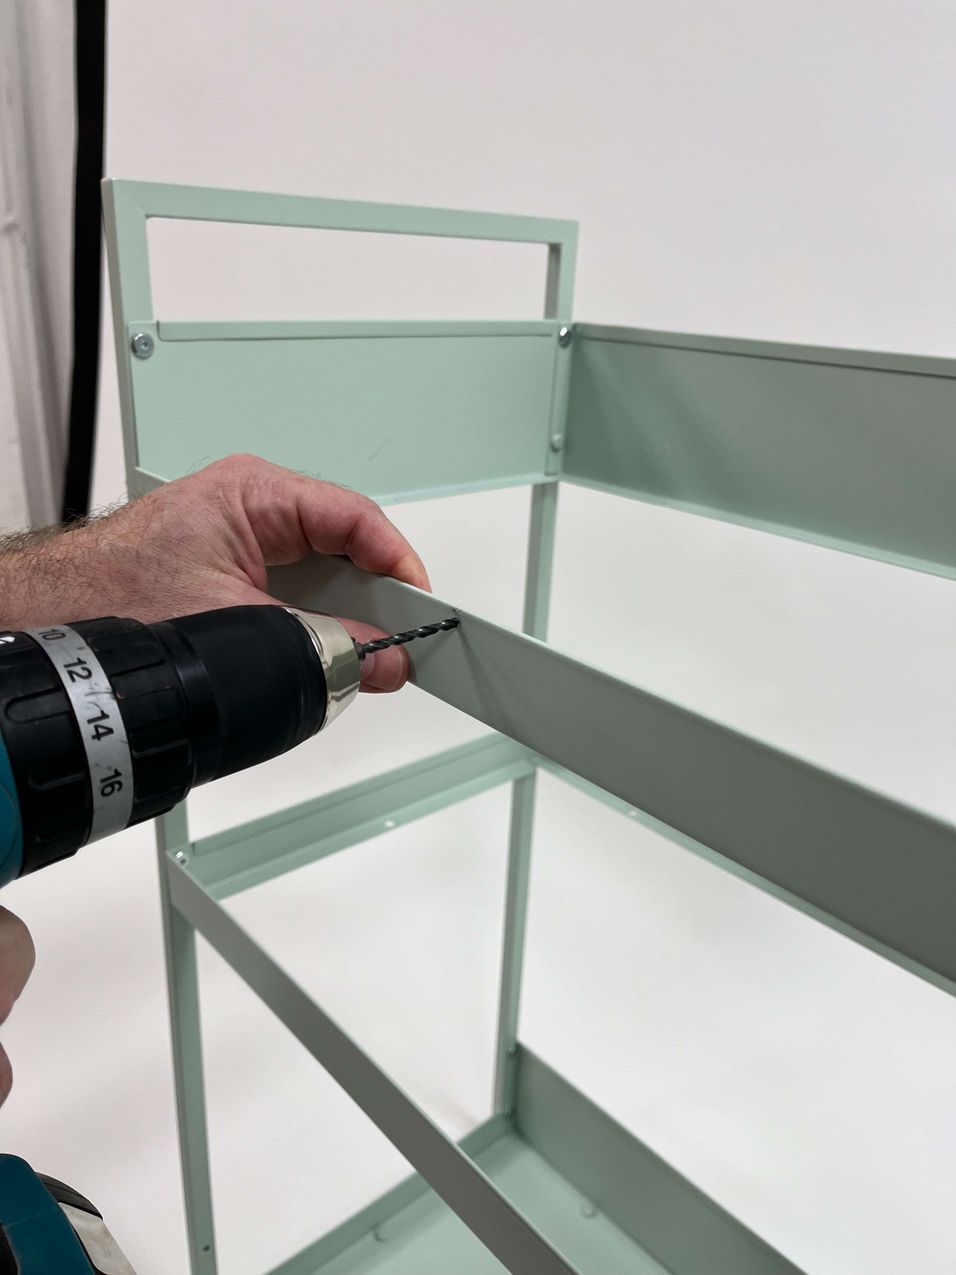
- Drill extra holes to match the top tray to the height of your kid.
- Only drill the metal structure on the inside - No need to drill it on both sides. Use 5.5mm drill bit. If not, use 5mm and grow the hole slightly.
- You can use the included plastic caps to fix the top tray into place. No additional screws are required.
- Use a lower wall for front of the top tray (steal from the bottom tray), so that it's easier for your child to reach out to the faucet.
- Use the excess higher wall at the back of the bottom tray. That'll help support the placed objects.
- Do not install the top tray yet. That's where we are going to place the pivoting washbasin.
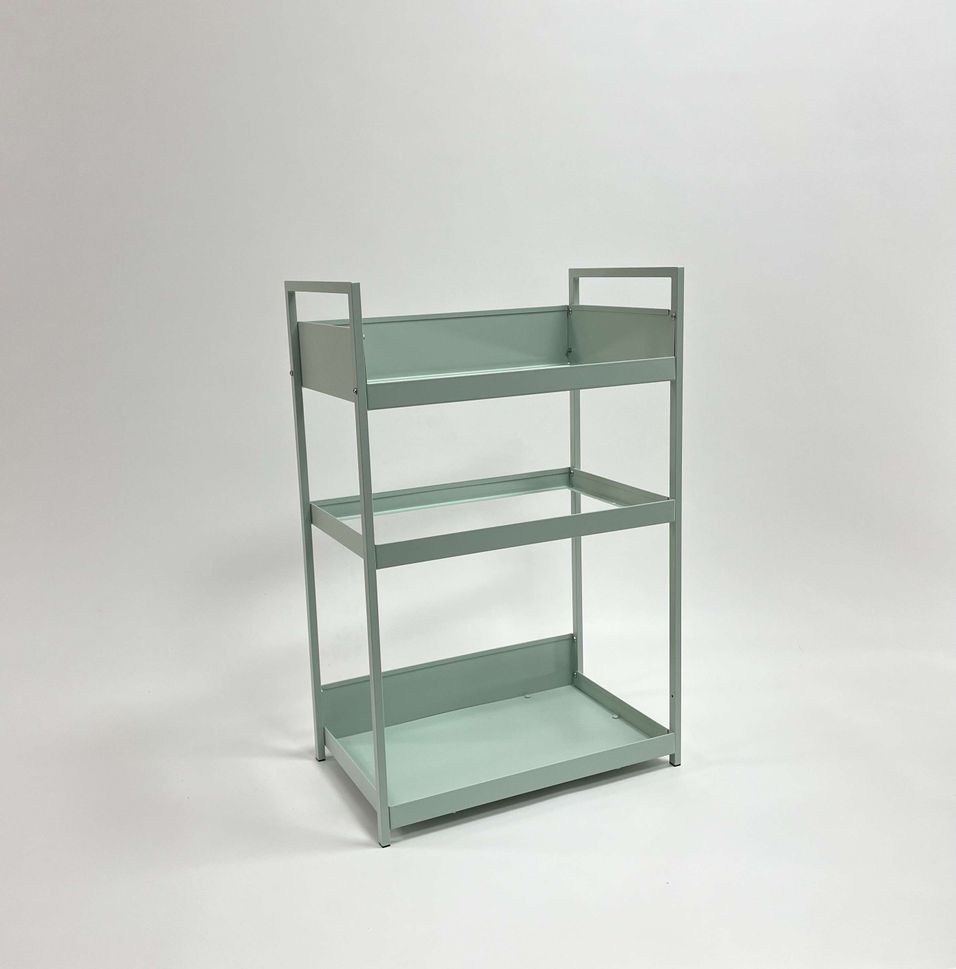
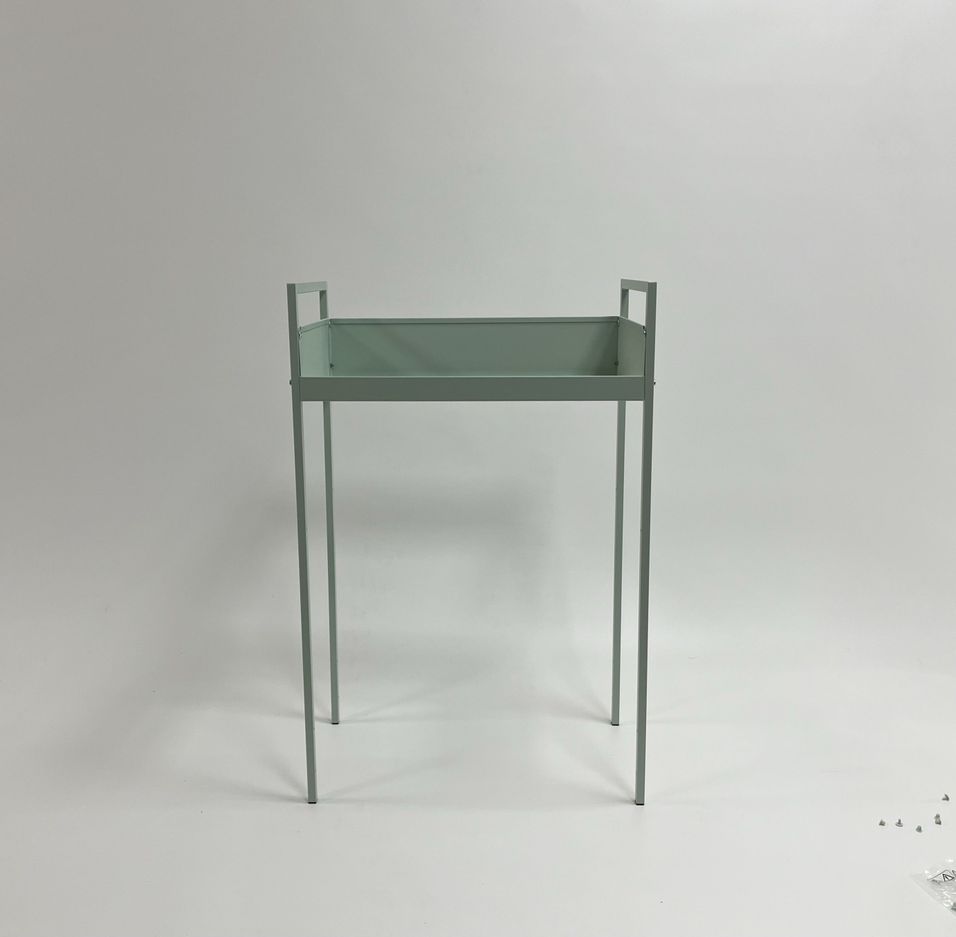
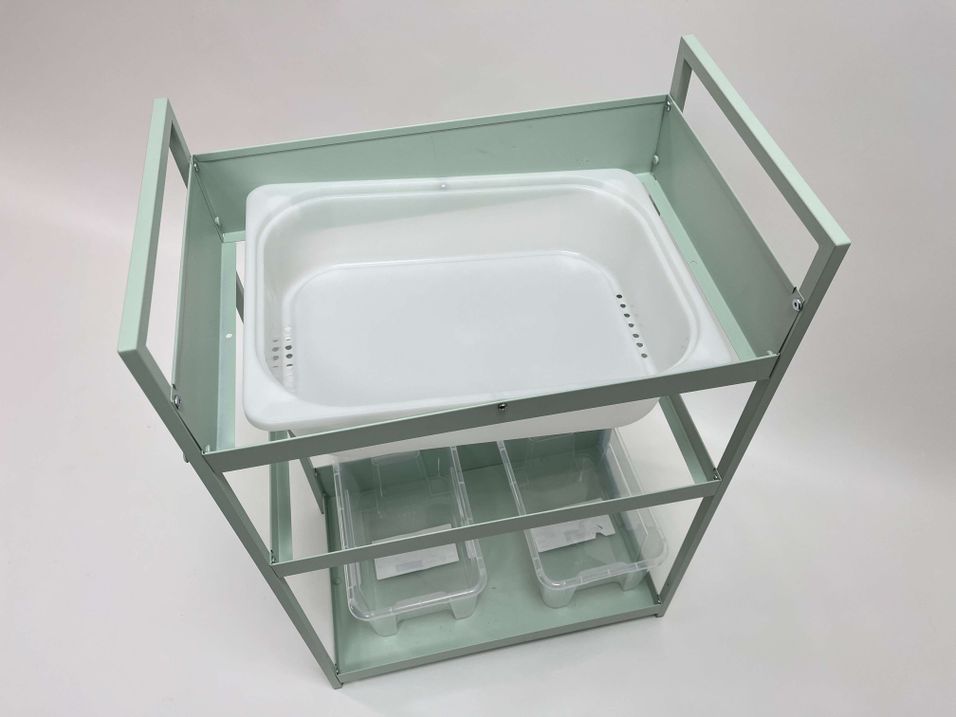
When you're done, if should look like what you see on the final image below.
-192ca9f4da3.jpg?width=956&resize=contain)
2
Make the washbasin
Now we'll convert the plastic tray into a rotatable washbasin.
Left side of the washbasin will be used to circulate clean water continuously. This side will be used when the child is just playing, and not contaminating the water.
The right side, however, will be used to dispose the dirty water, like regular sinks. In this case, the child might be using soap or really using the water for cleaning purposes. The water that exits from the right hand this side, will fill the dirty water bucket and will be disposed off when it's full.
To enable this, in the middle of the tray, we'll make a pivoting hole, so that the tray can be rotated to each side.
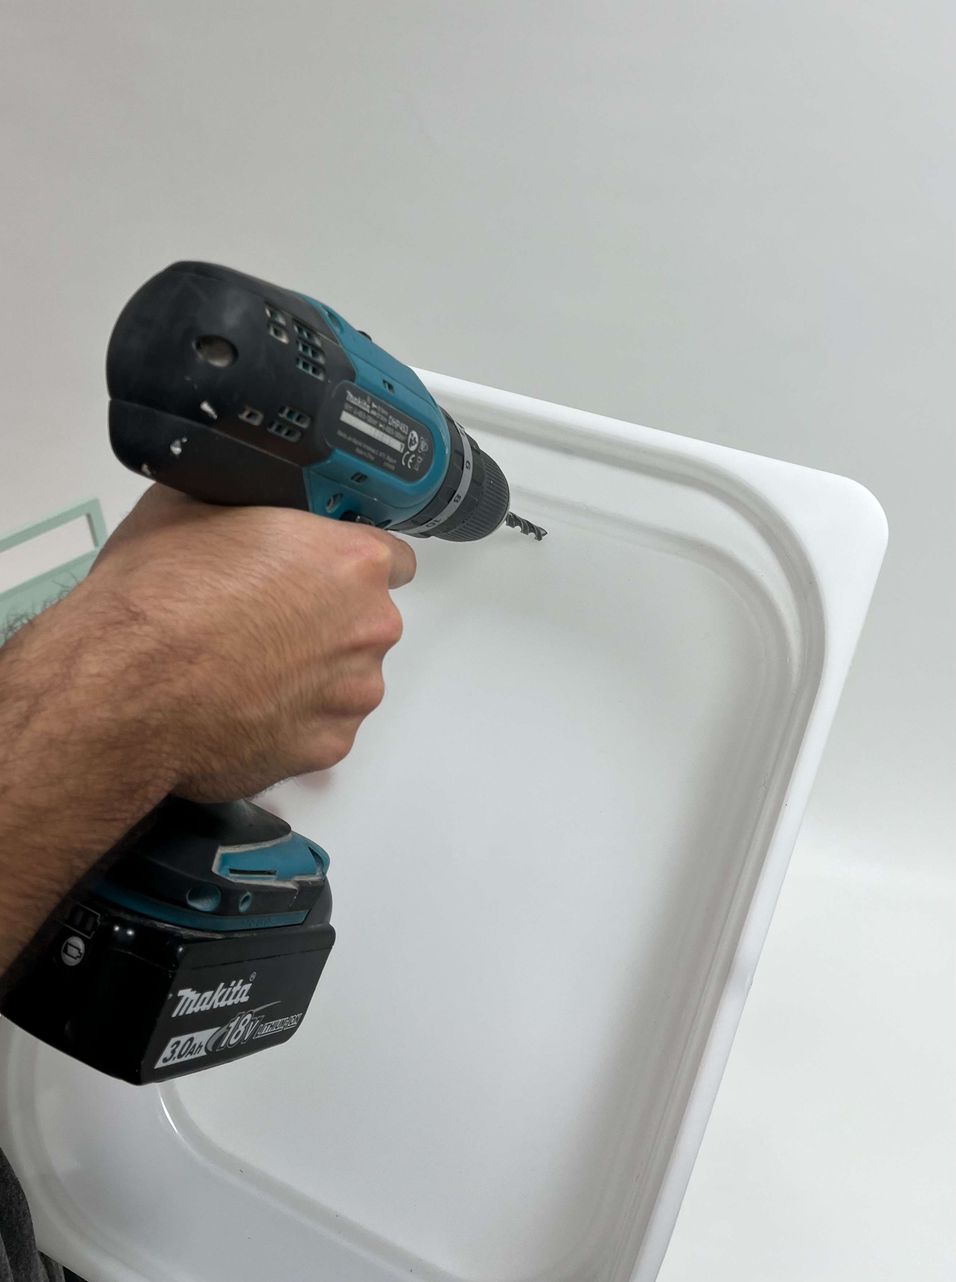
- First of all, drill 7 holes on each side of the plastic tray for water exits.
- Drill the holes on the deepest part of the tray which on its edge. If not, not all the water will be able to exit the washbasin.
- Once you do that, the tray will already look like a washbasin as in the 2nd image: It can sit on the top tray, but hasn't
3
Make the washbasin pivotable
Let's now make the washbasin pivotable for clean and dirty water modes.
- Measure and drill a hole in the middle of both sides of the top section the plastic tray. (we used 3.5mm drill and screws for these holes)
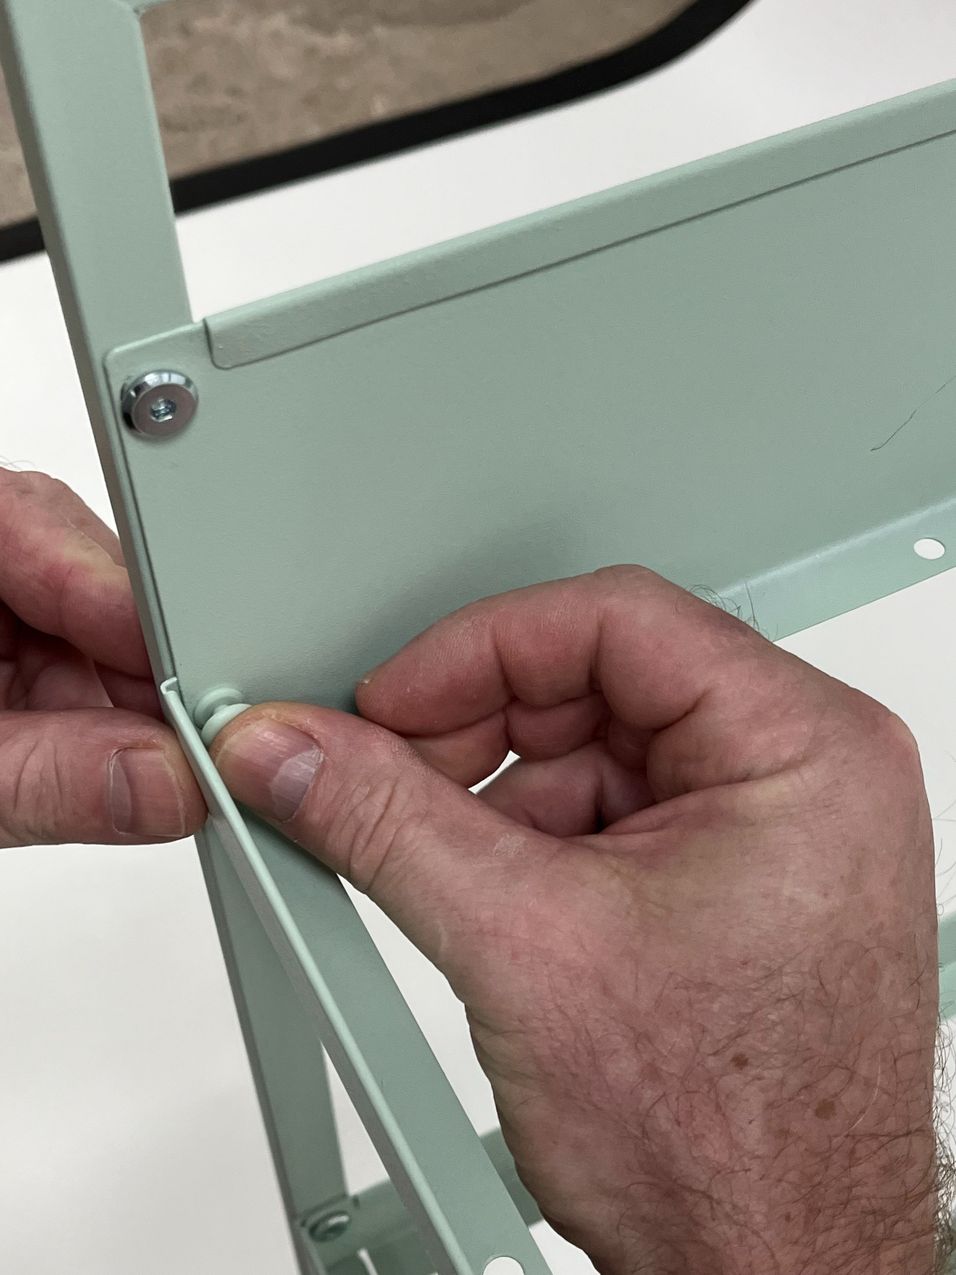
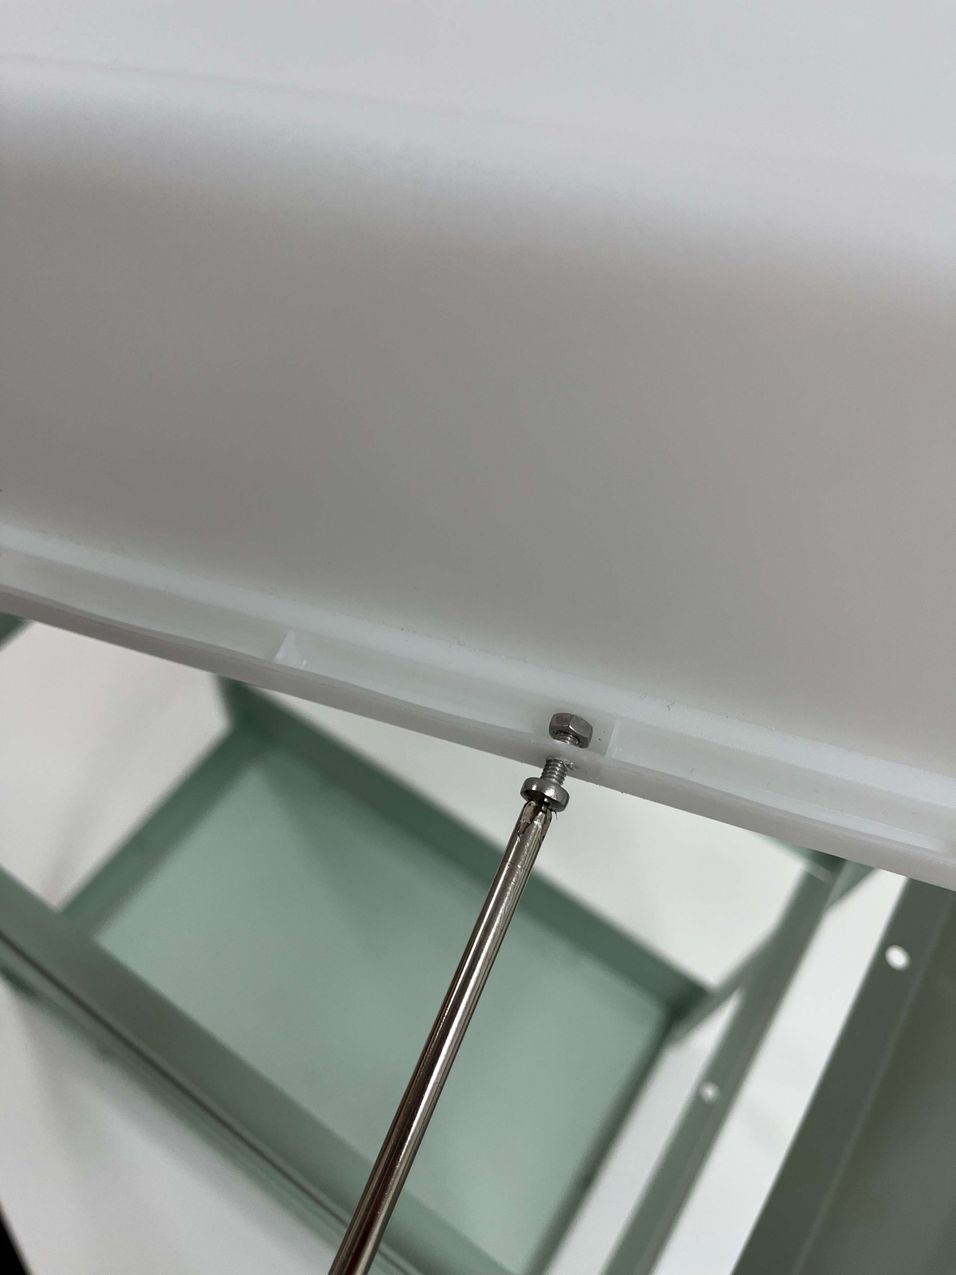
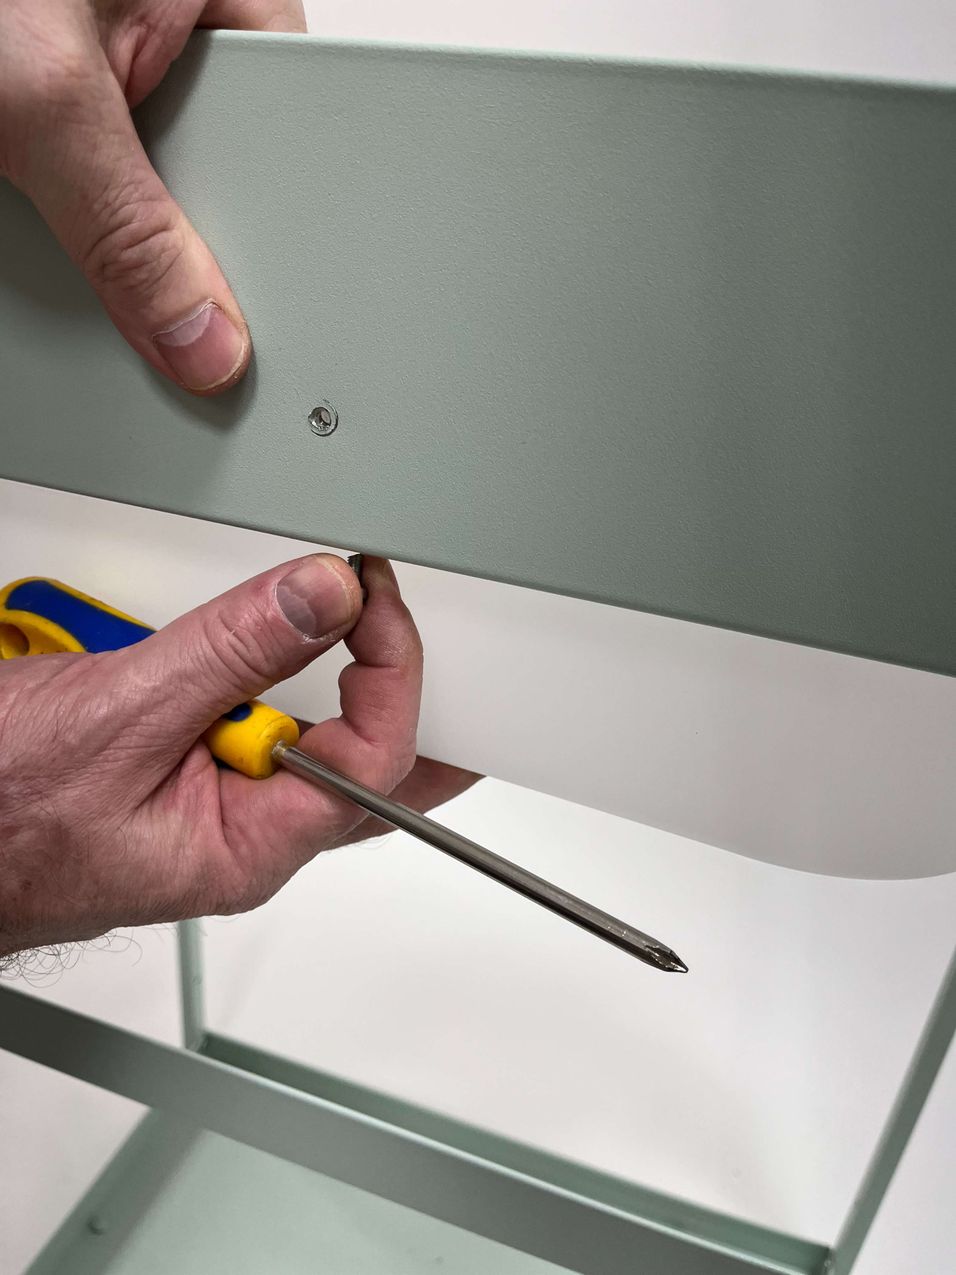
- Let's now prepare those holes to be screwed into the main metal structure. To make it easy, we'll make a small trick:
- We want to keep the back piece of the screw in place. To do that, screw both front and back pieces of the screw on the plastic tray (Do not position it on the metal structure yet.)
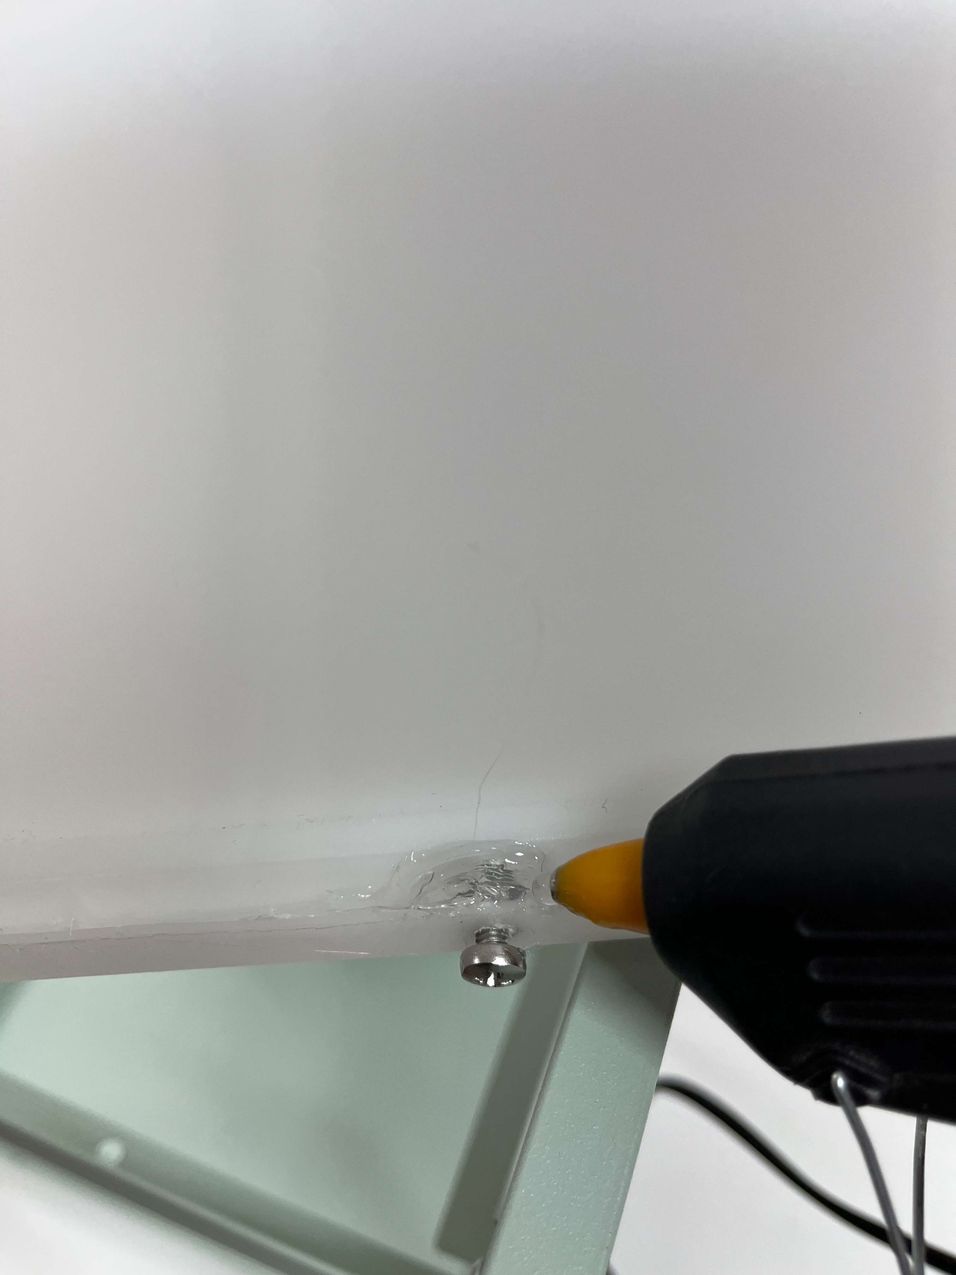
- Once it's in place, use some hot glue to fix the back piece in its current location.
- When glue is cold, remove the front piece of the screw, the back piece of the screw will remain in location, making it really easy to screw it on the metal structure.
4
Place the washbasin on the metal structure
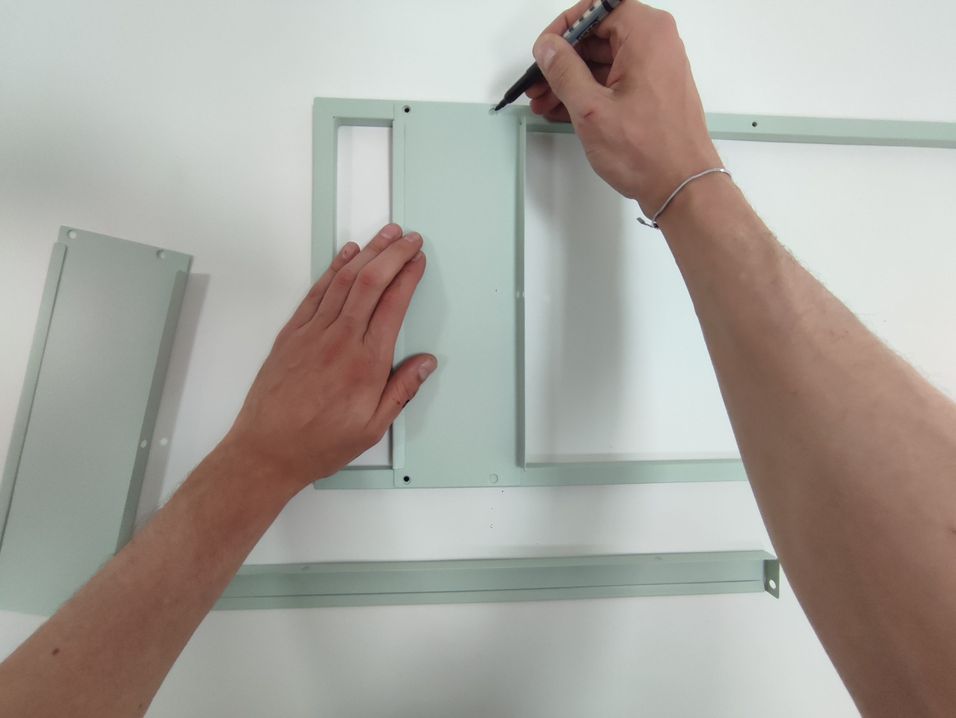
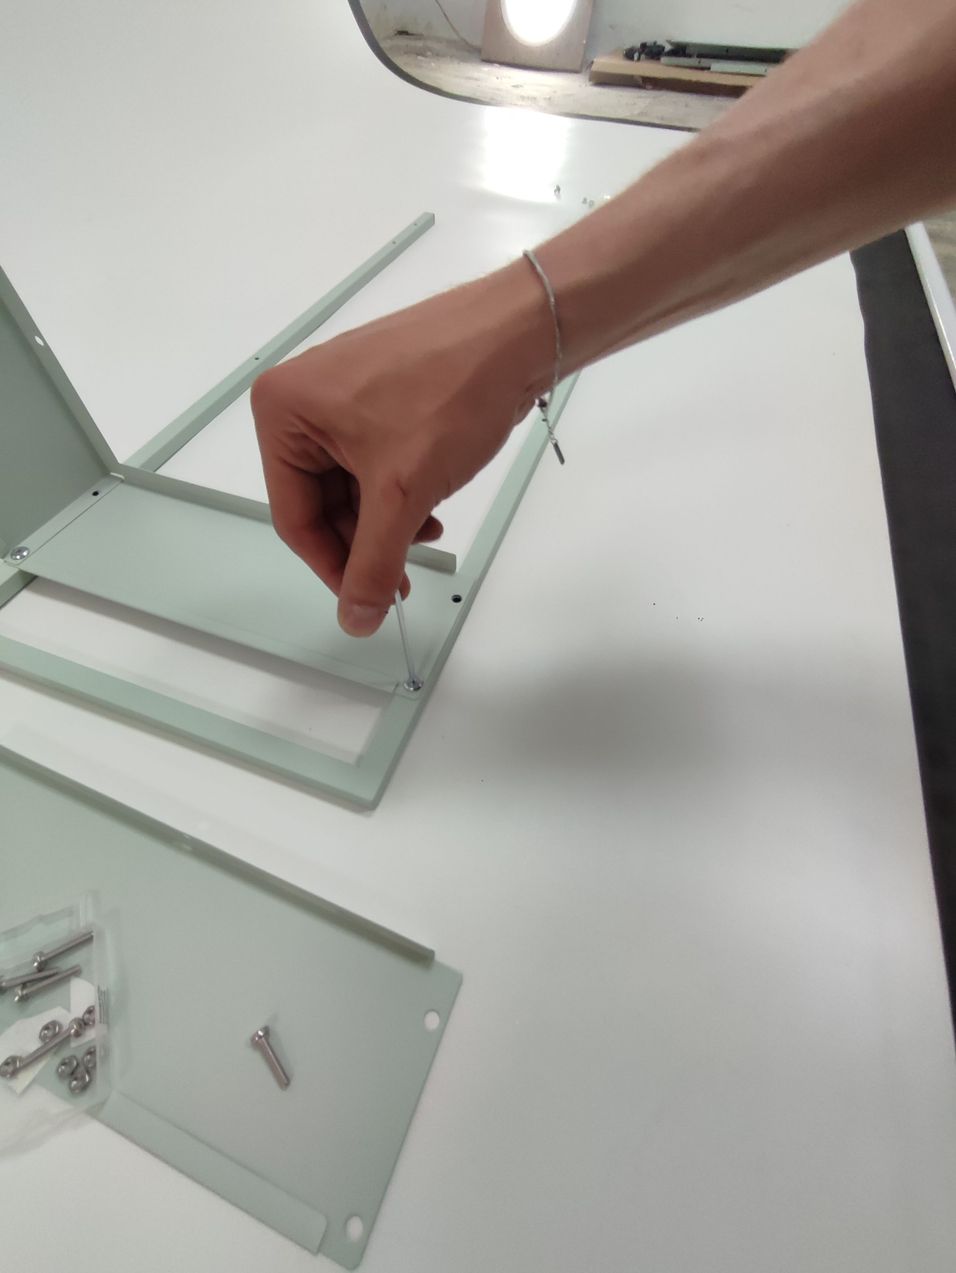
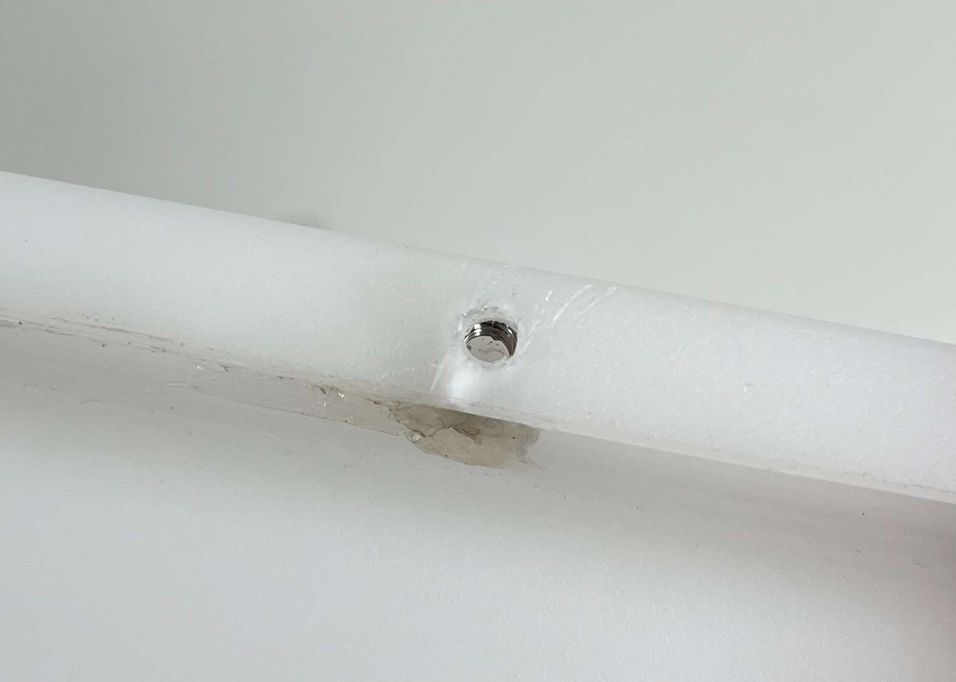
The central holes you made on the plastic tray will need match and coincide with some holes on the top level of the metal piece. We'll now drill those.
Measure and drill holes in the middle of the front section on the top tray of the metal piece. (these should match the holes on the plastic tray for which we used 3.5mm drill)
We'll drill them as high as possible on the front section, so that the washbasin has more room to pivot. (see 1st image)
Make sure to match the height of the back section to the same height as the front section.
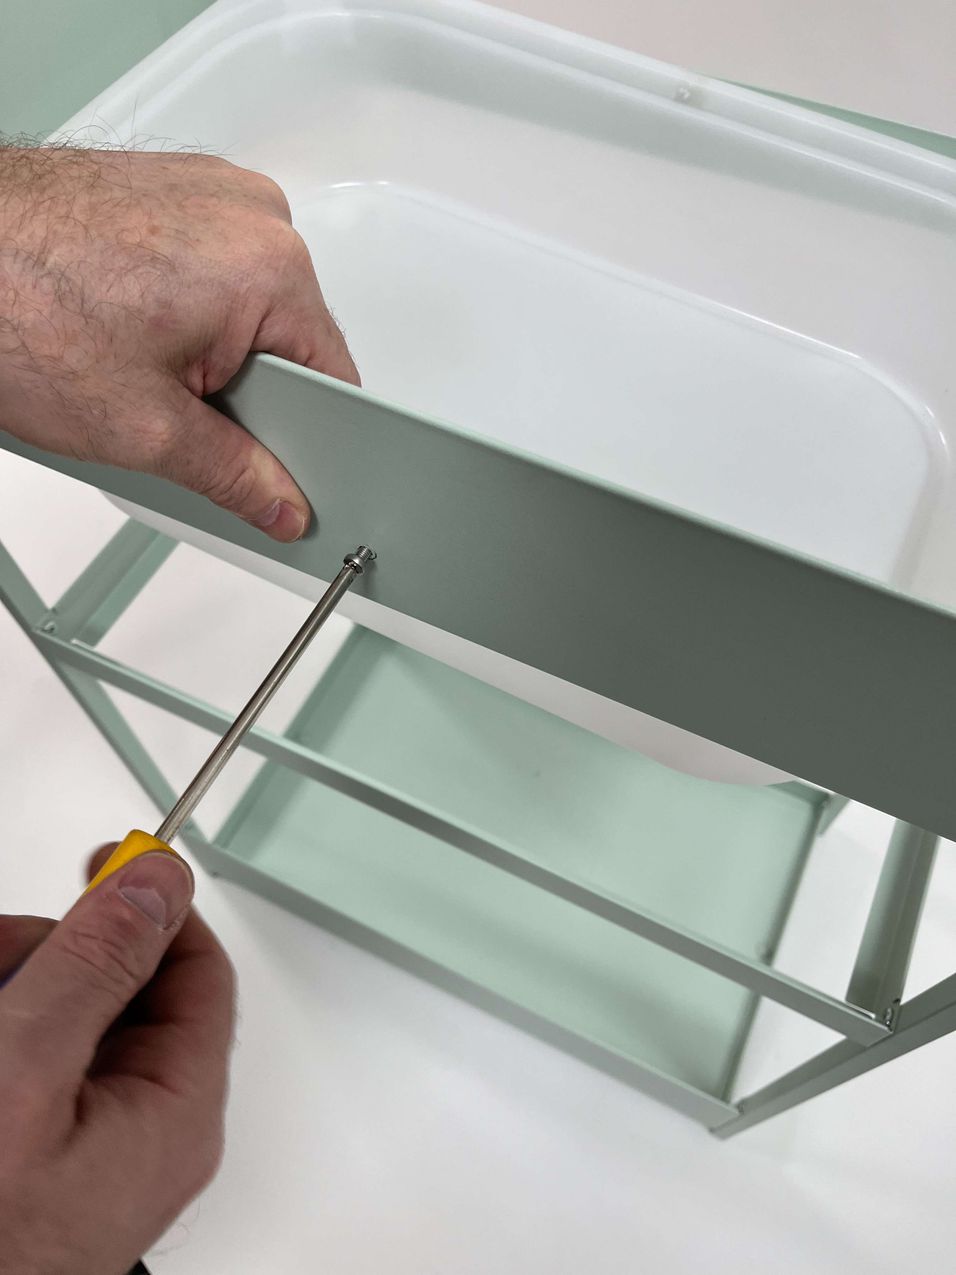
Once the wholes are drilled, you can easily fix the washbasin into place using the screws.
%20--%3e%3csvg%20version='1.1'%20id='Layer_1'%20xmlns='http://www.w3.org/2000/svg'%20xmlns:xlink='http://www.w3.org/1999/xlink'%20x='0px'%20y='0px'%20viewBox='0%200%2064%2063'%20style='enable-background:new%200%200%2064%2063;'%20xml:space='preserve'%3e%3cstyle%20type='text/css'%3e%20.st0{fill:%2320B7EB;}%20.st1{fill:%23E9475A;}%20.st2{fill:%23FECE4E;}%20%3c/style%3e%3cdesc%3eCreated%20with%20Sketch.%3c/desc%3e%3cg%20id='Page-1'%3e%3cg%20id='OA-Logo-Black-Background'%3e%3cpath%20id='Shape'%20class='st0'%20d='M14.1,30.1c-1.5-0.8-8.6-3.8-14.1-7.8c1.8-3.4,3.1-5.6,5-9.1c2.7,1.1,1.9,0.5,4.6,1.7%20c0.8,0.4,10.1,4.5,13.8,6.2c2.4,1.1,4.7,2.2,7,3.3L43,30.5l8.1,3.9c4,2,7.2,3.5,11.3,5.5c0.5,0.3-3.7,9.4-3.7,9.4%20c-1.7-0.6-3.9-1.8-5.5-2.5c-4.7-2.1-9-3.9-13.7-6c-4-1.8-6.7-2.9-10.8-4.5C25,34.9,17.1,31.6,14.1,30.1z'/%3e%3cpath%20id='Shape_1_'%20class='st1'%20d='M12.1,54.9c-0.8,0.6-1.6,1.2-2.5,1.6c-0.4-0.5-0.9-1-1.3-1.5c-0.3-1.2-2.3-4.9-2.7-6.2%20c-0.1-0.4-0.7-2.2-0.8-2.6c0,0,5-3.4,8.2-5.9c3.2-2.6,6.2-5,9.3-7.5c1.4-1.1,3.9-2.5,5.3-3.5c2.5-1.7,13-9.1,15.6-10.5%20c5.4-3.3,11.1-6.3,16.8-9c1.7,3.5,1.8,3,3.8,6.9c0,0-17.8,13.5-22.7,17.1c-3.8,2.8-7.5,5.7-11.3,8.5c-1.7,1.3-3.5,2.4-5.2,3.7'/%3e%3cpath%20id='Shape_2_'%20class='st2'%20d='M20.8,2.9l-0.2-0.8C25,0,31.2-0.3,31.4,0.2c0.4,1.1,0.9,2.2,1.2,3.4c1.4,4.4,2.7,8.7,4,13.1%20c0.4,1.4,2.8,10,2.9,10.5c0.5,2.8,1.2,5.6,1.6,8.4c0.8,4.7,1.4,8.6,2.3,13.3c0.6,3.1,1.3,6.3,2.3,11.3c0,0-5.8,1.4-7.5,1.8%20c-0.8,0.2-1.5,0.4-2.4,0.6c-0.3-1.1-0.2-1.2-0.5-2.1c-0.9-3.7-1.8-7.3-2.6-11c-1.5-6.4-3-12.9-4.4-19.3%20c-1.2-5.4-2.6-10.7-4.4-15.9c-1-3.1-1.8-6.3-2.7-9.5C21.1,3.8,21,3.8,20.8,2.9z'/%3e%3c/g%3e%3c/g%3e%3c/svg%3e)