
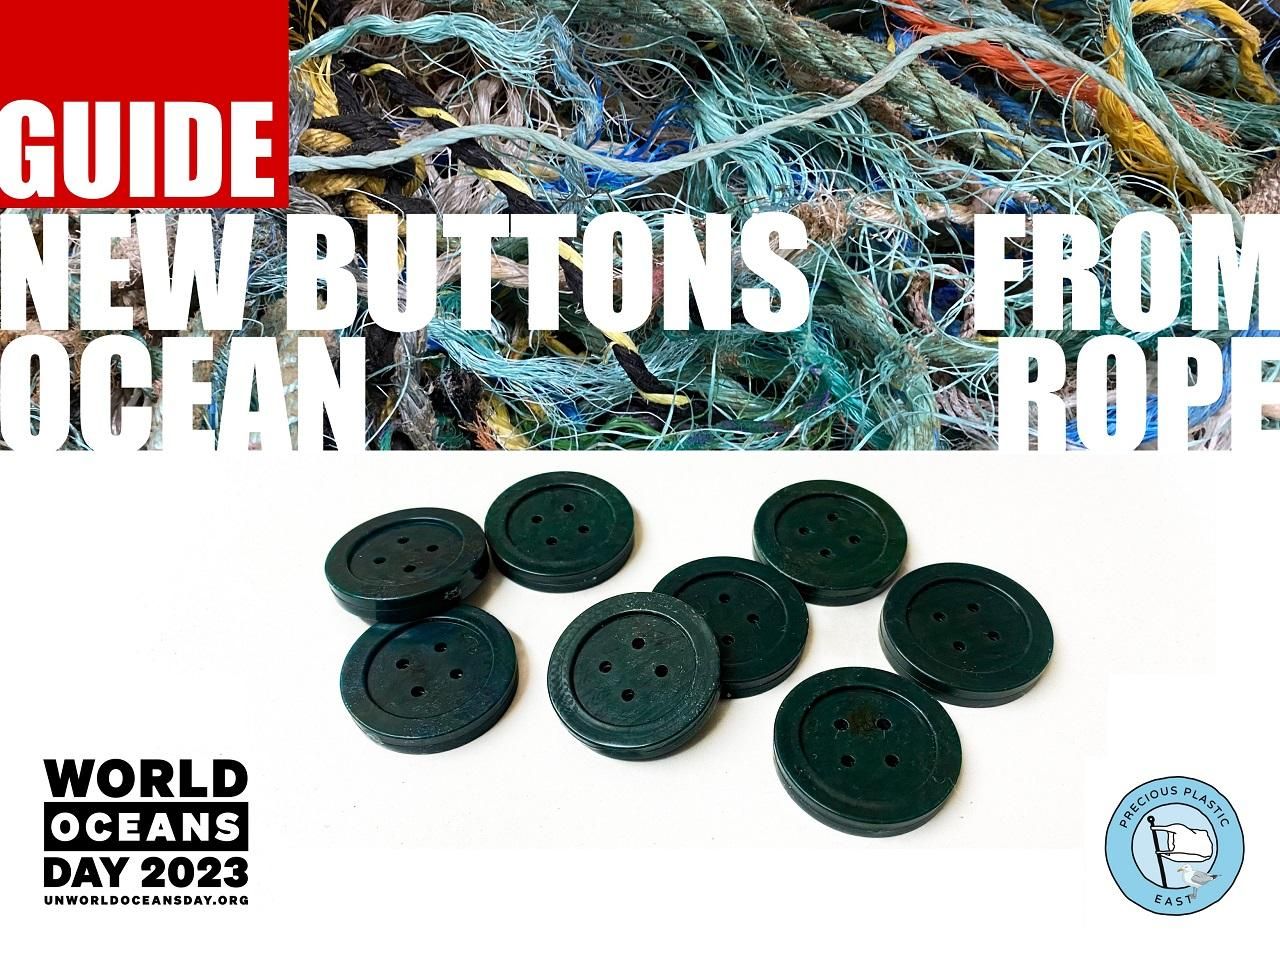
Make buttons from Ocean Rope
Published 3y. Edited 1yPublished about 3 years ago. Last edit over 1 year ago
As a coastal Precious Plastic workshop it's not a surprise to us that some of our prototyping focuses on plastics collected on Norfolk beach cleans. Ocean rope is a common find for beach cleaners around the 100 miles of Norfolk coastline and was one of our earliest experiments manufacturing from beach finds.
We pick out the rope from local finds that carries the characteristics of polypropylene rope... ropes that aren't stretchy, are often brittle and crunchy to the touch and commonly a light aqua blue. We're sharing this video on World Ocean Day because as a coastal workshop we feel a particular responsibility for removing plastic from the ocean and turn into things that should never be in the sea again. Plastic isn't the solution for future plastic, to tackle future plastic production we need significant curbs on production. Our work focuses on education and recycling existing plastic while campaigning for more robust policy to reduce production at the source. Products
productinjectionPPmould
More Information

%20--%3e%3csvg%20version='1.1'%20id='Layer_1'%20xmlns='http://www.w3.org/2000/svg'%20xmlns:xlink='http://www.w3.org/1999/xlink'%20x='0px'%20y='0px'%20viewBox='0%200%2064%2063'%20style='enable-background:new%200%200%2064%2063;'%20xml:space='preserve'%3e%3cstyle%20type='text/css'%3e%20.st0{fill:%23231F20;}%20%3c/style%3e%3cdesc%3eCreated%20with%20Sketch.%3c/desc%3e%3cg%20id='Page-1'%3e%3cg%20id='OA-Logo-Black-Background'%3e%3cpath%20id='Shape'%20class='st0'%20d='M14.1,30.1c-1.5-0.8-8.6-3.8-14.1-7.8c1.8-3.4,3.1-5.6,5-9.1c2.7,1.1,1.9,0.5,4.6,1.7%20c0.8,0.4,10.1,4.5,13.8,6.2c2.4,1.1,4.7,2.2,7,3.3L43,30.5l8.1,3.9c4,2,7.2,3.5,11.3,5.5c0.5,0.3-3.7,9.4-3.7,9.4%20c-1.7-0.6-3.9-1.8-5.5-2.5c-4.7-2.1-9-3.9-13.7-6c-4-1.8-6.7-2.9-10.8-4.5C25,34.9,17.1,31.6,14.1,30.1z'/%3e%3cpath%20id='Shape_1_'%20class='st0'%20d='M12.1,54.9c-0.8,0.6-1.6,1.2-2.5,1.6c-0.4-0.5-0.9-1-1.3-1.5c-0.3-1.2-2.3-4.9-2.7-6.2%20c-0.1-0.4-0.7-2.2-0.8-2.6c0,0,5-3.4,8.2-5.9c3.2-2.6,6.2-5,9.3-7.5c1.4-1.1,3.9-2.5,5.3-3.5c2.5-1.7,13-9.1,15.6-10.5%20c5.4-3.3,11.1-6.3,16.8-9c1.7,3.5,1.8,3,3.8,6.9c0,0-17.8,13.5-22.7,17.1c-3.8,2.8-7.5,5.7-11.3,8.5c-1.7,1.3-3.5,2.4-5.2,3.7'/%3e%3cpath%20id='Shape_2_'%20class='st0'%20d='M20.8,2.9l-0.2-0.8C25,0,31.2-0.3,31.4,0.2c0.4,1.1,0.9,2.2,1.2,3.4c1.4,4.4,2.7,8.7,4,13.1%20c0.4,1.4,2.8,10,2.9,10.5c0.5,2.8,1.2,5.6,1.6,8.4c0.8,4.7,1.4,8.6,2.3,13.3c0.6,3.1,1.3,6.3,2.3,11.3c0,0-5.8,1.4-7.5,1.8%20c-0.8,0.2-1.5,0.4-2.4,0.6c-0.3-1.1-0.2-1.2-0.5-2.1c-0.9-3.7-1.8-7.3-2.6-11c-1.5-6.4-3-12.9-4.4-19.3%20c-1.2-5.4-2.6-10.7-4.4-15.9c-1-3.1-1.8-6.3-2.7-9.5C21.1,3.8,21,3.8,20.8,2.9z'/%3e%3c/g%3e%3c/g%3e%3c/svg%3e)


1
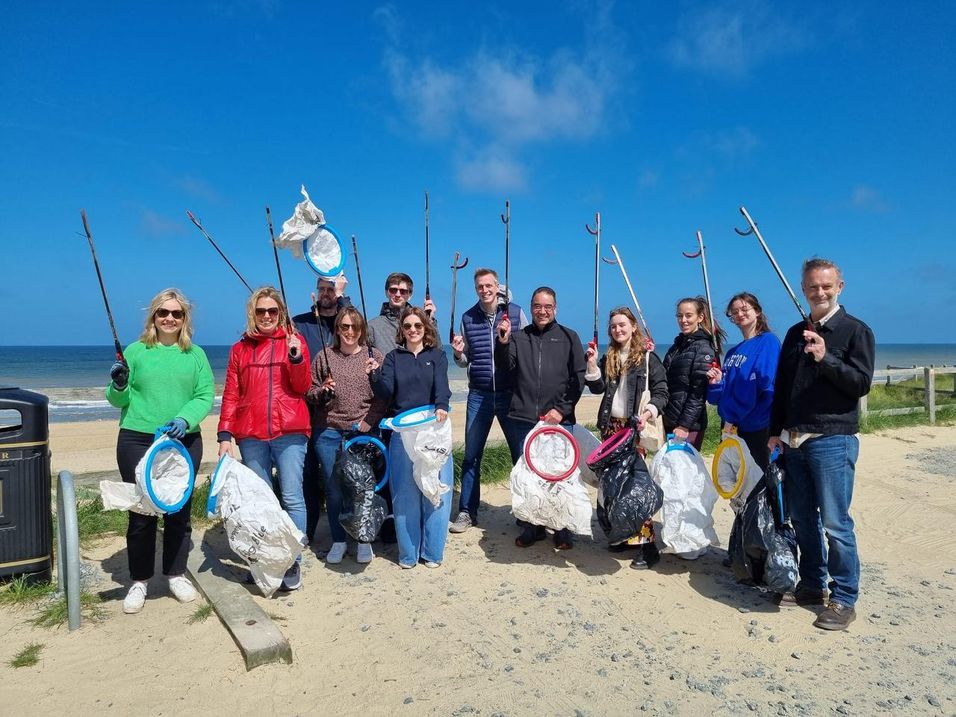
Source some ocean rope
A potentially obvious step, but one we thought it was worth mentioning all the same. When we were approached by beach clean groups in Norfolk they were desperate to find somewhere to donate their plastics to avoid them going into landfill or being incinerated. We have worked with Norfolk beach clean groups for over 12 months now and they pick up a lot of rope from the Norfolk coastline every month.
If you're in a coastal location, reach out to any organised groups that you can find. They're likely to welcome the opportunity of having their plastic recycled, because they're generally people who have a very deep love and sense of responsibility for marine conservation and ensuring litter doesn't end up in the wrong place.
If you're not a coastal Precious Plastic workshop then it could be worth seeking out beach clean groups in other parts of the country as a source, though we'd be inclined to encourage you to find plastics that are local to you.

2
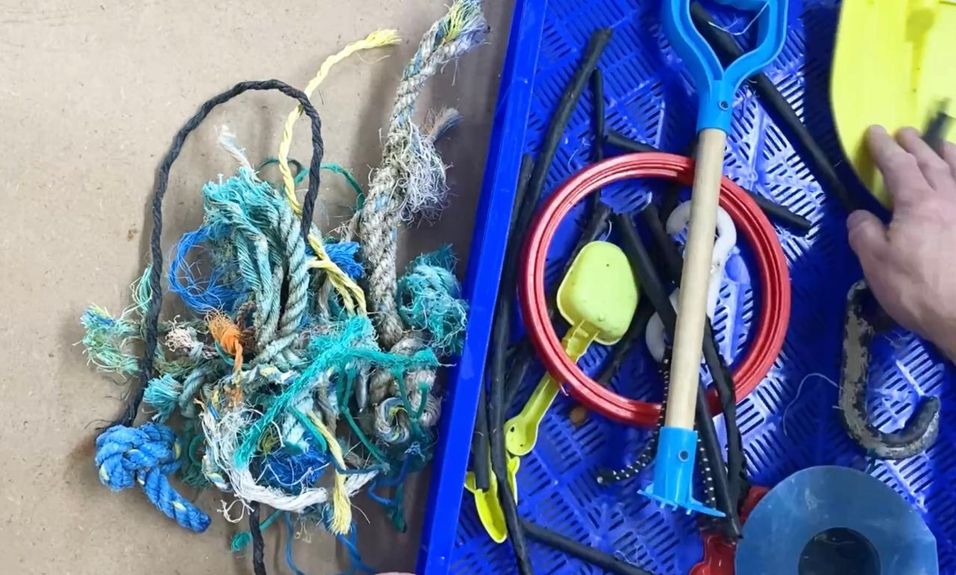
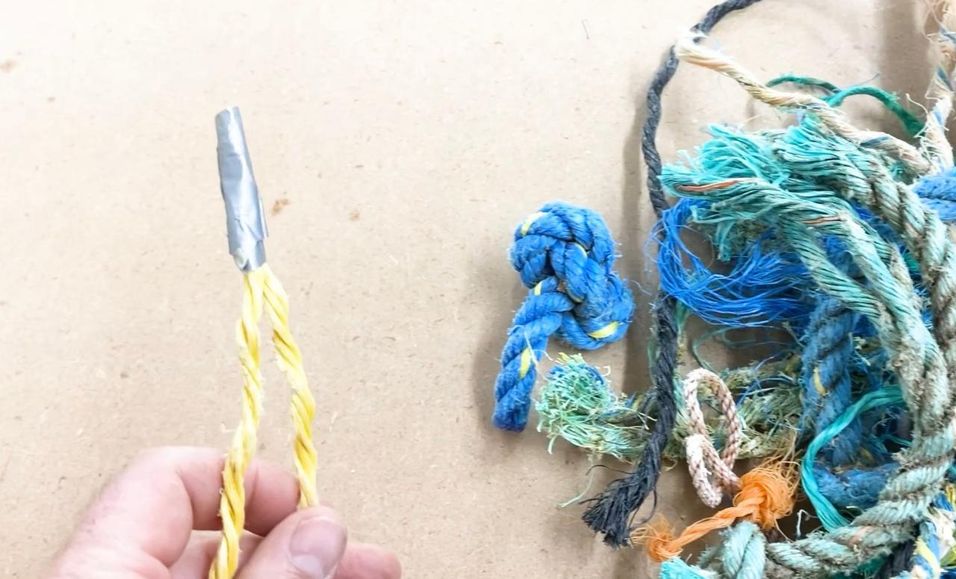
Sort and inspect your rope
Sorting and inspecting your rope is an important step ahead of cleaning. At this step you're looking to identify the polypropylene (PP) rope and remove anything like duct tape, zip ties or alike that are attached to the rope and won't be removed by cleaning.
Identifying polypropylene (PP) ocean rope is relatively easy though not a guarantee of a correct material identification. Polypropylene (PP) ropes are clearly plastic, with some characteristic features that when followed we find to provide us with enough rope and up until now has always avoided contamination. We look for ropes that aren't stretchy, are often brittle and crunchy to the touch and commonly a light aqua blue. We've found that ocean rope is also commonly black, or yellow and white, though we find the light blue is easiest to identify.
Remove anything like duct tape, zip ties or alike that are attached to the rope using scissors. General dirt will be removed by the cleaning step that comes next.
3
Clean and dry the rope
Cleaning and drying the rope is straightforward enough. We use a laundry bag, a washing machine and an airing cupboard. Ideally the washing machine would be part of a circular system that filters the waste water before feeding it back into the machine to avoid microplastics escaping.
We use a regular 40 degree centigrade (104 degrees fahrenheit) with an unfragranced detergent.
Our approach to drying the plastic again makes use of regular household or workshop features. We tend to leave the rope in the laundry bag and place the bag in either an airing cupboard overnight or on a windowsill on a sunny day. In our experience after an afternoon or a night in one of these spots the rope should feel dry. If not, rearrange the rope so that different pieces are on top and leave it for a further afternoon or evening.
-18881df51cb.jpeg?width=956&resize=contain)
-18881df60c6.jpeg?width=956&resize=contain)

4
Shred your rope
We've found shredding ocean rope to be a completely different experience to shredding a hard plastic like a DVD case or a soft drink bottle lid. Some of the ocean rope we've received from beach cleans has been as thick as 36mm, so we decided to use our bigger commercial shredder rather than our smaller Precious Plastic shredder. We'd recommend that you review the thickness of the rope you're looking to shred and the power of your shredder and act accordingly.
The other observation we made when shredding rope is that only a small amount of it falls through to the collection bin under the blades. It may be that if we'd shredded our rope for longer this would have been different. We'd be curious to hear other experiences from the Precious Plastic community. So we shredded our rope for a shorter period, collected the shredded rope from the collection bin underneath and then carefully removed the shredded rope from the shredder with gloves after unplugging the machine.
-18881e8c3ad.jpeg?width=956&resize=contain)
-18881e8d8f7.jpeg?width=956&resize=contain)
-18881e8ede2.jpeg?width=956&resize=contain)
5
Select your mould and machine and apply heat
Now that you have your material ready for manufacture, it's time to select your mould and machines.
We use our Sustainable Design Studio large button mould with our ocean rope, heating the mould in a mini oven before use. This time when we used our mould we spotted a very light area of corrosion on the inner face of the mould which we removed with a very fine sand paper.
Put your PPE on, we're using a double charcoal activated face mask and heat resistant gloves. Ventilate your space. Sometime we use a fume extractor for this though when shouting this video we were able to open the double doors of our workshop space to create an air flow. Heat your mini oven to your desired temperature. We chose to heat our mini over and our mould to 200 degrees centigrade (390 degrees Fahrenheit).
-18881f29a14.jpeg?width=956&resize=contain)
-18881f2ac07.jpeg?width=956&resize=contain)
-18881f2baed.jpeg?width=956&resize=contain)
6
Prepare the Arbour Press for use
Set up your Arbour Press or injection moulding machine in a clear ventilated space on a firm surface and switch on.
We're running our Arbour Press at 265 degrees centigrade (500 degrees Fahrenheit).
Loading your injection moulder with shredded rope is different to loading it with shredded hard plastics like shredded DVD cases or soft drink bottle lids. Rather than pouring granules into the hopper the shredded rope needs more careful introduction to the machine. Wearing heat resistant gloves we drop shredded rope into the hopper and then using a metal rod start guiding it into the chamber. The final step is the use the shaft of the Arbour Press to move it down into the body of the Arbour Press ready for injecting.
When preparing the press for the first injection of the day we leave the Arbour Press for a good 20 minutes once the plastic is in and the temperature is settling down. Shredded rope could easily have more air held within it than shredded hard plastics.
-18881fd0731.jpeg?width=956&resize=contain)
-18881fd2225.jpeg?width=956&resize=contain)
-18881fd3846.jpeg?width=956&resize=contain)
7
Mould your ocean rope buttons
Once the mould is up to temperature and the Arbour Press has settled with its ocean rope ready for deliver into the mould, remove the mould from the mini oven. Ensuring there is space on the work bench to place the mould once it's full and space to move safely around the Arbour Press lower the jack, control the flow of molten plastic and place the mould under the nozzle. When ready engage the mould with the nozzle of the Arbour Press and apply pressure to inject the plastic into the mould.
At this point we find it important to be really observant of the mould and the pressure in the level that's delivering the molten plastic. When using this mould on this occasion we observed a small amount of condensation leave the mould mid injection and a firm piece of resistance once the mould was full.
We released a bit of pressure on the level that delivers the molten plastic, dropped the mould on the jack and places the full mould onto the workbench, checking the Arbour Press could be left.
-18882060f44.jpeg?width=956&resize=contain)
-18882062447.jpeg?width=956&resize=contain)
-18882063776.jpeg?width=956&resize=contain)
8
Opening the mould and finishing your buttons
During this final step we try to manage our anticipation and stay present in our process. We review the state of the plastic inside the mould based on any visible plastic at the point where the nozzle injected it. This generally means we leave the mould for a few minutes before starting the take the steps to open it.
Wearing gloves to protect against the heat, and injury on the mould should the spanner slip, we carefully remove the bolts holding the mould together. Laying the mould on the workbench we use a tool to prise the mould open.
Sometimes the buttons are easily removed. Sometimes there are buttons clinging more firmly to the mould where the plastic has cooled and shrink around mould elements. If you're going to lever the buttons out of the mould, do it would great care as any scratches made on the buttons aren't easy to remove. We try to lever stubborn buttons our with any remaining sprue and a small flat head screwdriver. Finish buttons by trimming off any mould marks.
-188820fa767.jpeg?width=956&resize=contain)
-188820fba5c.jpeg?width=956&resize=contain)
-188820fccf8.jpeg?width=956&resize=contain)
%20--%3e%3csvg%20version='1.1'%20id='Layer_1'%20xmlns='http://www.w3.org/2000/svg'%20xmlns:xlink='http://www.w3.org/1999/xlink'%20x='0px'%20y='0px'%20viewBox='0%200%2064%2063'%20style='enable-background:new%200%200%2064%2063;'%20xml:space='preserve'%3e%3cstyle%20type='text/css'%3e%20.st0{fill:%2320B7EB;}%20.st1{fill:%23E9475A;}%20.st2{fill:%23FECE4E;}%20%3c/style%3e%3cdesc%3eCreated%20with%20Sketch.%3c/desc%3e%3cg%20id='Page-1'%3e%3cg%20id='OA-Logo-Black-Background'%3e%3cpath%20id='Shape'%20class='st0'%20d='M14.1,30.1c-1.5-0.8-8.6-3.8-14.1-7.8c1.8-3.4,3.1-5.6,5-9.1c2.7,1.1,1.9,0.5,4.6,1.7%20c0.8,0.4,10.1,4.5,13.8,6.2c2.4,1.1,4.7,2.2,7,3.3L43,30.5l8.1,3.9c4,2,7.2,3.5,11.3,5.5c0.5,0.3-3.7,9.4-3.7,9.4%20c-1.7-0.6-3.9-1.8-5.5-2.5c-4.7-2.1-9-3.9-13.7-6c-4-1.8-6.7-2.9-10.8-4.5C25,34.9,17.1,31.6,14.1,30.1z'/%3e%3cpath%20id='Shape_1_'%20class='st1'%20d='M12.1,54.9c-0.8,0.6-1.6,1.2-2.5,1.6c-0.4-0.5-0.9-1-1.3-1.5c-0.3-1.2-2.3-4.9-2.7-6.2%20c-0.1-0.4-0.7-2.2-0.8-2.6c0,0,5-3.4,8.2-5.9c3.2-2.6,6.2-5,9.3-7.5c1.4-1.1,3.9-2.5,5.3-3.5c2.5-1.7,13-9.1,15.6-10.5%20c5.4-3.3,11.1-6.3,16.8-9c1.7,3.5,1.8,3,3.8,6.9c0,0-17.8,13.5-22.7,17.1c-3.8,2.8-7.5,5.7-11.3,8.5c-1.7,1.3-3.5,2.4-5.2,3.7'/%3e%3cpath%20id='Shape_2_'%20class='st2'%20d='M20.8,2.9l-0.2-0.8C25,0,31.2-0.3,31.4,0.2c0.4,1.1,0.9,2.2,1.2,3.4c1.4,4.4,2.7,8.7,4,13.1%20c0.4,1.4,2.8,10,2.9,10.5c0.5,2.8,1.2,5.6,1.6,8.4c0.8,4.7,1.4,8.6,2.3,13.3c0.6,3.1,1.3,6.3,2.3,11.3c0,0-5.8,1.4-7.5,1.8%20c-0.8,0.2-1.5,0.4-2.4,0.6c-0.3-1.1-0.2-1.2-0.5-2.1c-0.9-3.7-1.8-7.3-2.6-11c-1.5-6.4-3-12.9-4.4-19.3%20c-1.2-5.4-2.6-10.7-4.4-15.9c-1-3.1-1.8-6.3-2.7-9.5C21.1,3.8,21,3.8,20.8,2.9z'/%3e%3c/g%3e%3c/g%3e%3c/svg%3e)