Construction of green walls with recycled plastic

Products
%20--%3e%3csvg%20version='1.1'%20id='Layer_1'%20xmlns='http://www.w3.org/2000/svg'%20xmlns:xlink='http://www.w3.org/1999/xlink'%20x='0px'%20y='0px'%20viewBox='0%200%2044.6%2043.9'%20style='enable-background:new%200%200%2044.6%2043.9;'%20xml:space='preserve'%3e%3cstyle%20type='text/css'%3e%20.st0{fill:%231D1D1B;}%20%3c/style%3e%3ctitle%3eicon%20time%20needed%3c/title%3e%3cg%20id='Calque_1'%3e%3cpath%20class='st0'%20d='M20.5,0.5c-5.8,1.1-11,4.2-14.7,8.7c-3.4,4.3-6.3,11.5-5.7,17.1C1.5,40.9,15,45,27.8,43.6%20c10.3-1.2,17.5-15.5,16.8-25C43.7,7.2,31.9-2.2,20.5,0.5c-1.6,0.4-0.9,2.8,0.7,2.4c11.1-2.6,21.6,7.7,21,18.6%20c-0.3,4.3-1.9,8.4-4.4,11.8c-3.5,4.9-7.2,7.8-13.5,8c-10.6,0.4-22.3-4.4-21.8-17C3.2,13.8,10.8,5,21.1,2.9%20C22.7,2.6,22,0.2,20.5,0.5z'/%3e%3cpath%20class='st0'%20d='M19.9,6.7c0.1,5.2,0.4,10.5,0.9,15.7c0.1,1.6,2.6,1.6,2.5,0c-0.5-5.2-0.8-10.4-0.9-15.7c0-0.7-0.6-1.2-1.2-1.2%20S19.9,6,19.9,6.7z'/%3e%3cpath%20class='st0'%20d='M21.2,23.3c2.1,1.8,4.3,3.4,6.6,4.9c1.4,0.8,2.7-1.4,1.3-2.1c-2.1-1.3-4.2-2.8-6.1-4.5%20C21.7,20.6,20,22.3,21.2,23.3L21.2,23.3z'/%3e%3c/g%3e%3c/svg%3e) < 1 day
 Hard
HDPELDPE
%20--%3e%3csvg%20version='1.1'%20id='Calque_1'%20xmlns='http://www.w3.org/2000/svg'%20xmlns:xlink='http://www.w3.org/1999/xlink'%20x='0px'%20y='0px'%20viewBox='0%200%2027.2%2027.8'%20style='enable-background:new%200%200%2027.2%2027.8;'%20xml:space='preserve'%3e%3ctitle%3eicon%20redirect%20new%3c/title%3e%3cg%3e%3cpath%20d='M27.2,26.5c-0.1-5-0.3-10-0.4-15c0-0.7-0.6-1.2-1.2-1.2s-1.2,0.6-1.2,1.2c0.1,4.6,0.3,9.1,0.4,13.7%20c-3.9-0.2-7.7-0.6-11.6-0.4c-3.3,0.2-6.7,0.5-10,0.4C2.8,19.5,2.7,13.7,2.5,8c2.9-0.1,5.8-0.8,8.6-0.7c1.6,0.1,1.6-2.4,0-2.5%20C7.8,4.6,4.5,5.7,1.2,5.5c-0.6,0-1,0.3-1.1,0.7C0,6.3,0,6.4,0,6.6c0,0,0,0.1,0,0.1c0,0,0,0,0,0.1c0.2,6.6,0.4,13.2,0.5,19.7%20c0,0.6,0.4,1.3,1.2,1.4c3.8,0.1,7.5-0.2,11.3-0.4c4.4-0.3,8.6,0.2,12.9,0.4c0.6,0,1-0.3,1.1-0.7C27.1,26.9,27.2,26.7,27.2,26.5z'/%3e%3cpath%20d='M12,12.6c-0.2,0.7,0.2,1.4,0.9,1.5c0.7,0.2,1.4-0.2,1.5-0.9v0c0.6-2.2,1.4-4.5,3.1-6c1.3-1.2,3-1.9,4.7-2.7%20c-0.4,1.3-0.8,2.6-1.4,3.8c-0.6,1.5,1.8,2.1,2.4,0.7c0.8-1.9,1.5-3.9,2-5.9c0-0.1,0-0.2,0-0.3c0.3-0.6,0.1-1.5-0.7-1.8%20C22.3,0.4,20,0,17.7,0c-0.7,0-1.2,0.6-1.2,1.2s0.6,1.2,1.2,1.2c0.9,0,1.7,0.1,2.6,0.2c-1.7,0.8-3.4,1.7-4.8,3%20C13.6,7.6,12.7,10.1,12,12.6z'/%3e%3c/g%3e%3c/svg%3e)
More Information

%20--%3e%3csvg%20version='1.1'%20id='Layer_1'%20xmlns='http://www.w3.org/2000/svg'%20xmlns:xlink='http://www.w3.org/1999/xlink'%20x='0px'%20y='0px'%20viewBox='0%200%2064%2063'%20style='enable-background:new%200%200%2064%2063;'%20xml:space='preserve'%3e%3cstyle%20type='text/css'%3e%20.st0{fill:%23231F20;}%20%3c/style%3e%3cdesc%3eCreated%20with%20Sketch.%3c/desc%3e%3cg%20id='Page-1'%3e%3cg%20id='OA-Logo-Black-Background'%3e%3cpath%20id='Shape'%20class='st0'%20d='M14.1,30.1c-1.5-0.8-8.6-3.8-14.1-7.8c1.8-3.4,3.1-5.6,5-9.1c2.7,1.1,1.9,0.5,4.6,1.7%20c0.8,0.4,10.1,4.5,13.8,6.2c2.4,1.1,4.7,2.2,7,3.3L43,30.5l8.1,3.9c4,2,7.2,3.5,11.3,5.5c0.5,0.3-3.7,9.4-3.7,9.4%20c-1.7-0.6-3.9-1.8-5.5-2.5c-4.7-2.1-9-3.9-13.7-6c-4-1.8-6.7-2.9-10.8-4.5C25,34.9,17.1,31.6,14.1,30.1z'/%3e%3cpath%20id='Shape_1_'%20class='st0'%20d='M12.1,54.9c-0.8,0.6-1.6,1.2-2.5,1.6c-0.4-0.5-0.9-1-1.3-1.5c-0.3-1.2-2.3-4.9-2.7-6.2%20c-0.1-0.4-0.7-2.2-0.8-2.6c0,0,5-3.4,8.2-5.9c3.2-2.6,6.2-5,9.3-7.5c1.4-1.1,3.9-2.5,5.3-3.5c2.5-1.7,13-9.1,15.6-10.5%20c5.4-3.3,11.1-6.3,16.8-9c1.7,3.5,1.8,3,3.8,6.9c0,0-17.8,13.5-22.7,17.1c-3.8,2.8-7.5,5.7-11.3,8.5c-1.7,1.3-3.5,2.4-5.2,3.7'/%3e%3cpath%20id='Shape_2_'%20class='st0'%20d='M20.8,2.9l-0.2-0.8C25,0,31.2-0.3,31.4,0.2c0.4,1.1,0.9,2.2,1.2,3.4c1.4,4.4,2.7,8.7,4,13.1%20c0.4,1.4,2.8,10,2.9,10.5c0.5,2.8,1.2,5.6,1.6,8.4c0.8,4.7,1.4,8.6,2.3,13.3c0.6,3.1,1.3,6.3,2.3,11.3c0,0-5.8,1.4-7.5,1.8%20c-0.8,0.2-1.5,0.4-2.4,0.6c-0.3-1.1-0.2-1.2-0.5-2.1c-0.9-3.7-1.8-7.3-2.6-11c-1.5-6.4-3-12.9-4.4-19.3%20c-1.2-5.4-2.6-10.7-4.4-15.9c-1-3.1-1.8-6.3-2.7-9.5C21.1,3.8,21,3.8,20.8,2.9z'/%3e%3c/g%3e%3c/g%3e%3c/svg%3e)


1
First you need to have the recycled plastic plate
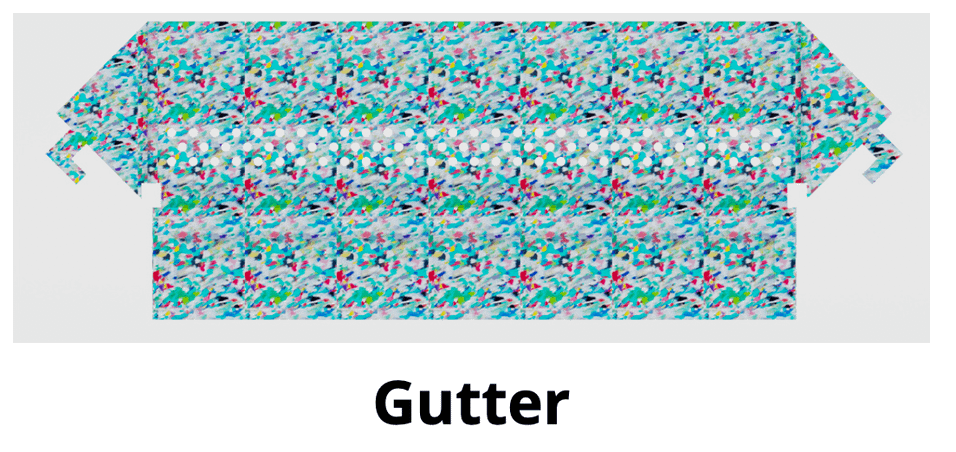
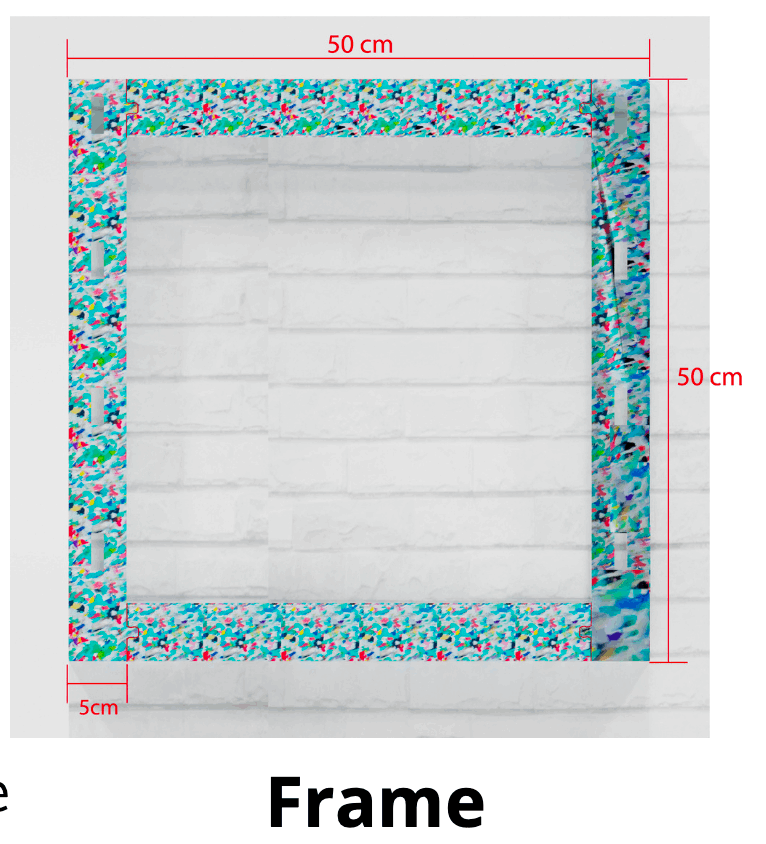
According to the drawn pieces you need to cut them in a CNC cutting machine, the following images are the development of the gutter and the frame.
Note. Reduces and cuts are needed to be considered in the drawings to be cut to later assemble the pieces.
2
Join the pieces
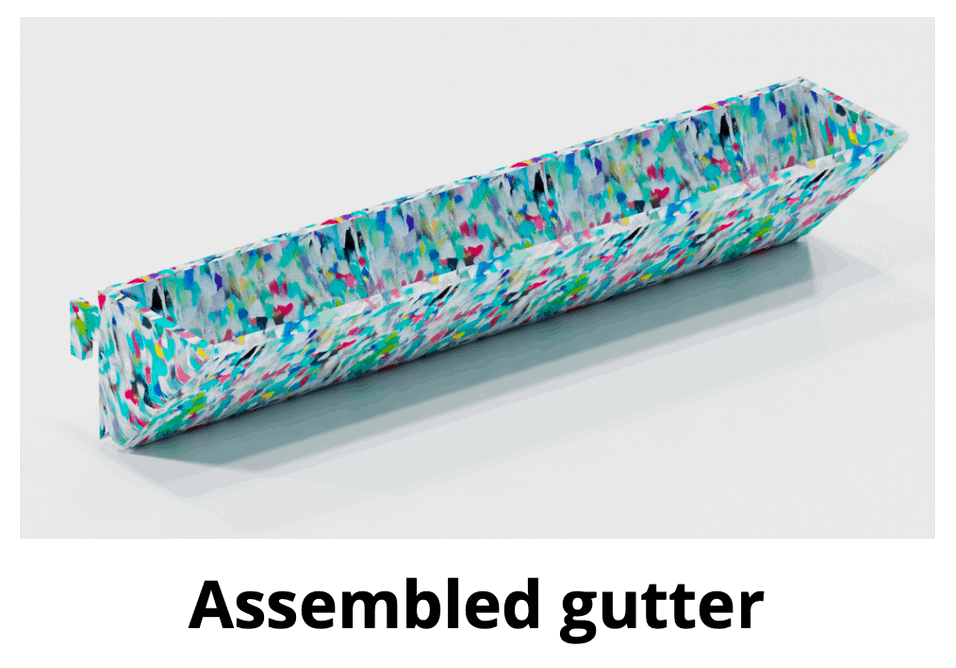
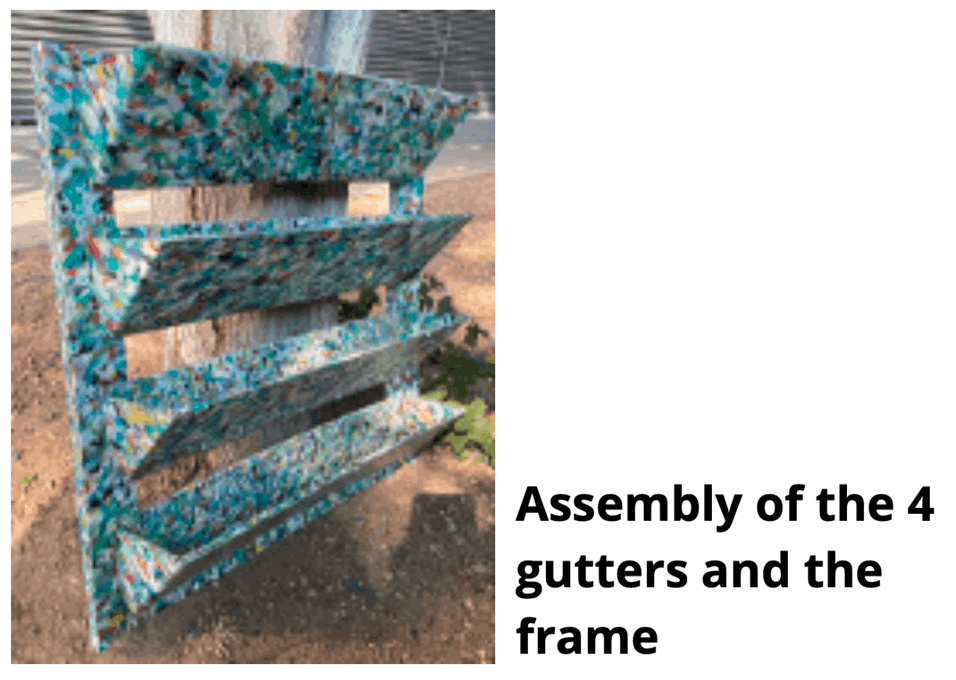
You have to bend the gutters and put a screw in them to maintain the shape of the gutter. You need to have 4 gutters per frame.
3
Install the wall
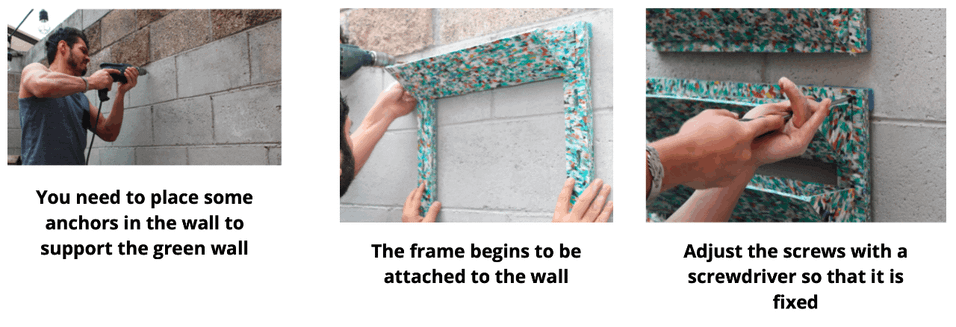
Once the gutters and frames you want are assembled, it is time to install them on the wall.
1.-You need to place some anchors in the wall to support the green wall
2.-The frame begins to be attached to the wall
3.-Adjus the screw with a screwdriver so that it is fixed
4
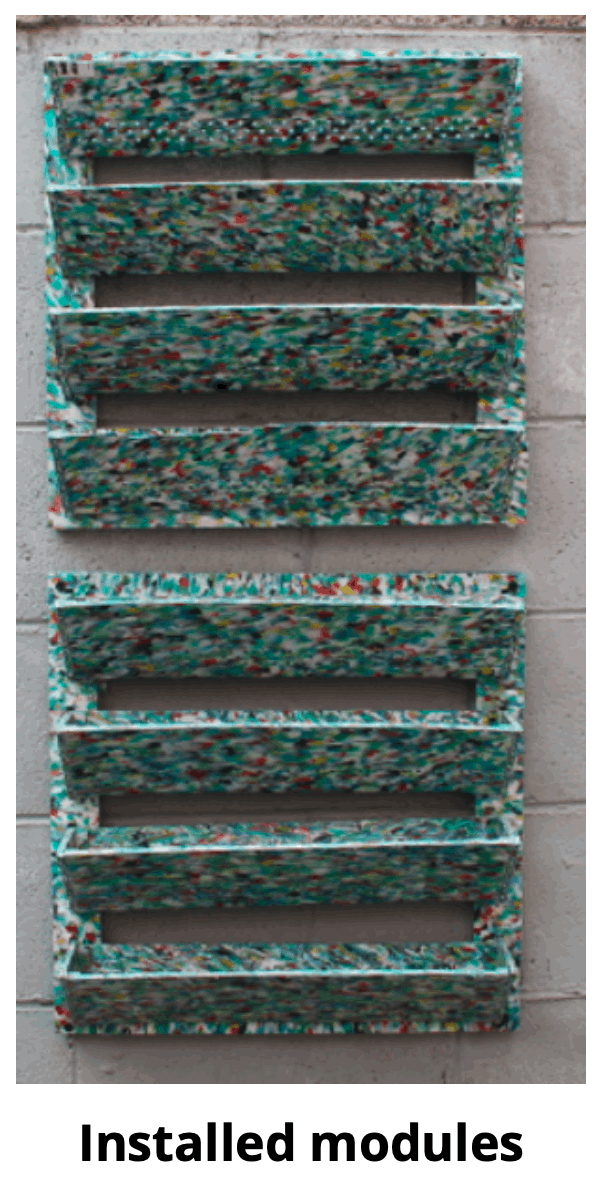
Modules installed
The number of modules that are desired are installed.
1.-Installed modules
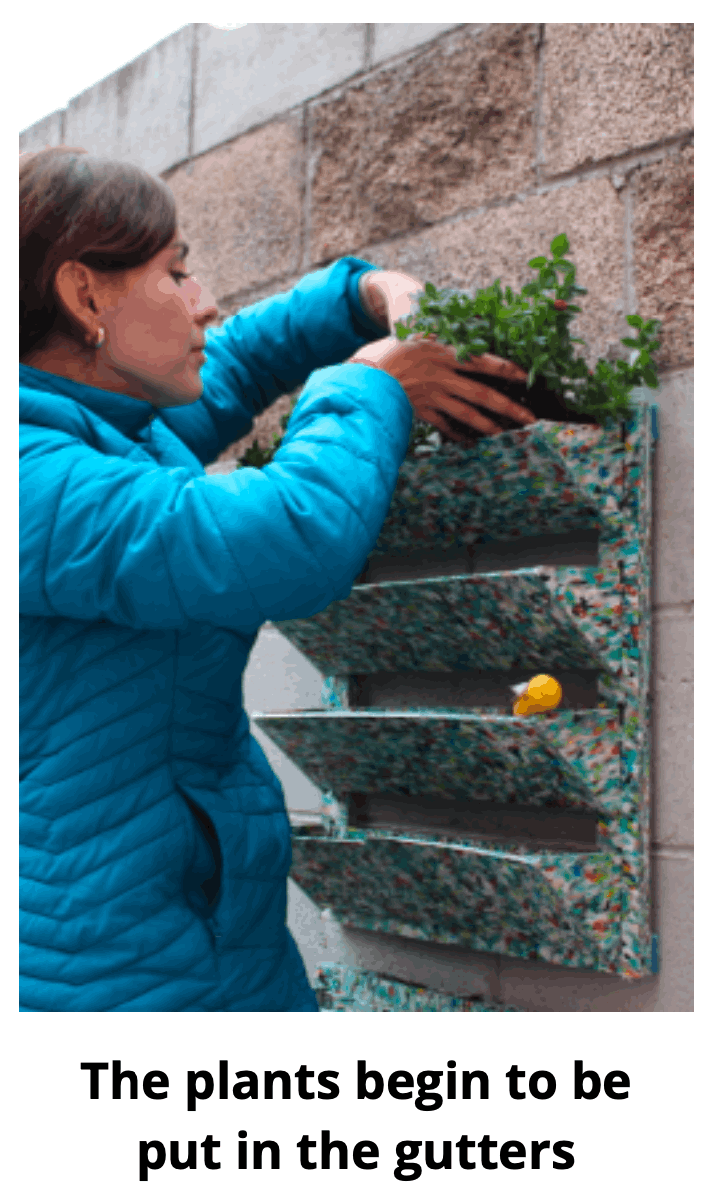
2.-The plants begin to be put in the gutters
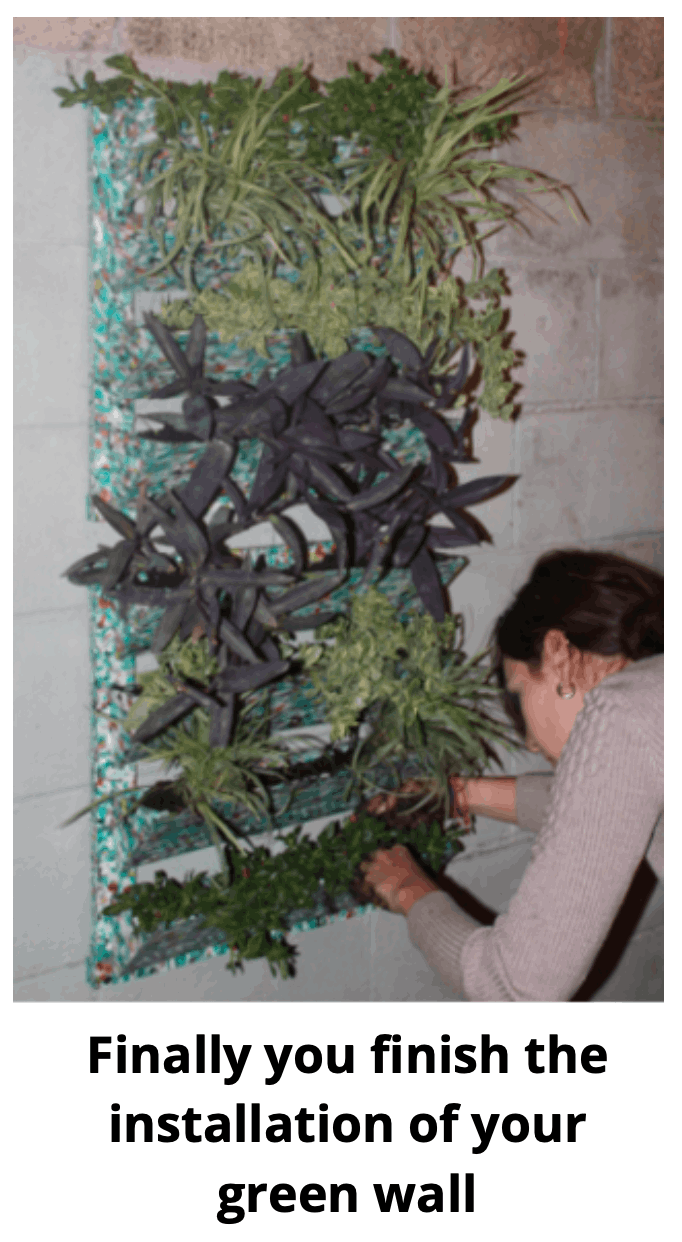
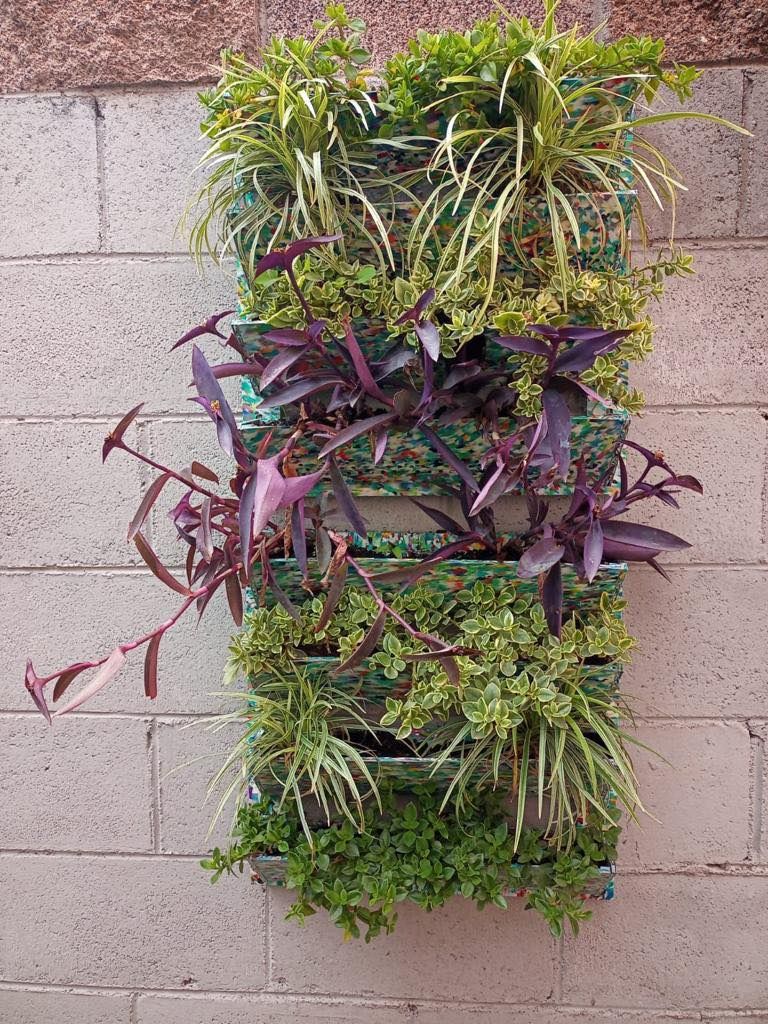
3.-Finally you finish the installation of your green wall